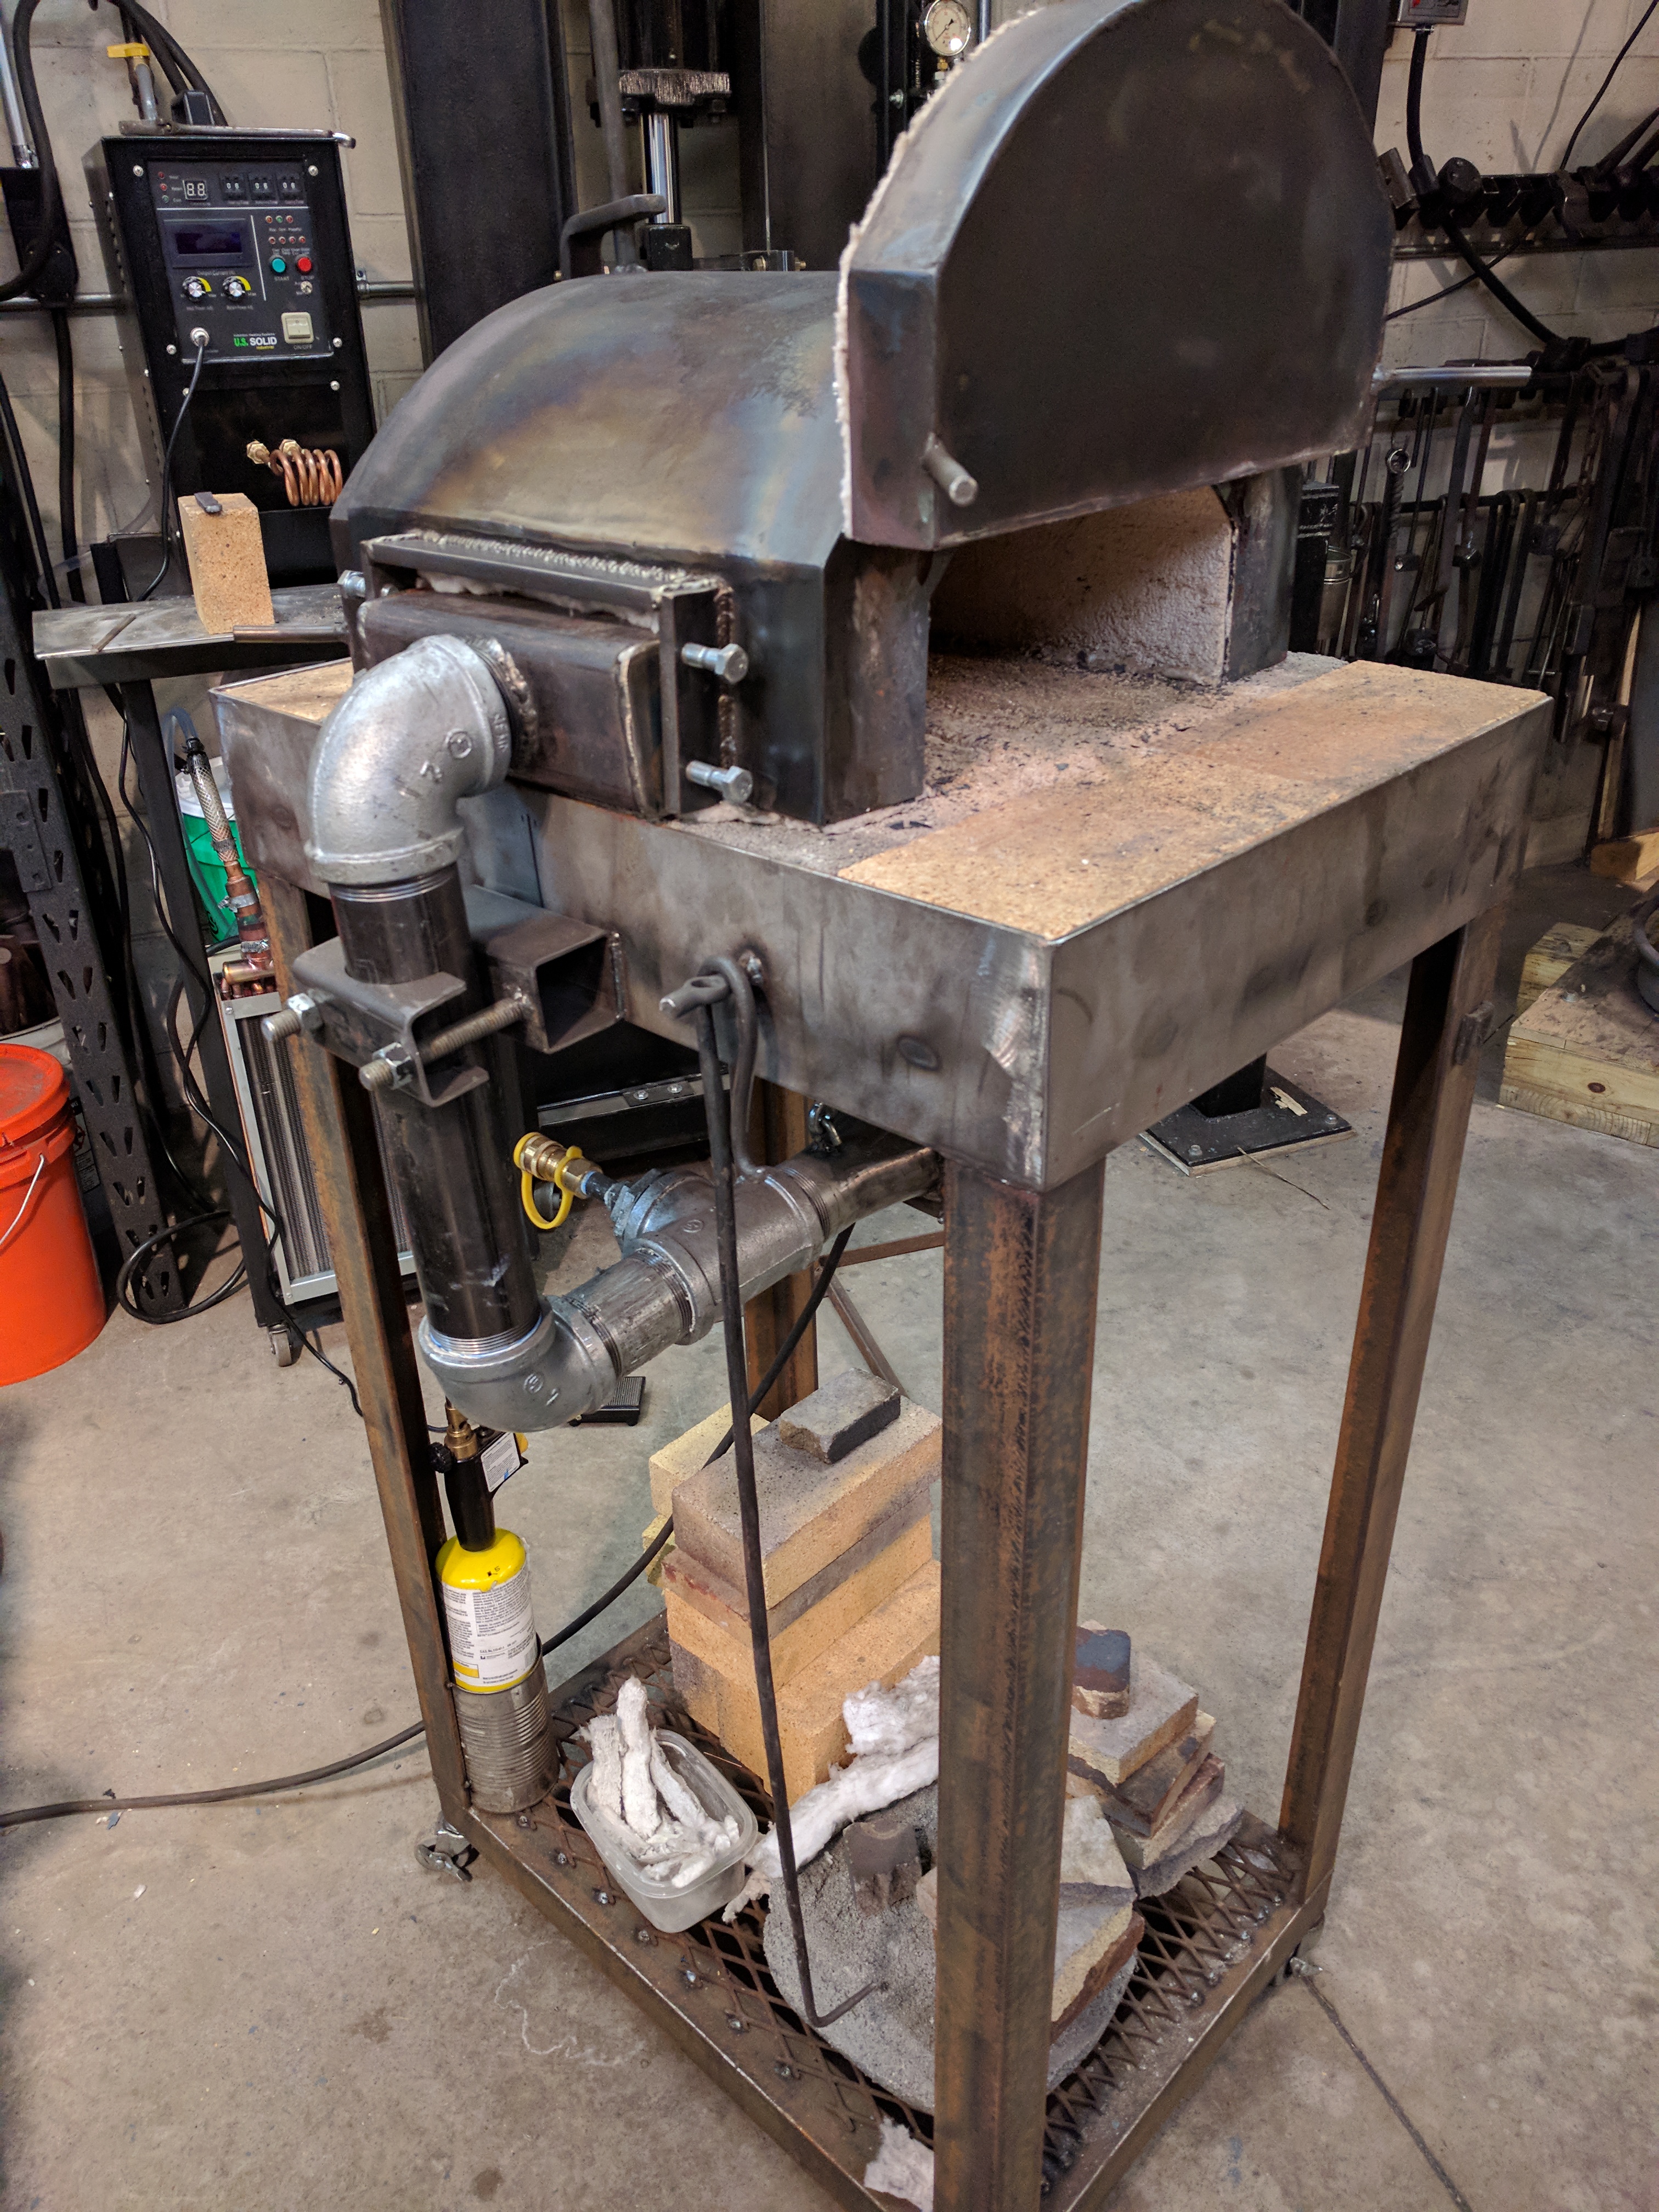
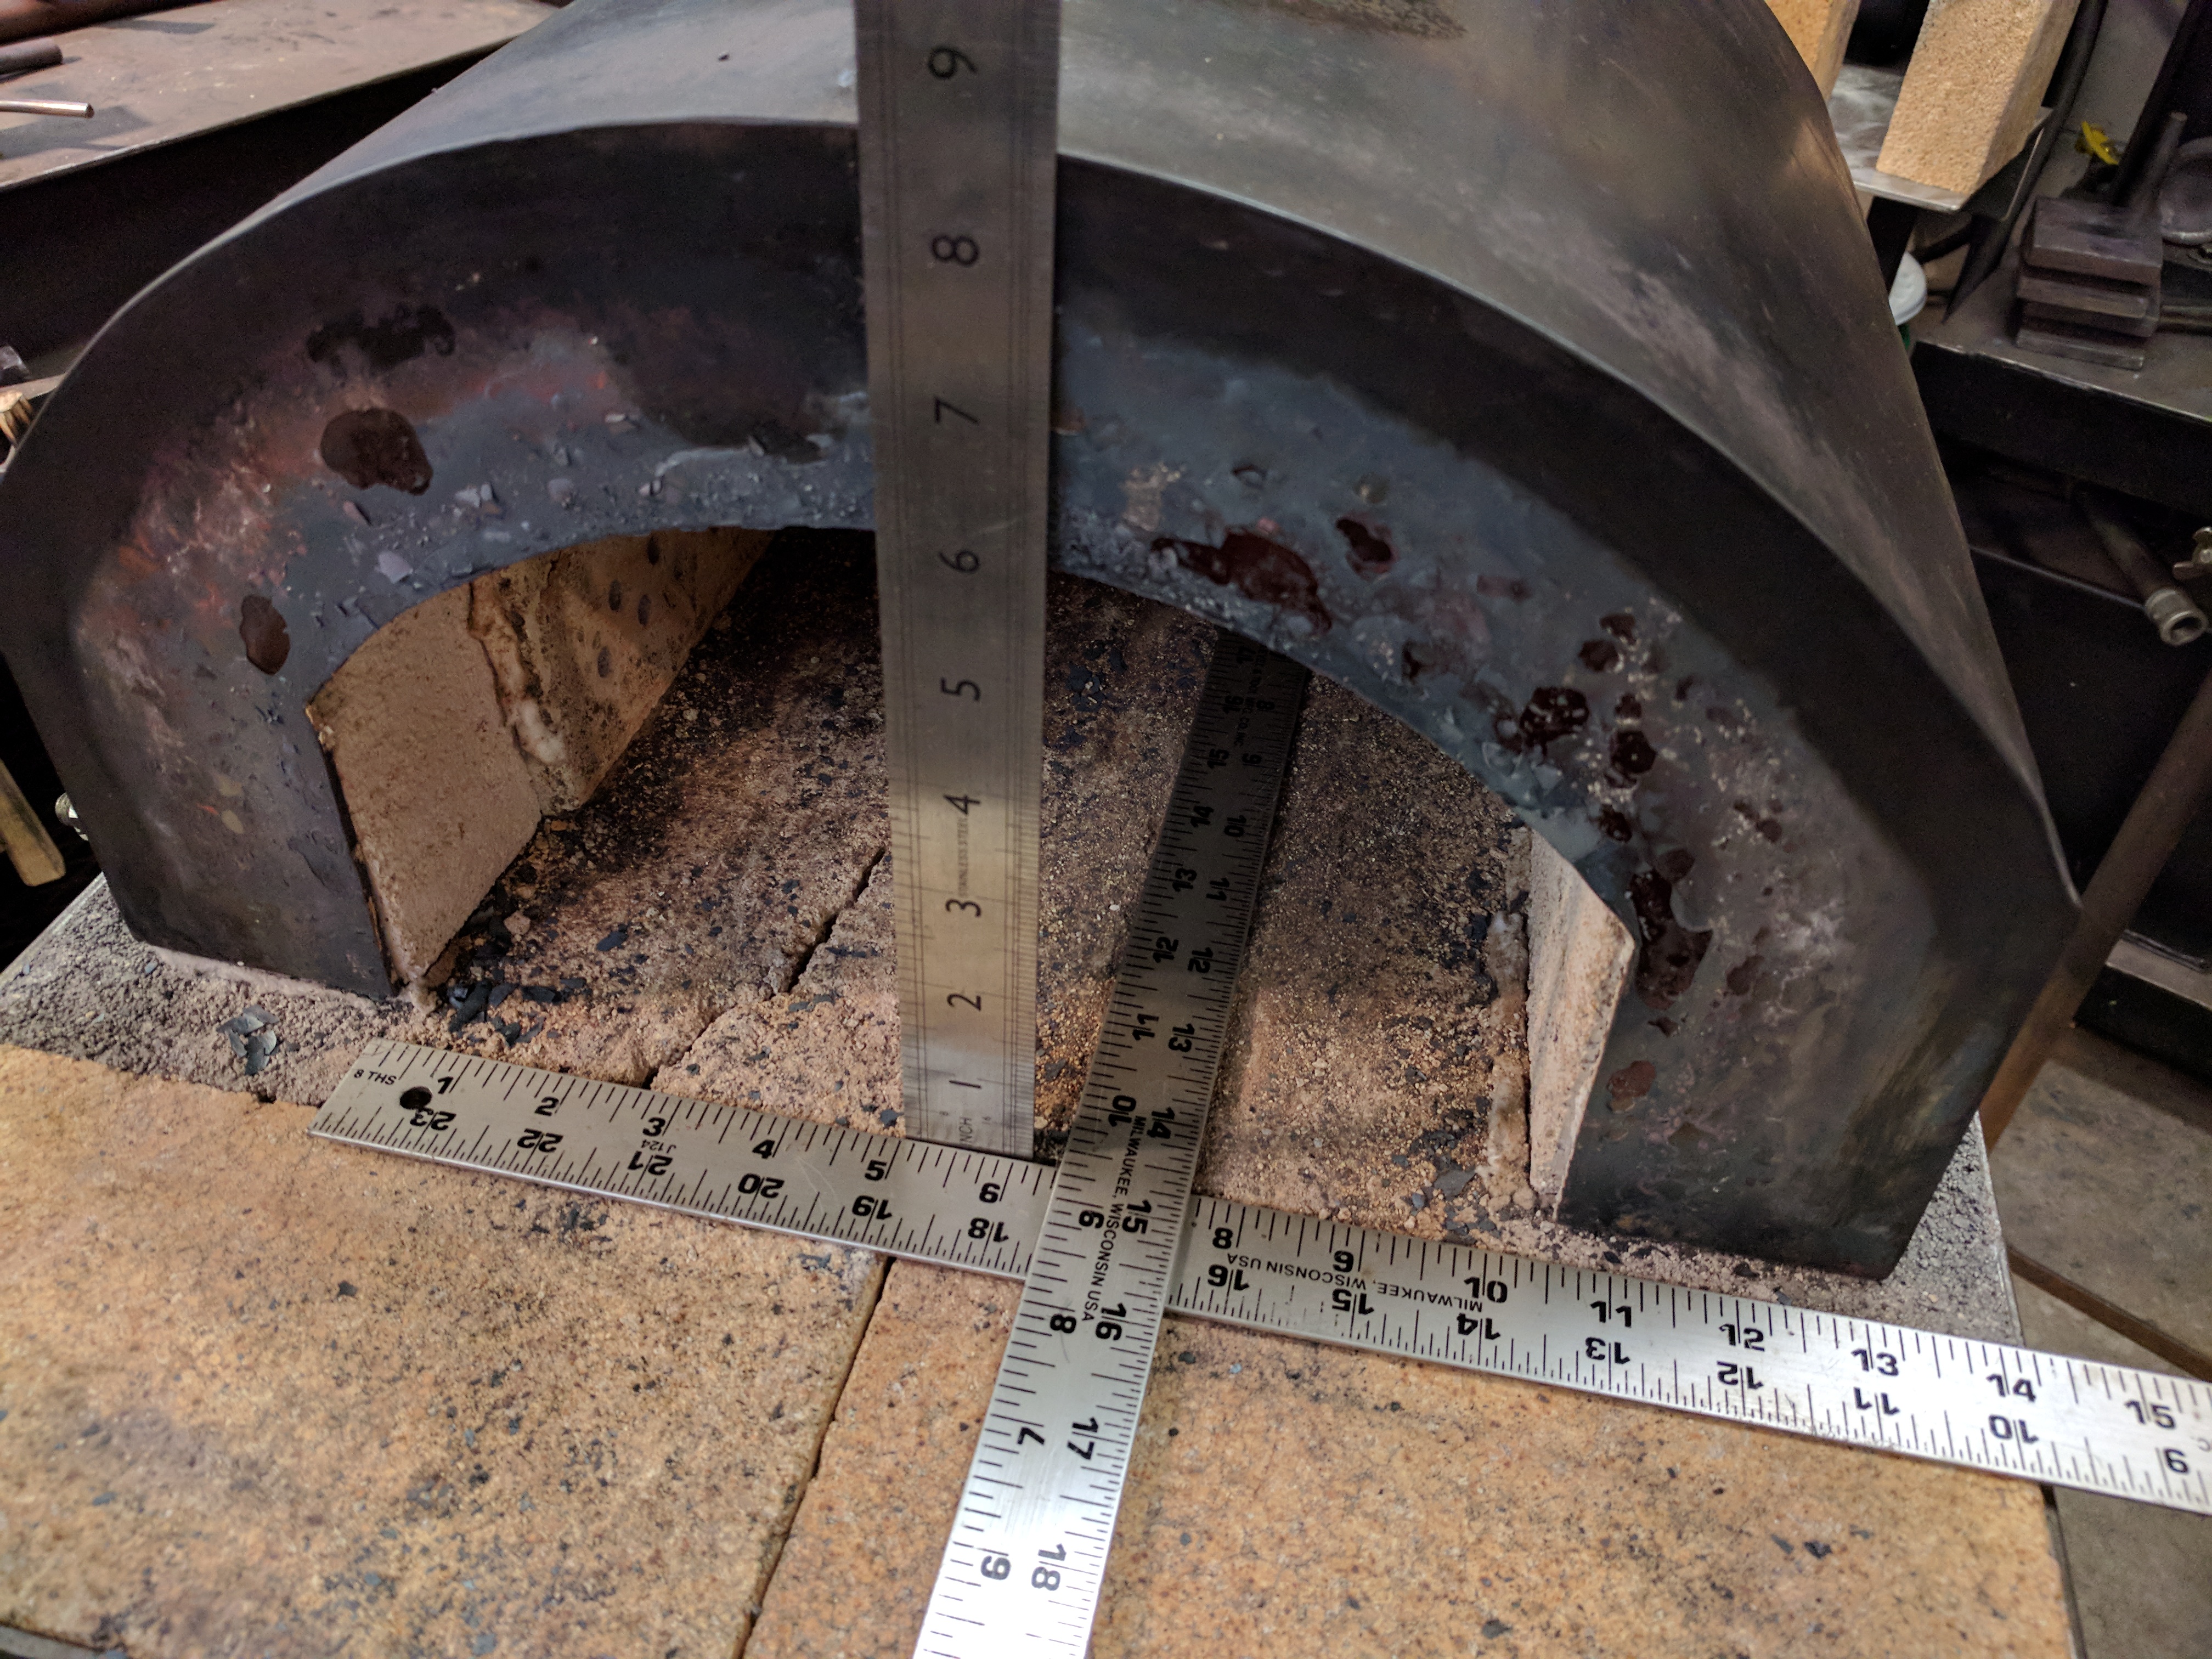
I built a natural gas ribbon burner and forge last year and since it’s been almost a year and I’ve worked most the kinks out of it I thought I would share my experiences here. I first had to do a bunch of research online. I didn’t find any single source of information that had all the answers so I had to piece my information together from several different sources. Most people making ribbon burners were using propane but I really like the idea of using the natural gas that is already plumbed into my shop. An additional bonus is NG never runs out or requires a trip to the propane dealer for a refill + natural gas is much cheaper than propane. The problem with natural gas is the low pressure in most home lines. I wasn’t sure it was going to work but I thought it was worth giving the natural gas a try. If I didn’t have enough pressure from my home line I could always convert over to propane. Luckily for me it worked out, the pressure is enough to get the ribbon burner firing better than I imagined. I wanted this forge to have a larger chamber than my other propane forge that had a maximum size height of 2.5 inchs. The new ribbon burner chamber is 6" high 10.5" wide at the opening and 14.5" deep so my ability to heat bigger and odd shaped pieces improved dramatically.
Hopefully others can benefit from my fumbling through attempting to understand ribbon burners running on natural gas.
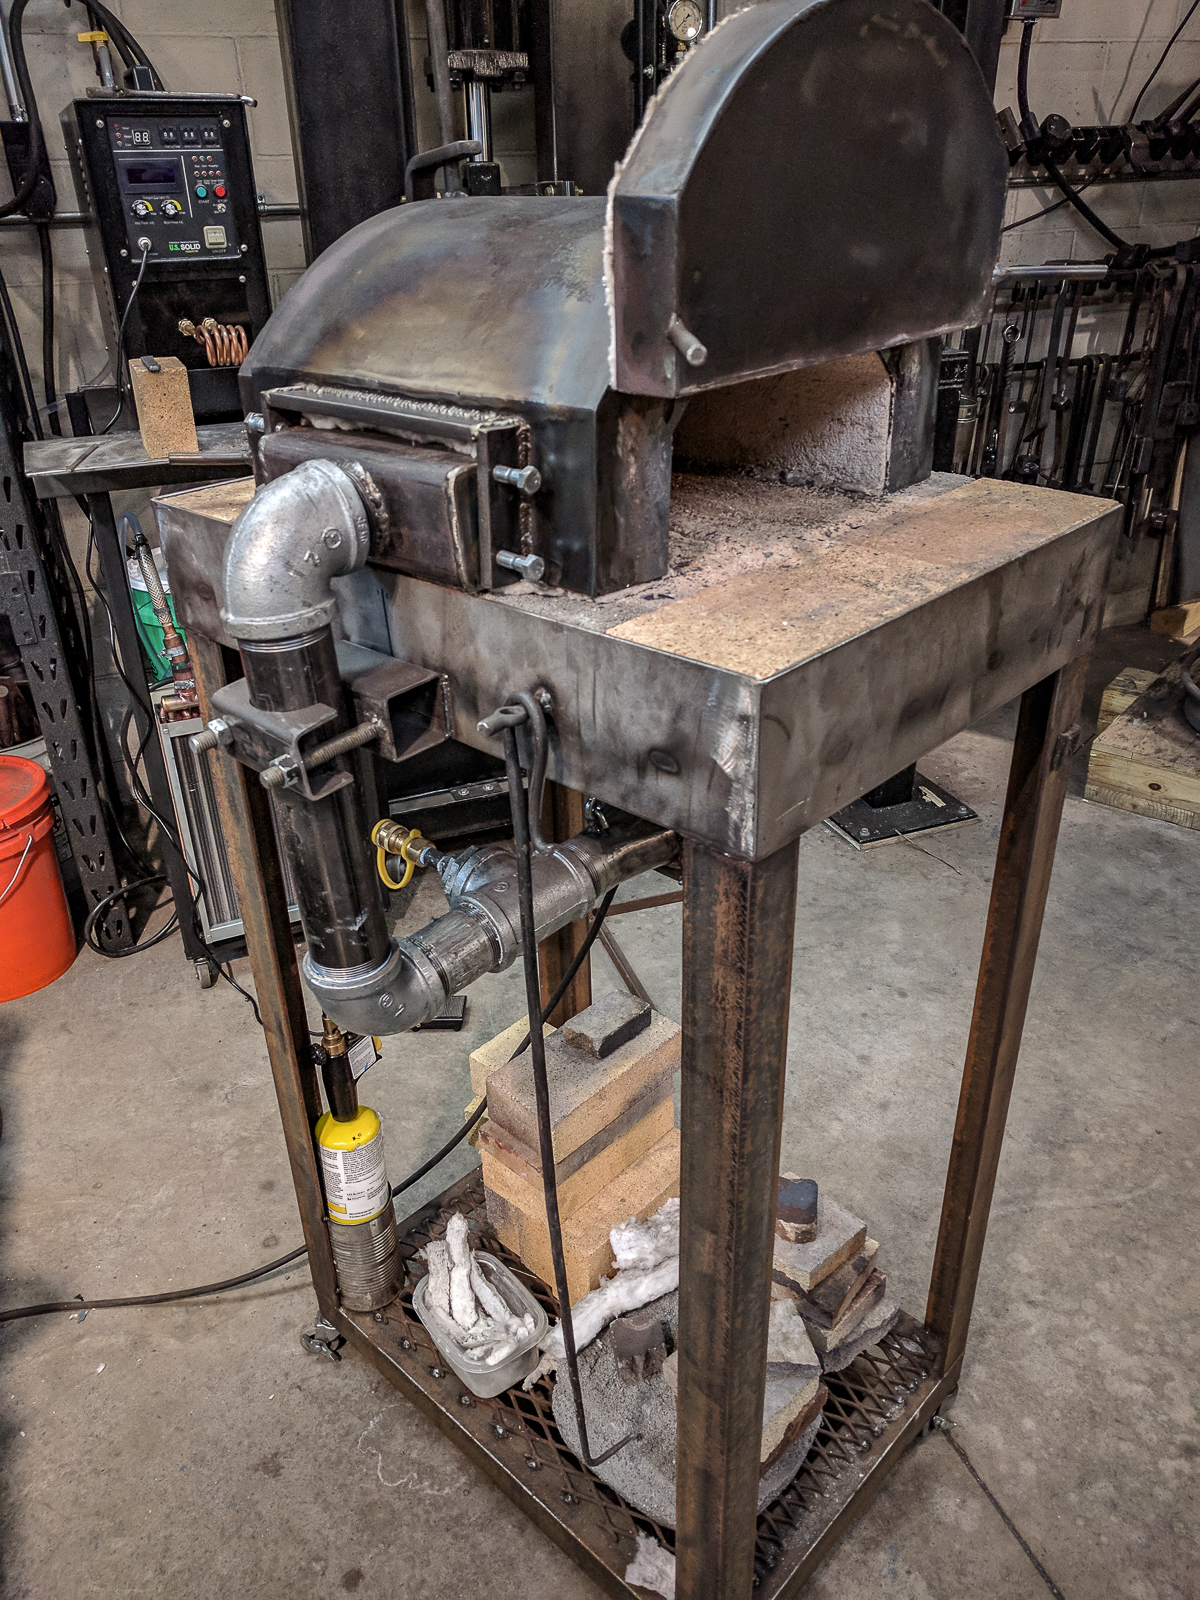
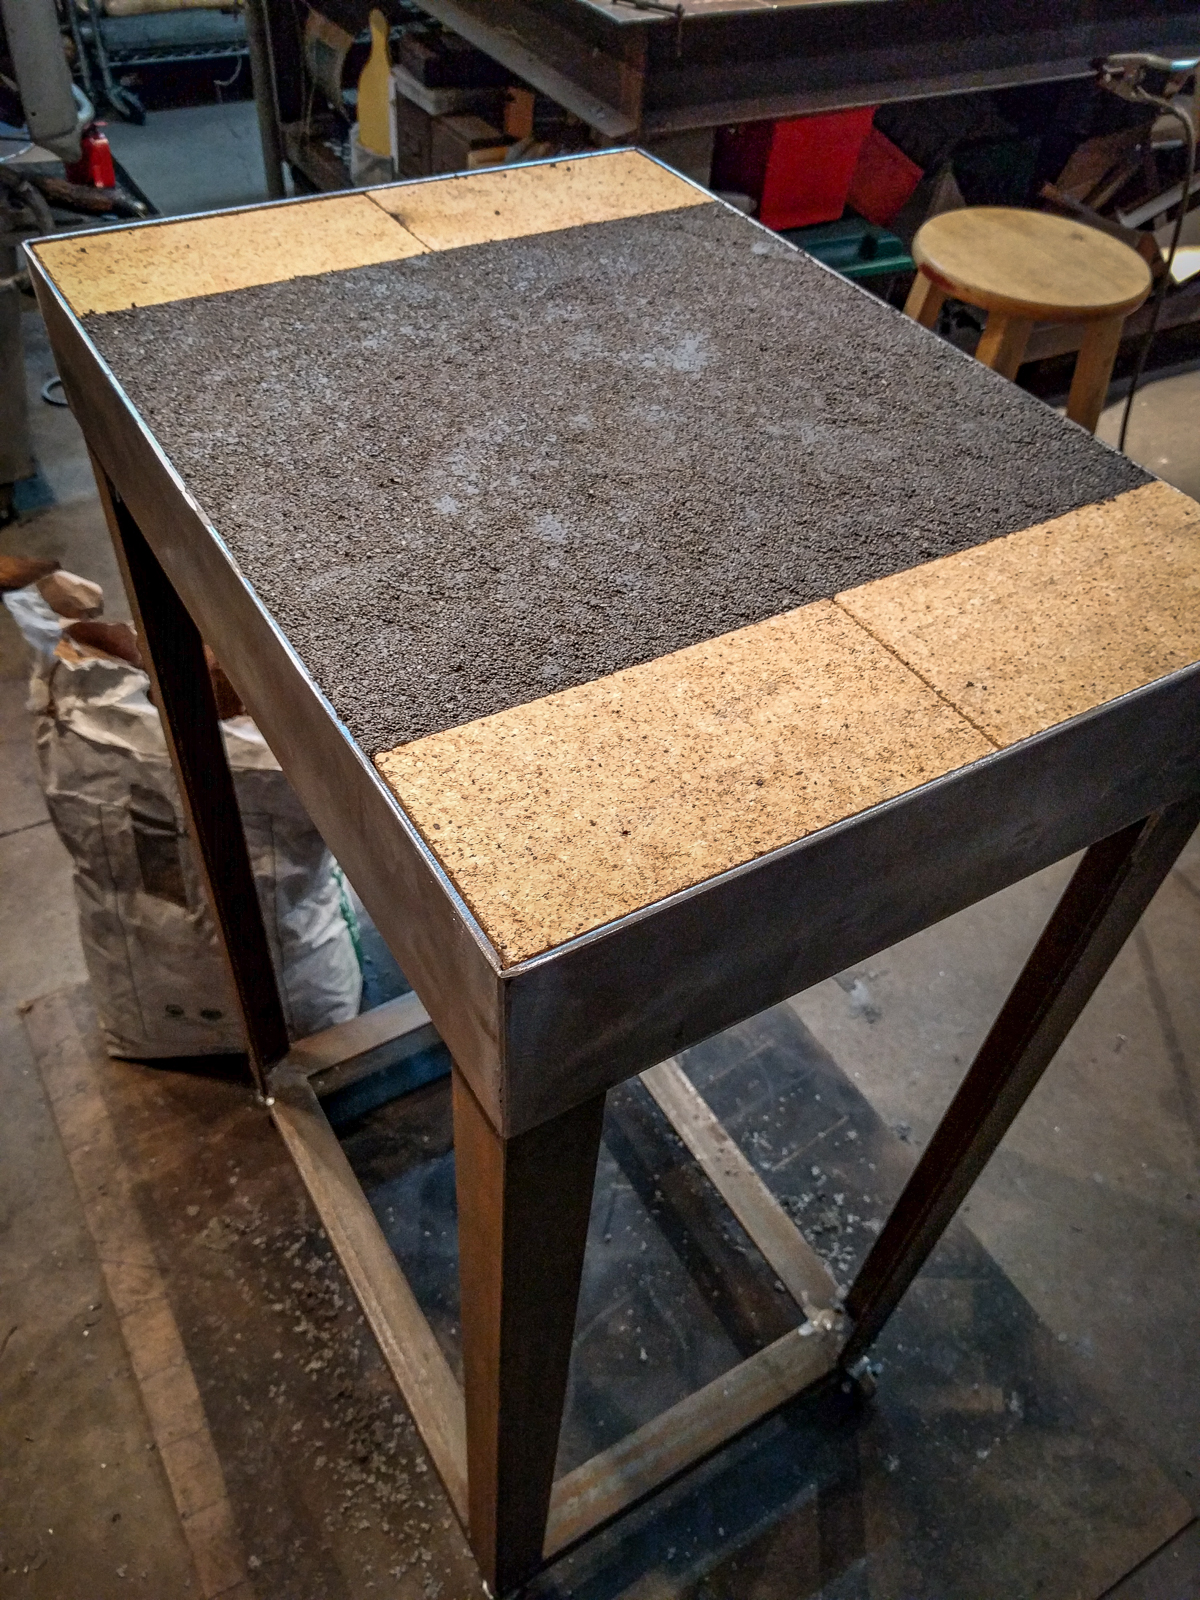
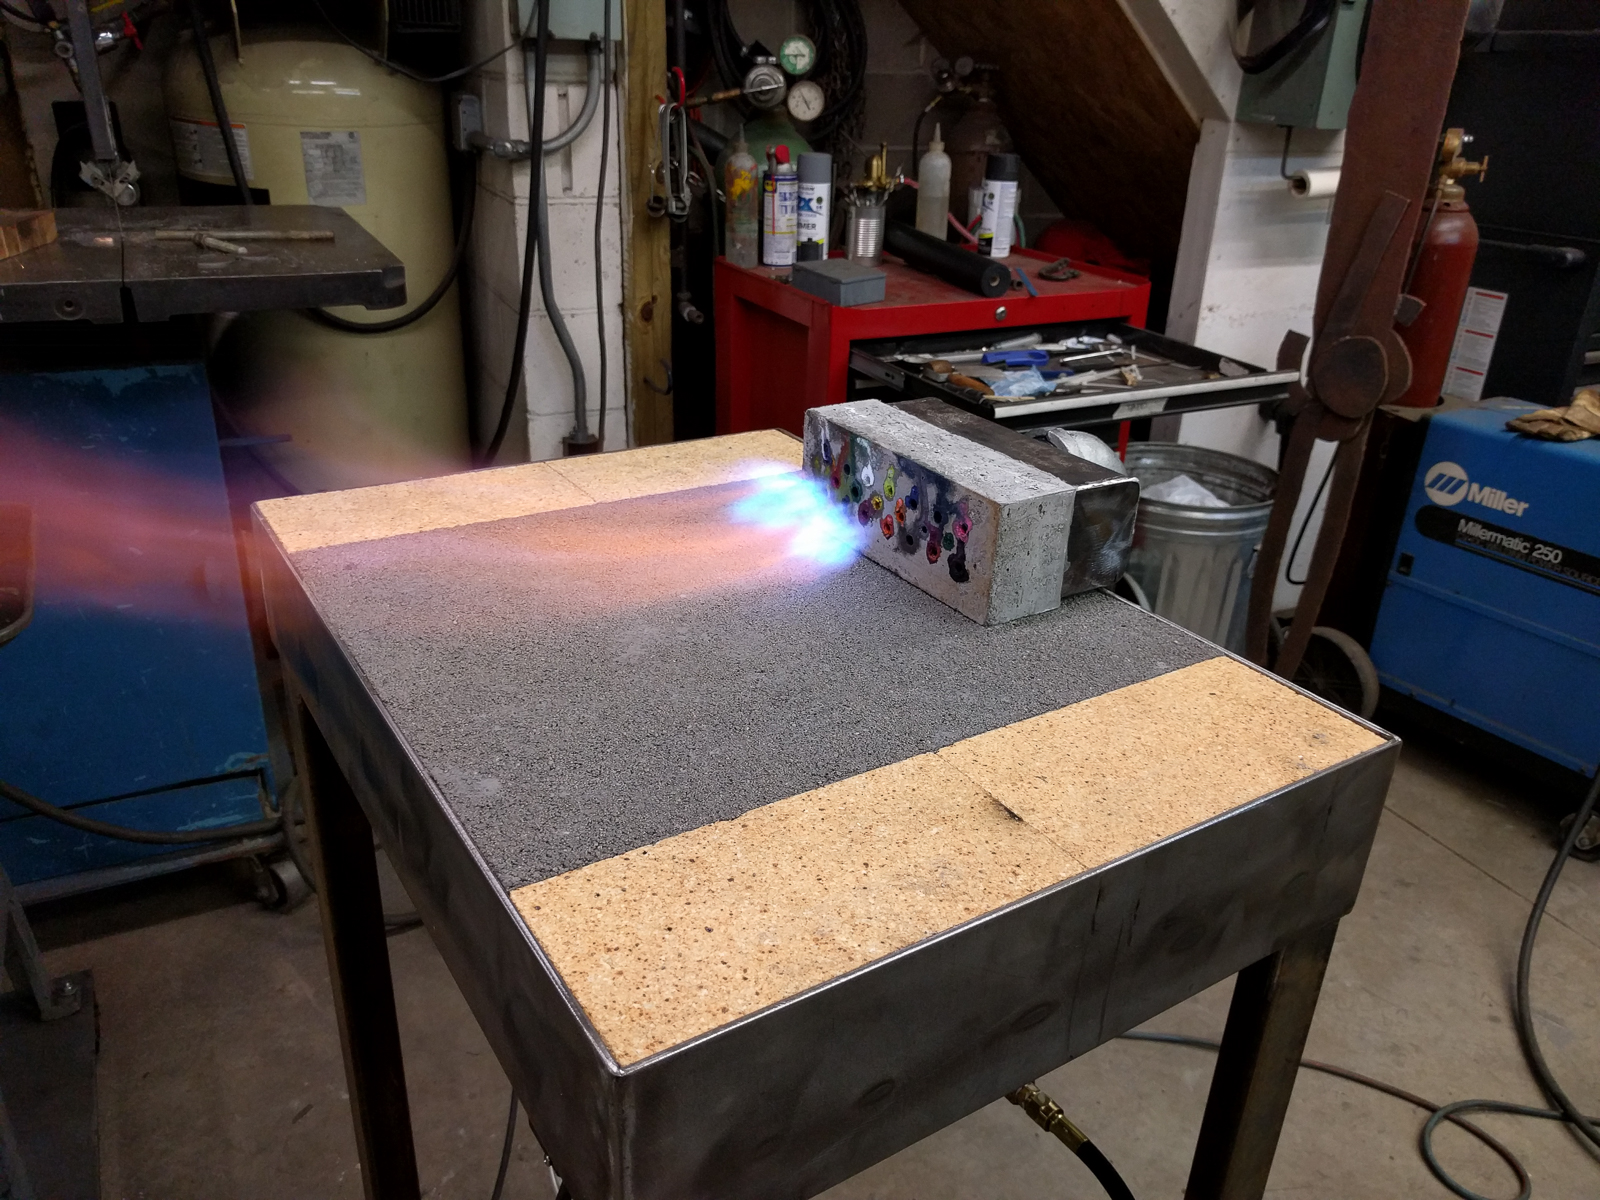
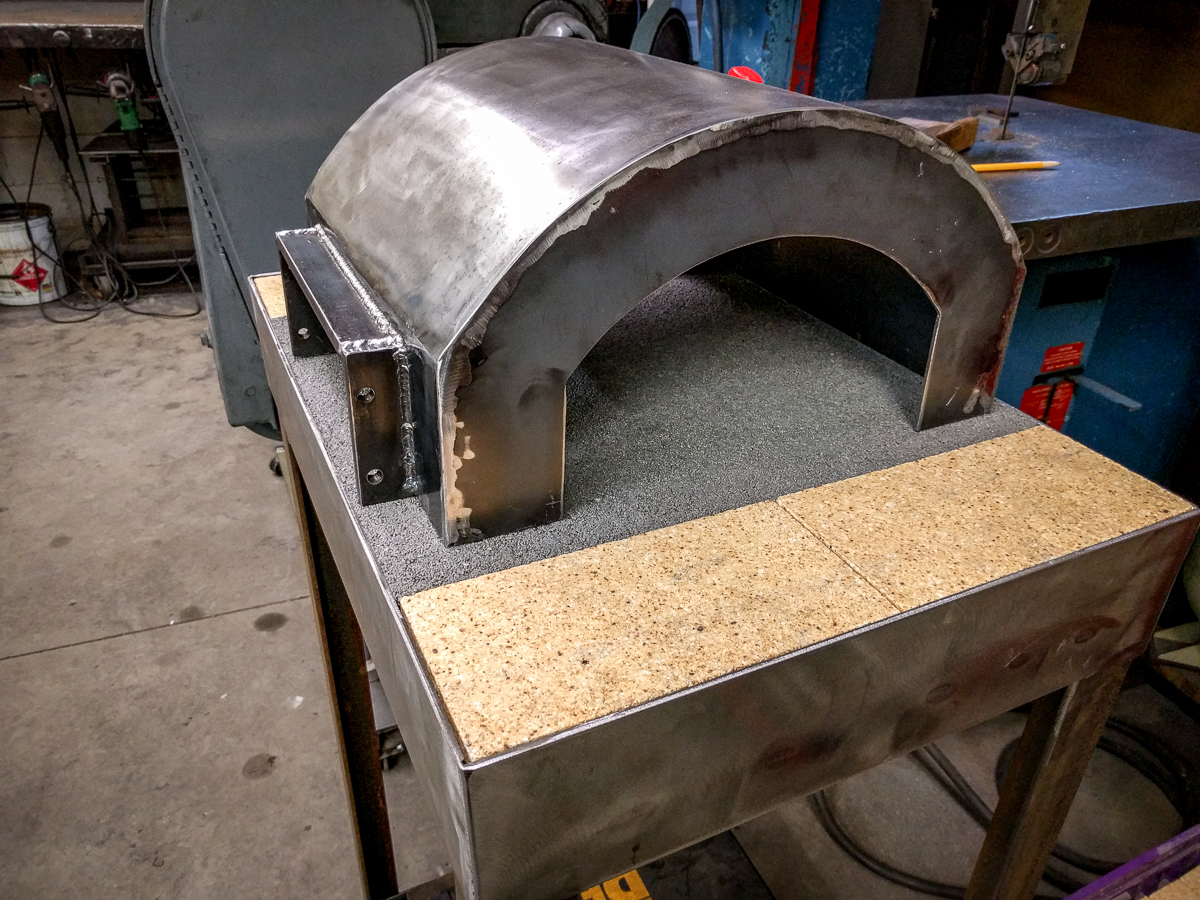
I tried to keep the footprint as small as I could to save space in my shop. Also being a taller guy I like the forge taller so I don’t have to bend over to look in the forge. The taller table also gave me more room to add the blower and gas lines under the table. I decided to use firebrick on the ends and then some cast o lite in the center of the table. This is one change I would make- I would use firebrick on the entire table floor. Firebrick is much easier to replace and install. I already have a crack so a firebrick base is in my future.
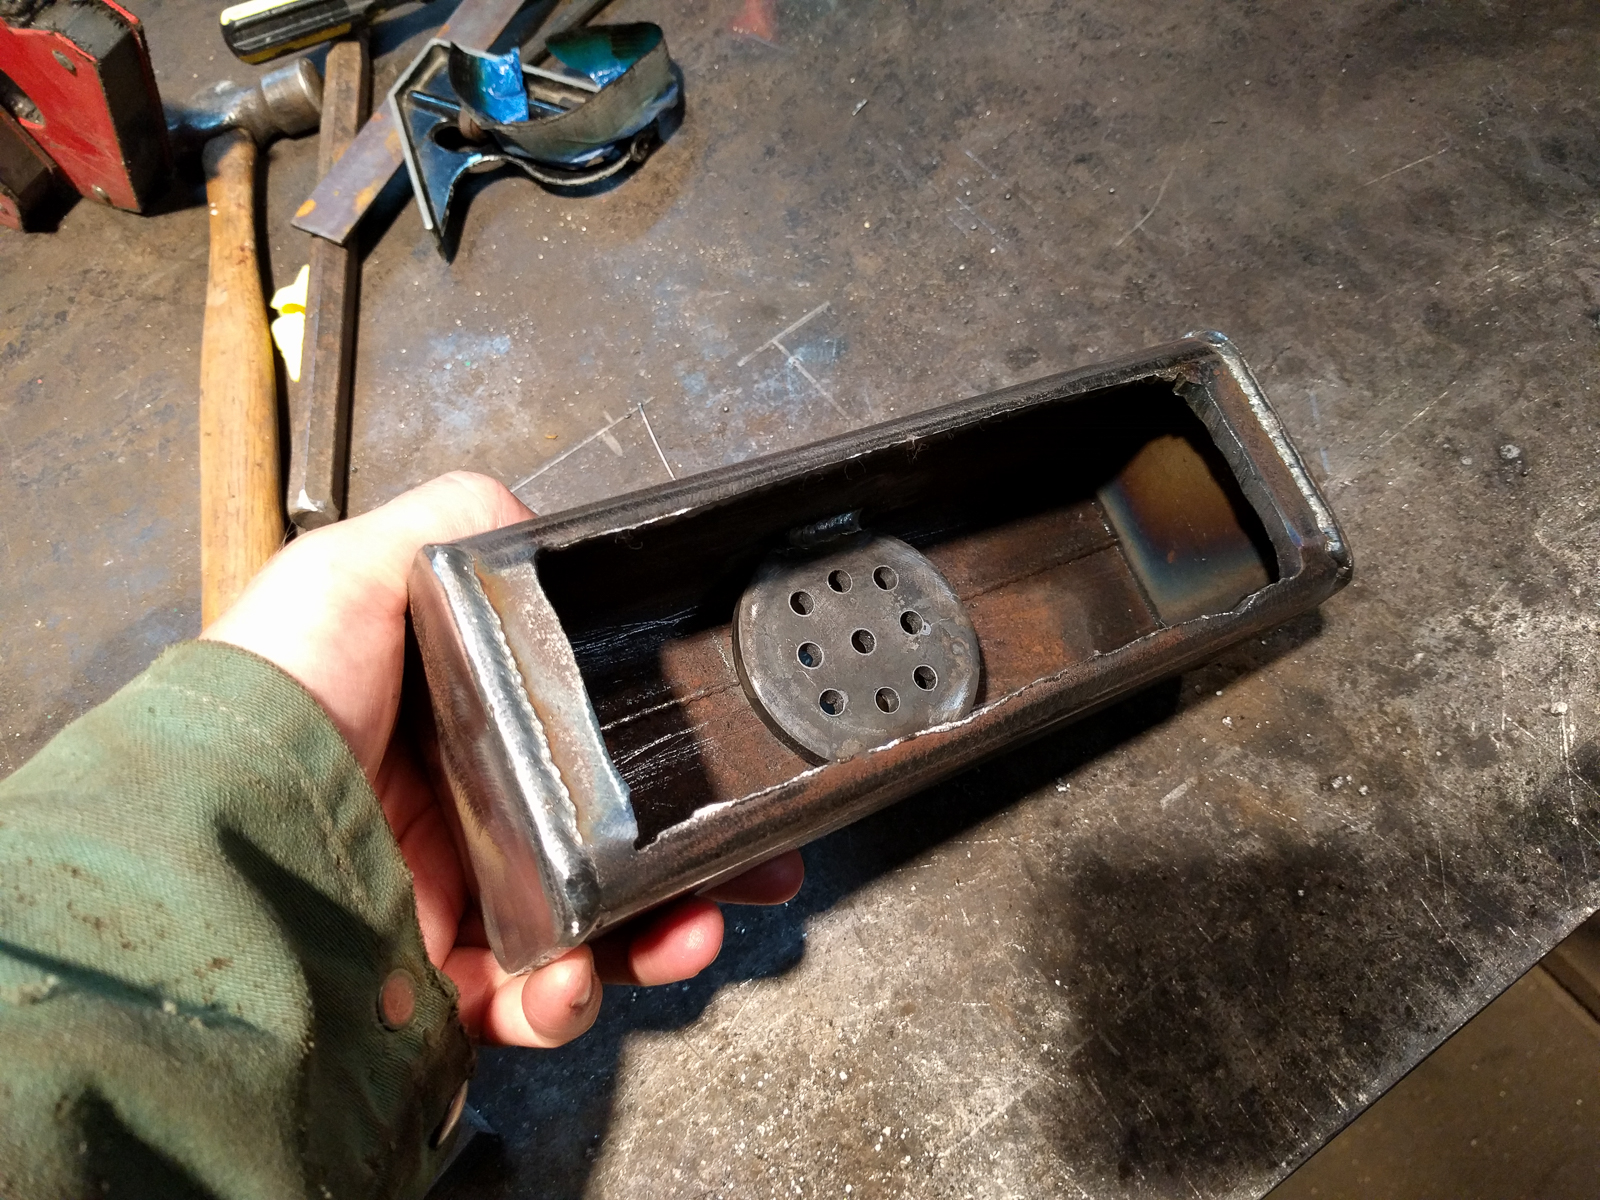
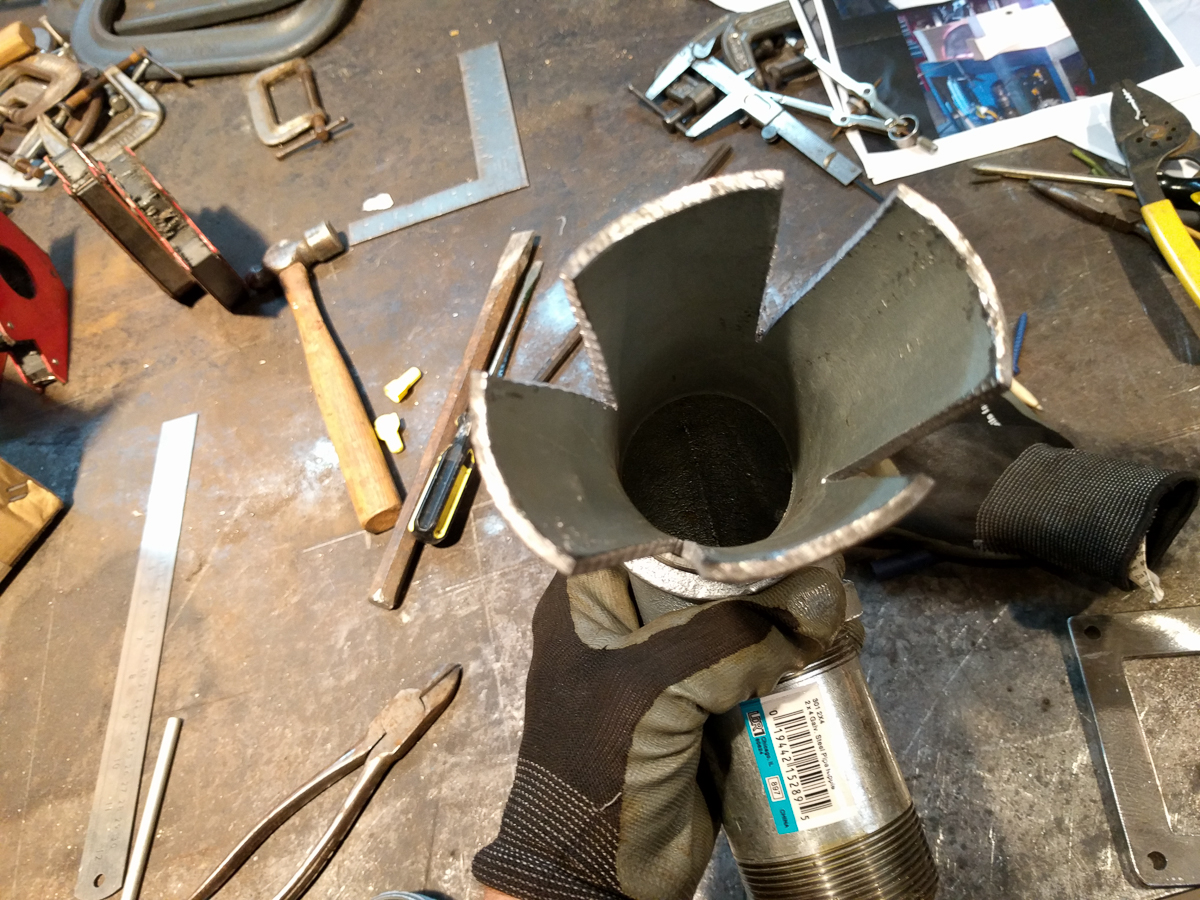
3"square pipe 8" long. Cut the from of the pipe off
Cap the ends.
Weld 2" plumbing pipe to the back.
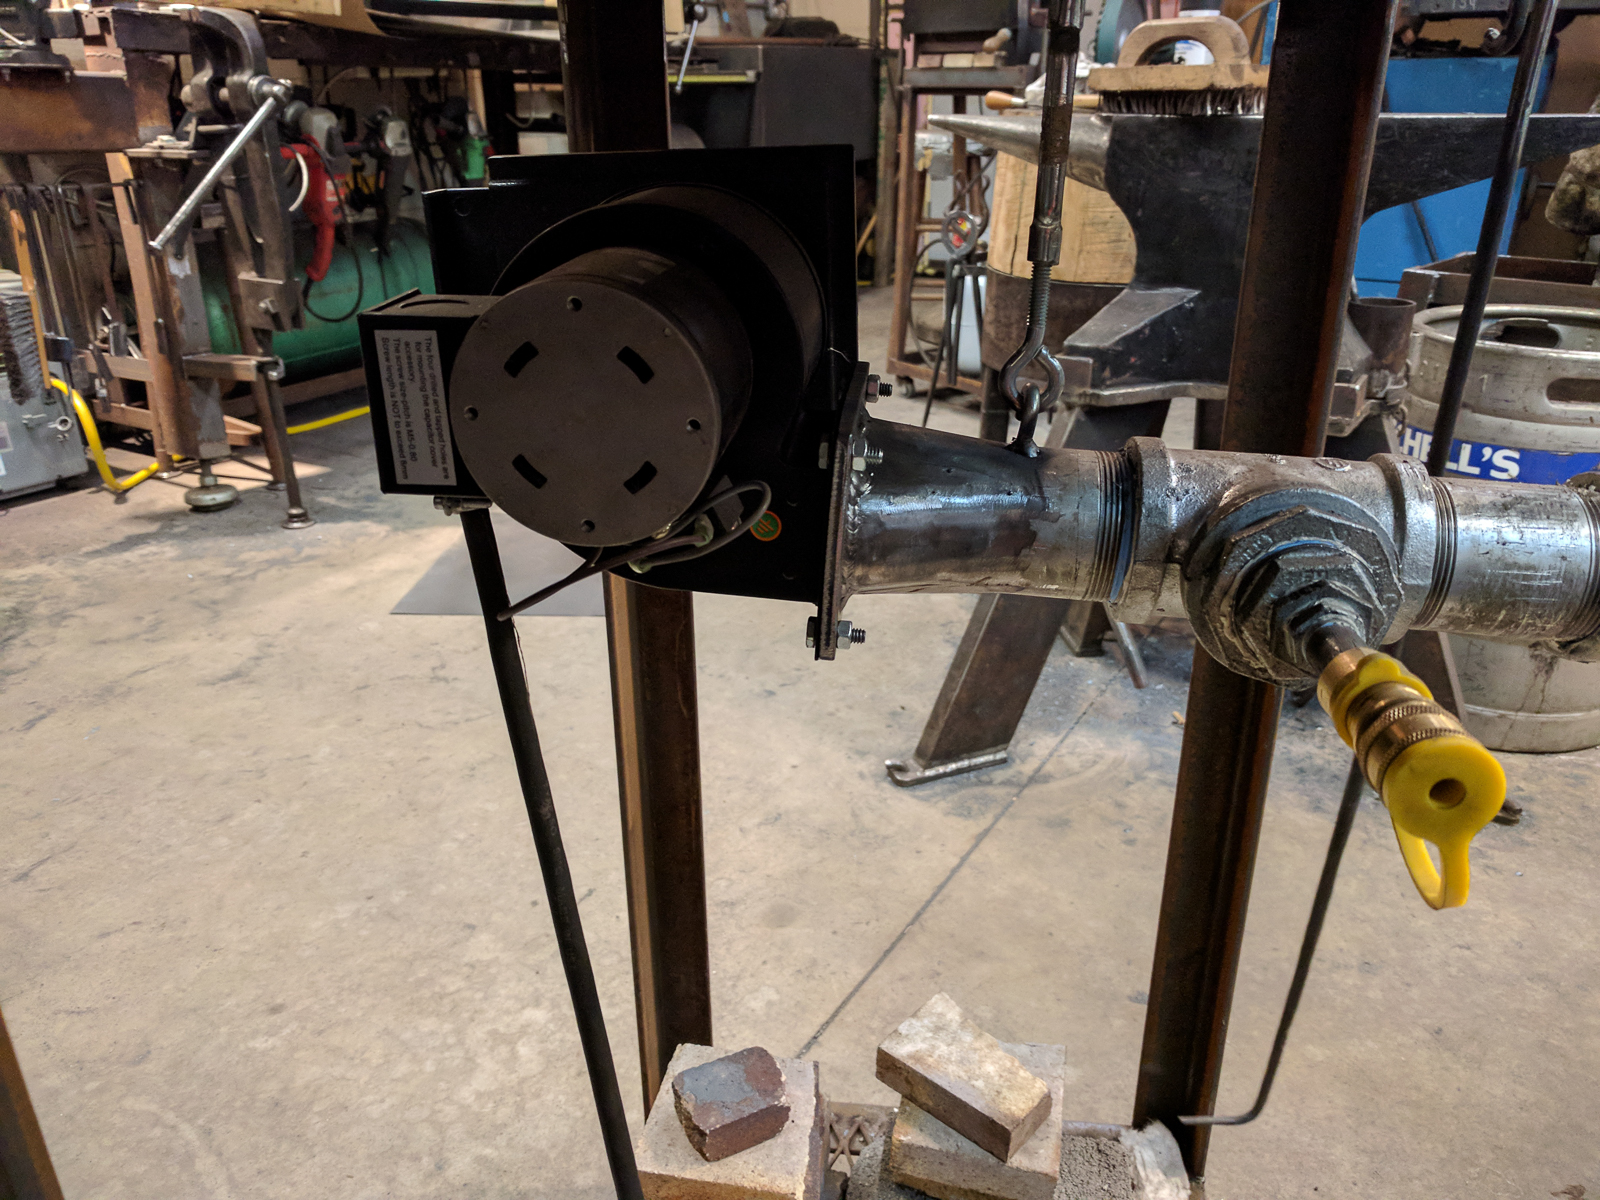
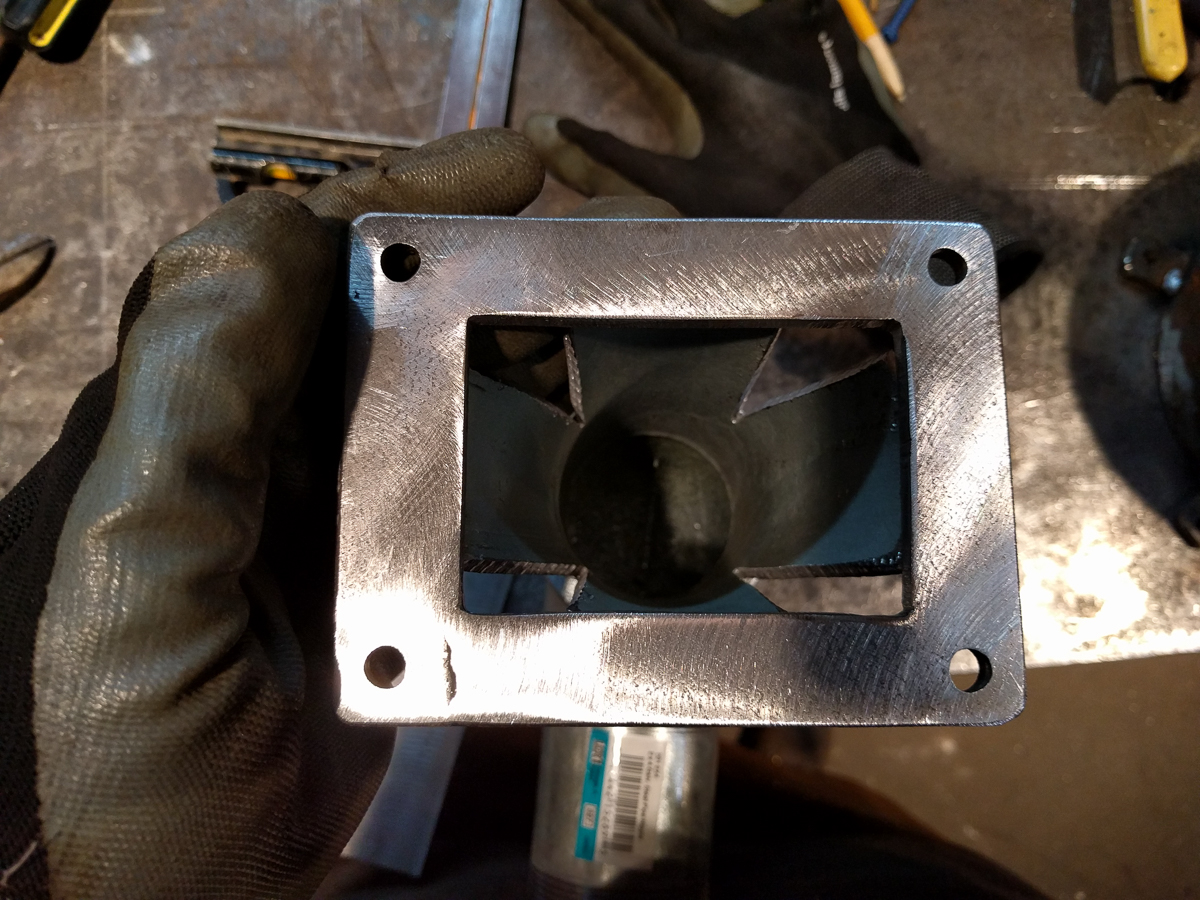
Add a air gas mixer/ diverter to the back of the pipe. Mine is standing off 3/8" (see photo)
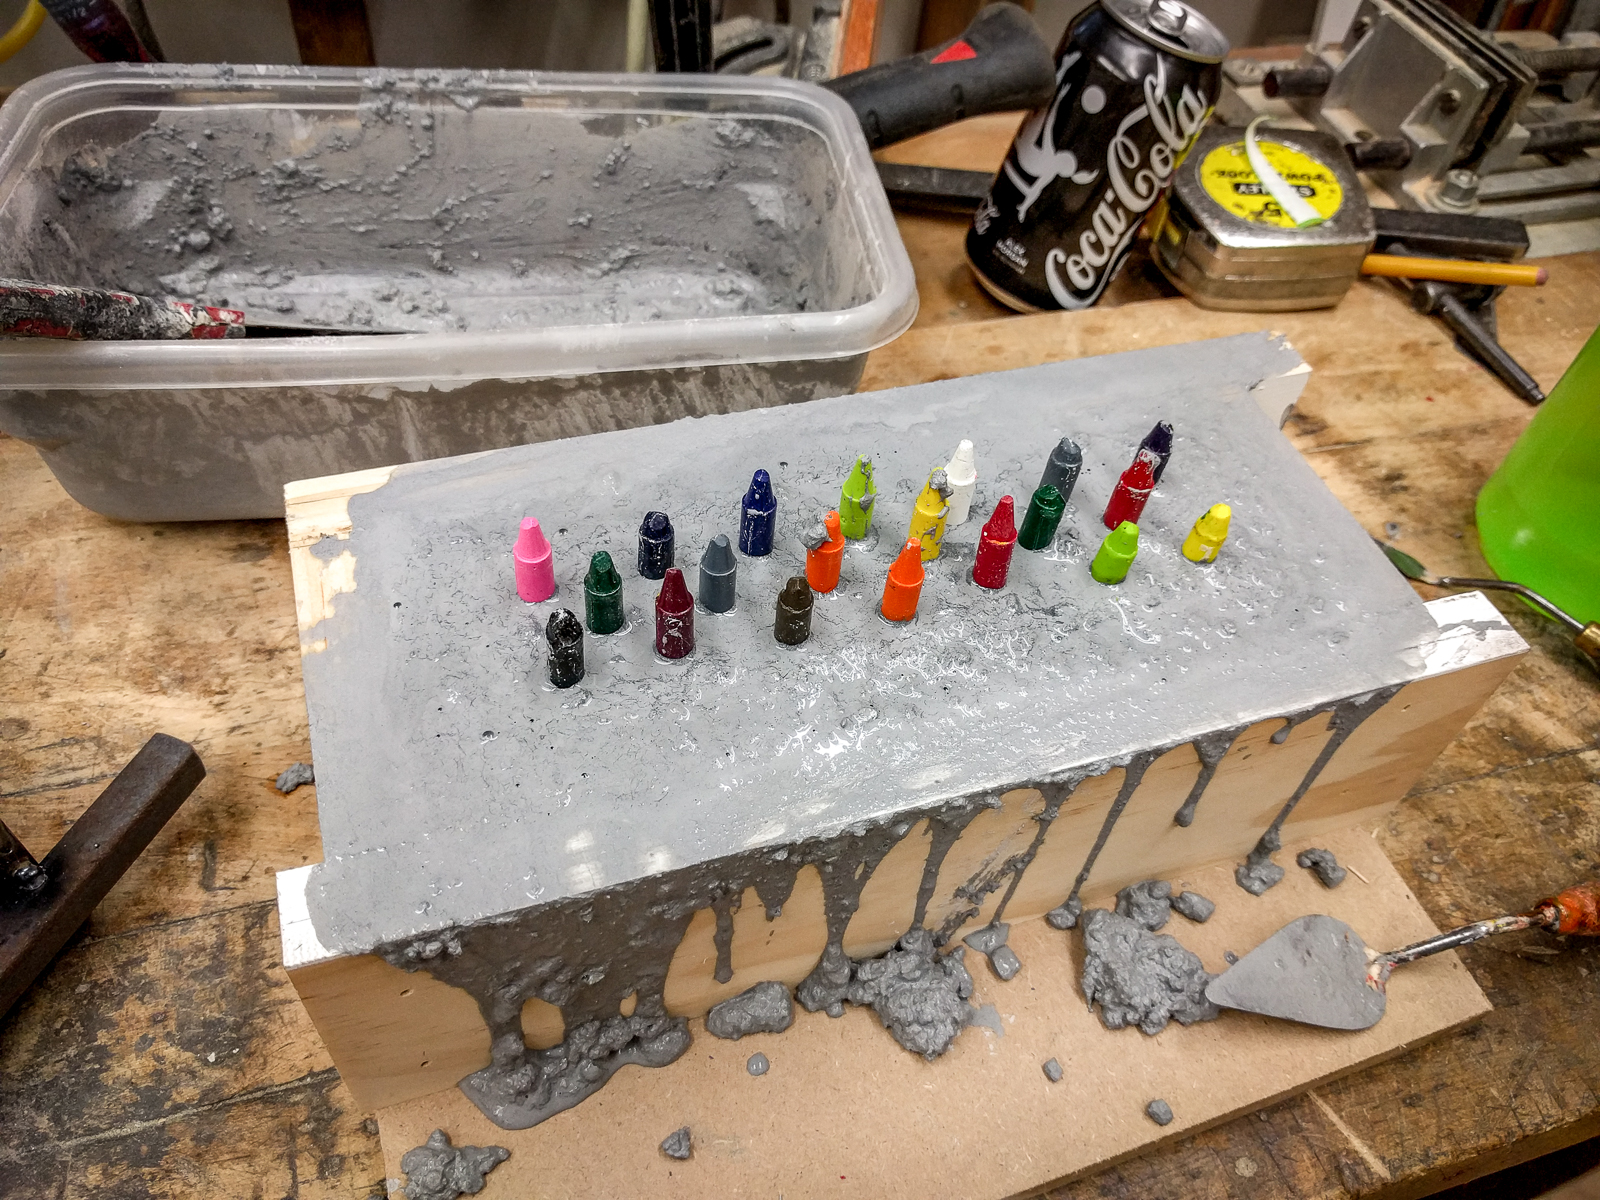
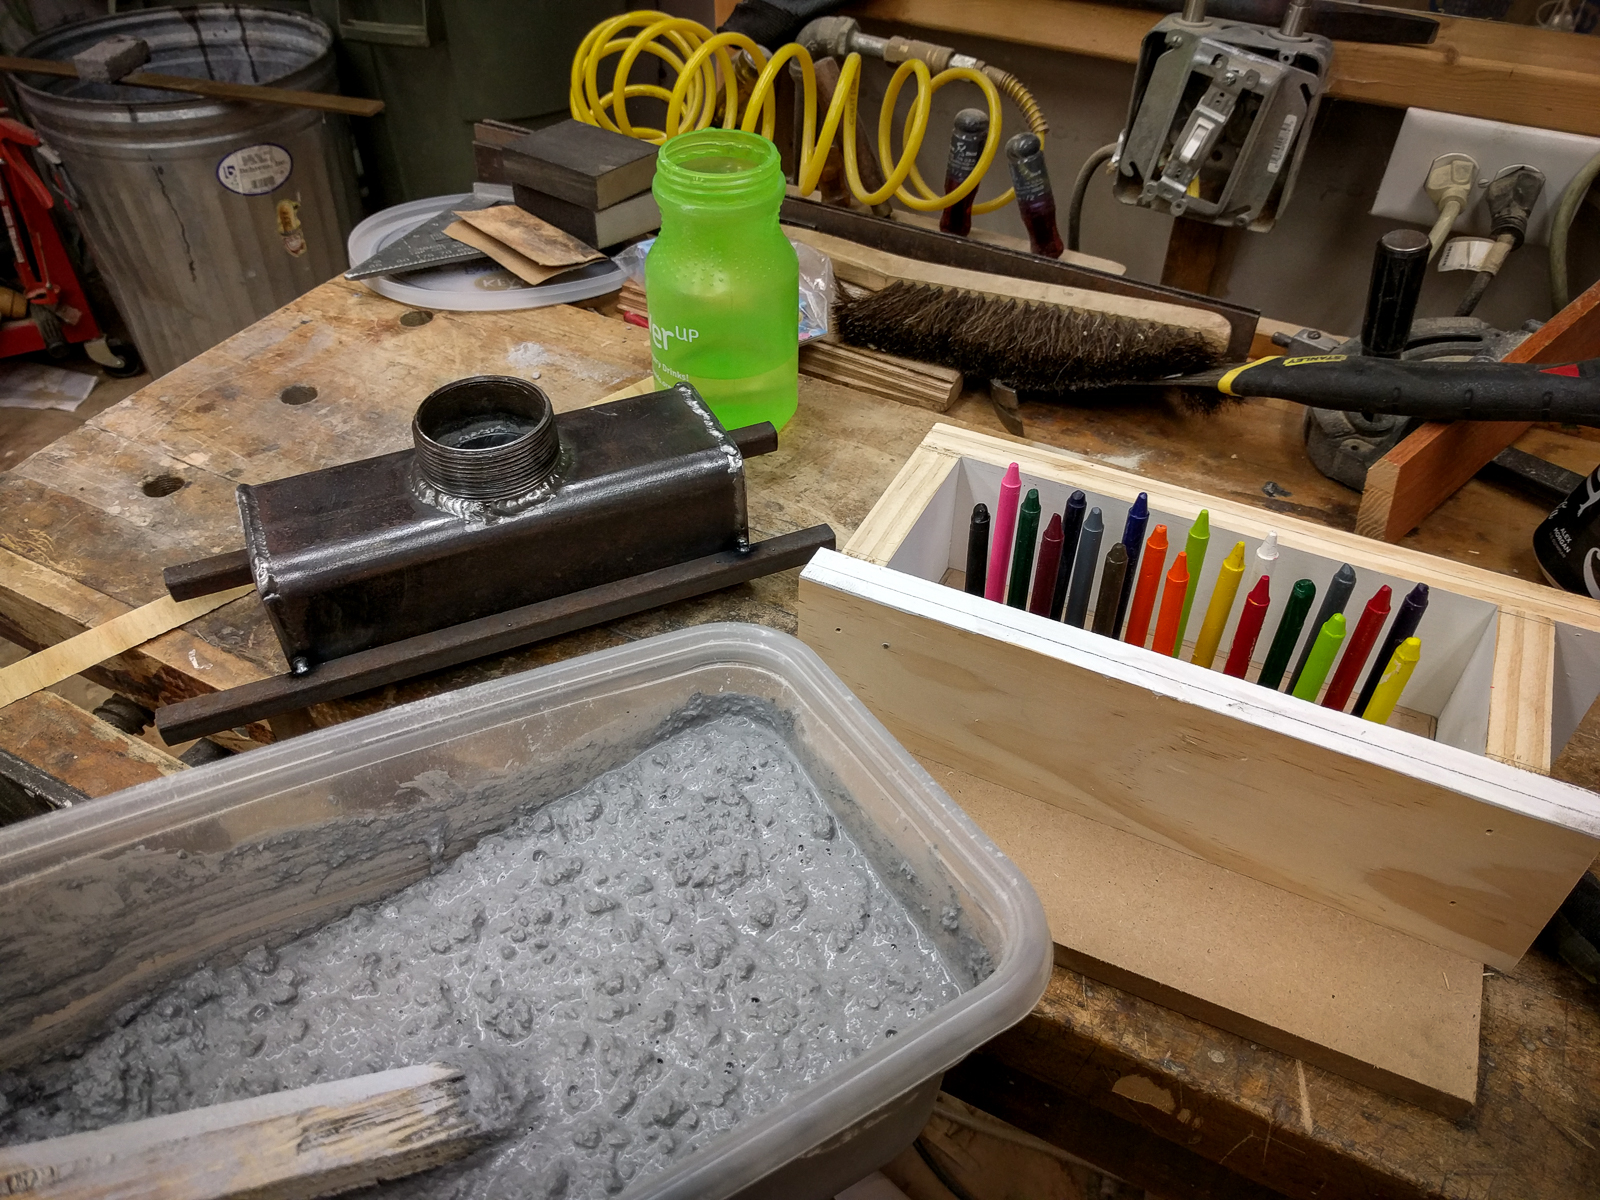
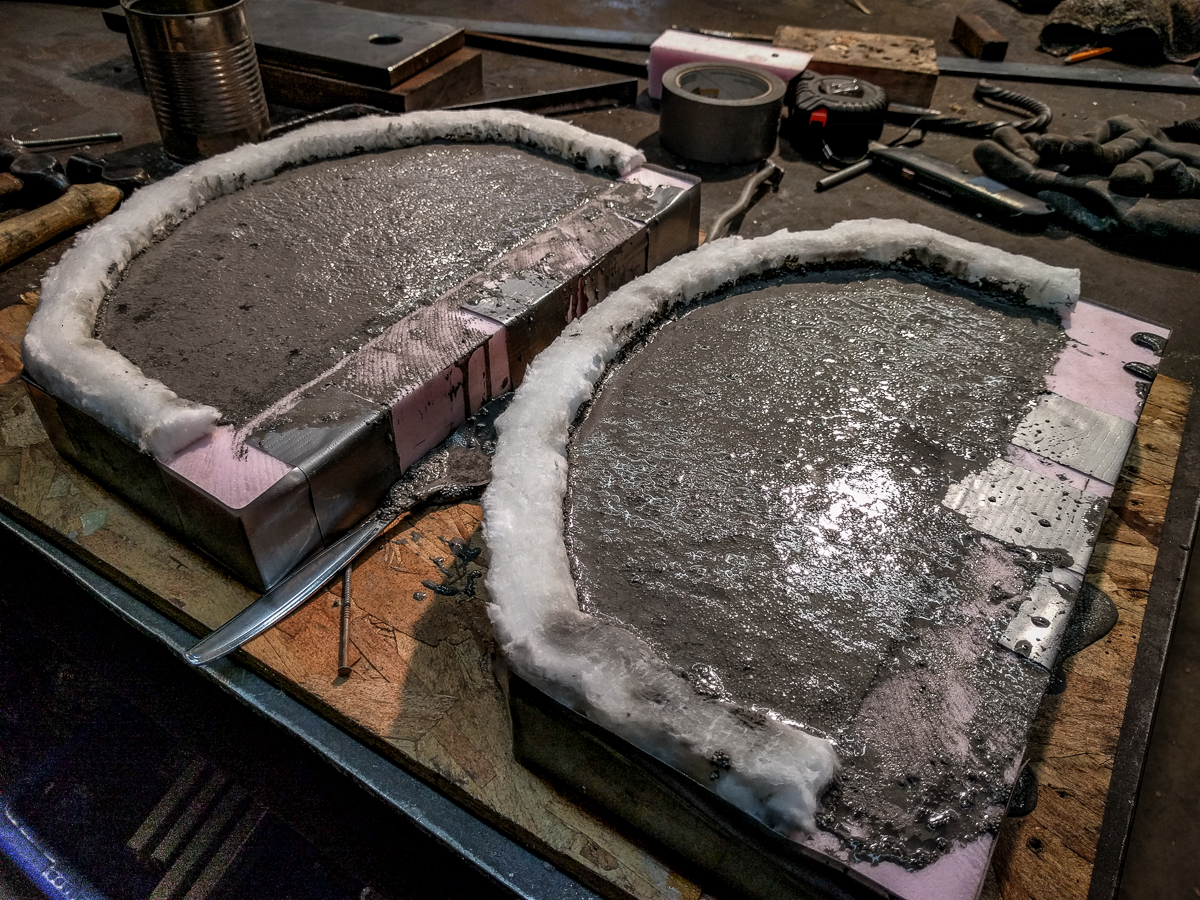
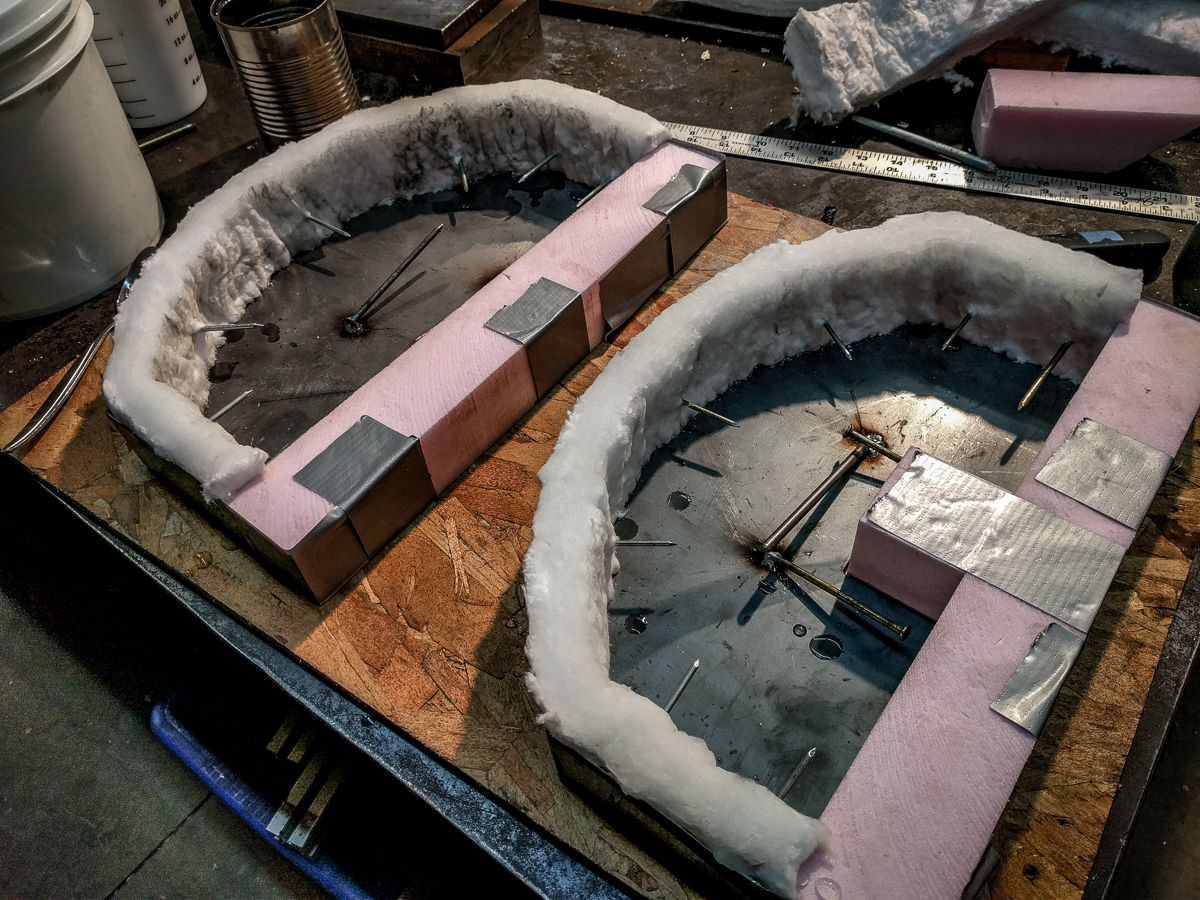
Make a 3x8 mold and place crayons in the pattern you want for the burner (remove paper or you will have trouble later trying to remove them)
Add castable refractory- mizzou in my case. make sure to vibrate the mold to make sure the refractory is as tight as possible.
While the refractory is still wet set the pipe into the refractory. I welded stops on my pipe so it could only sit 3/8 into the wet refractory and removed the stops later. After the refractory dries the two pieces should have a air tight fit.
Follow the instructions for curing time and then remove the crayons. Some will slip out but I had to carefully drill out the rest of them. Use a torch to melt the remaining crayon bits out.
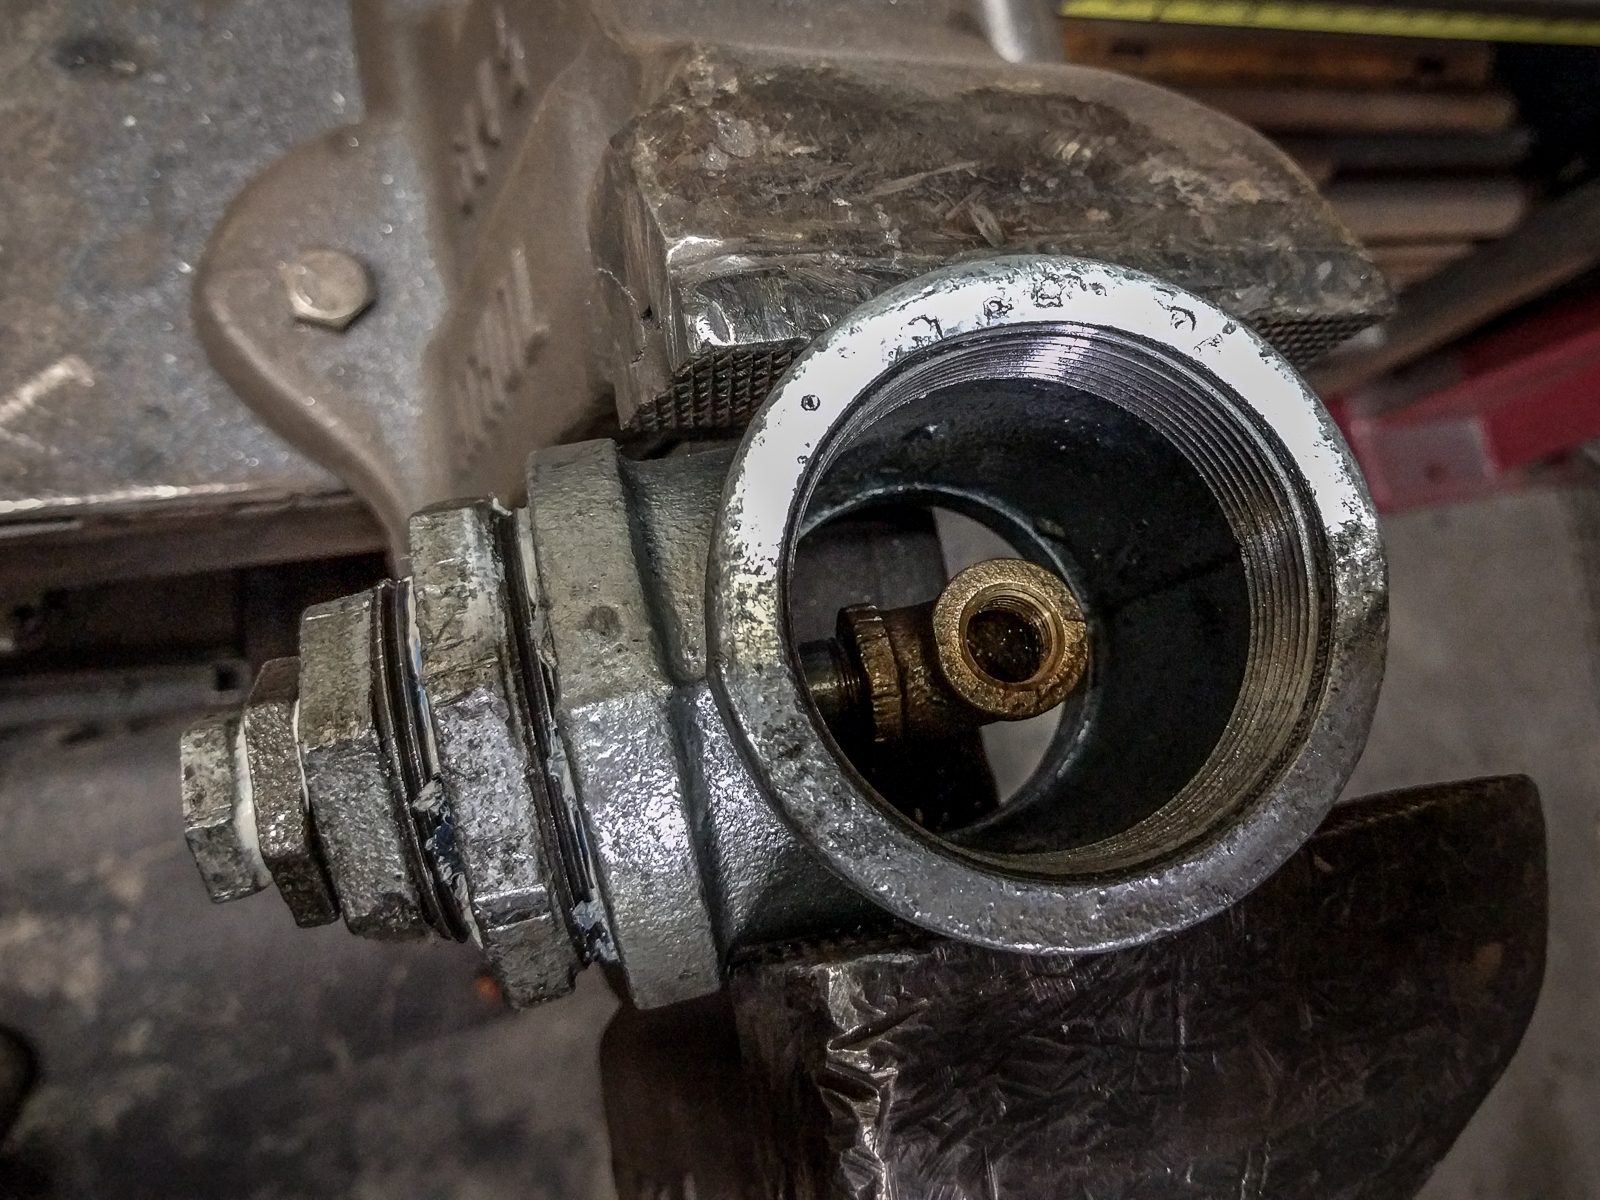
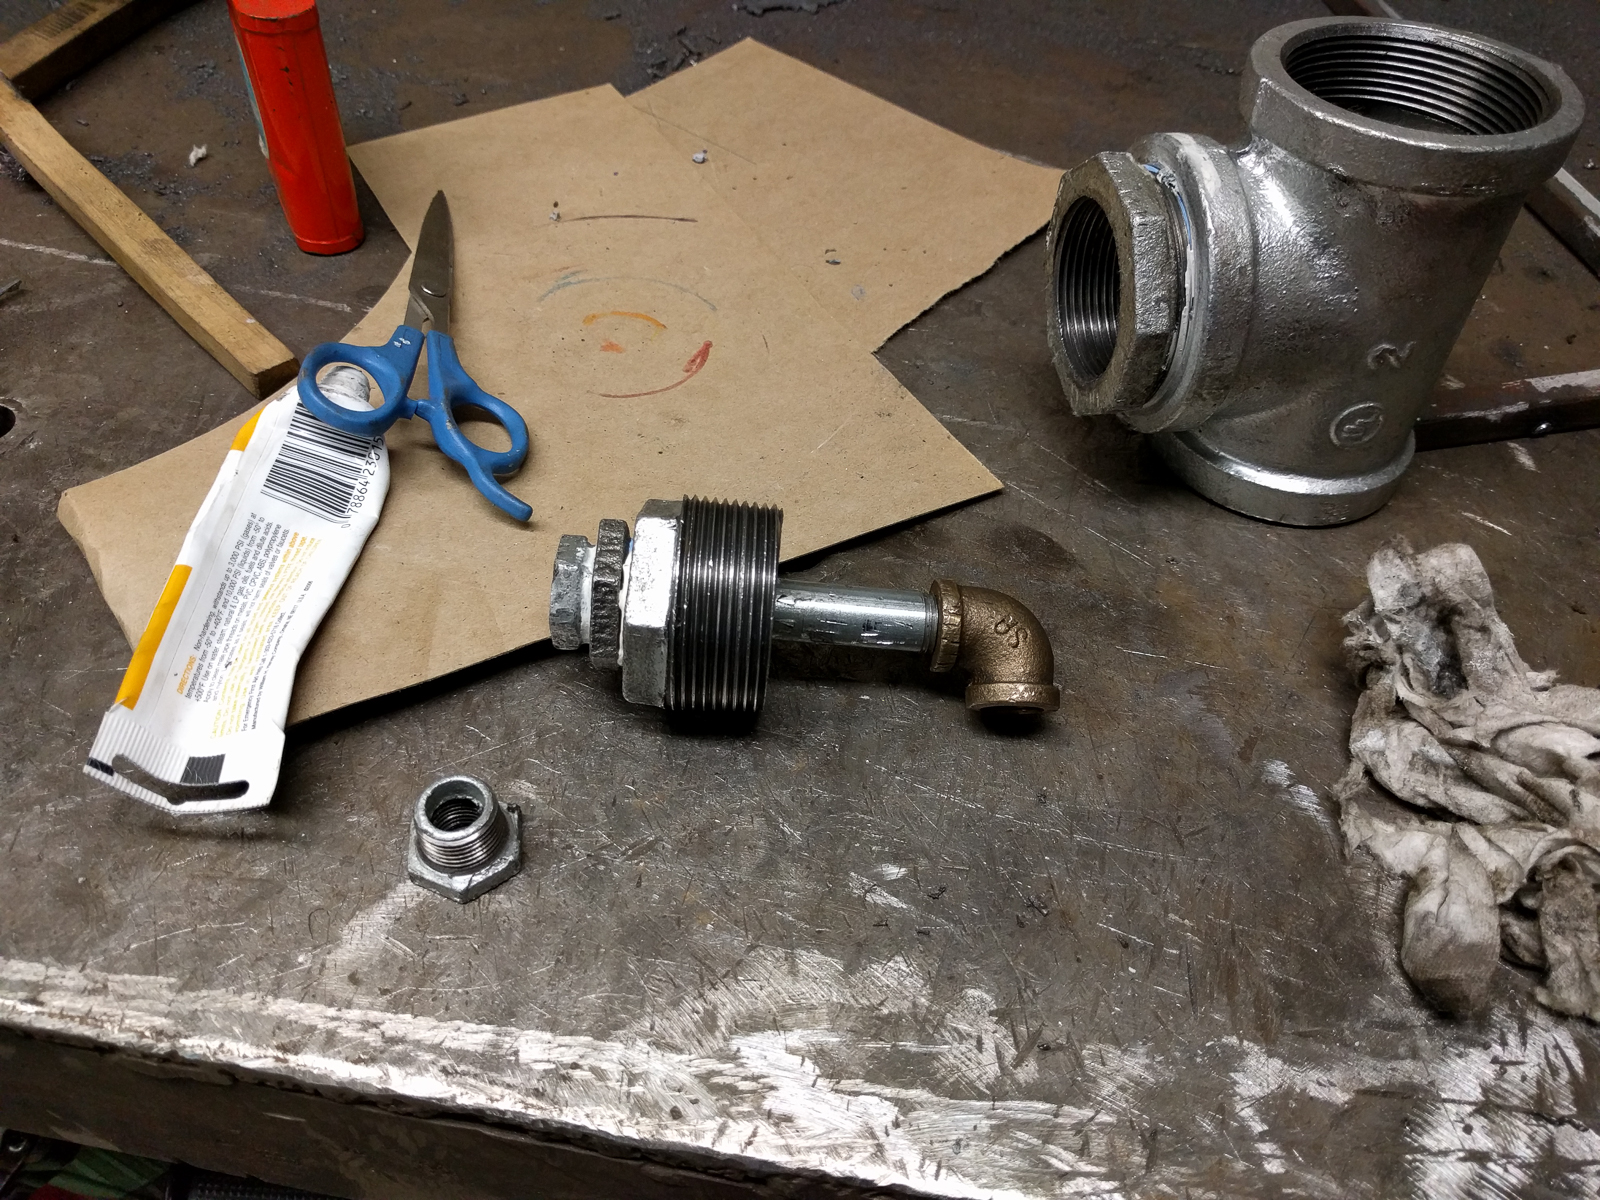
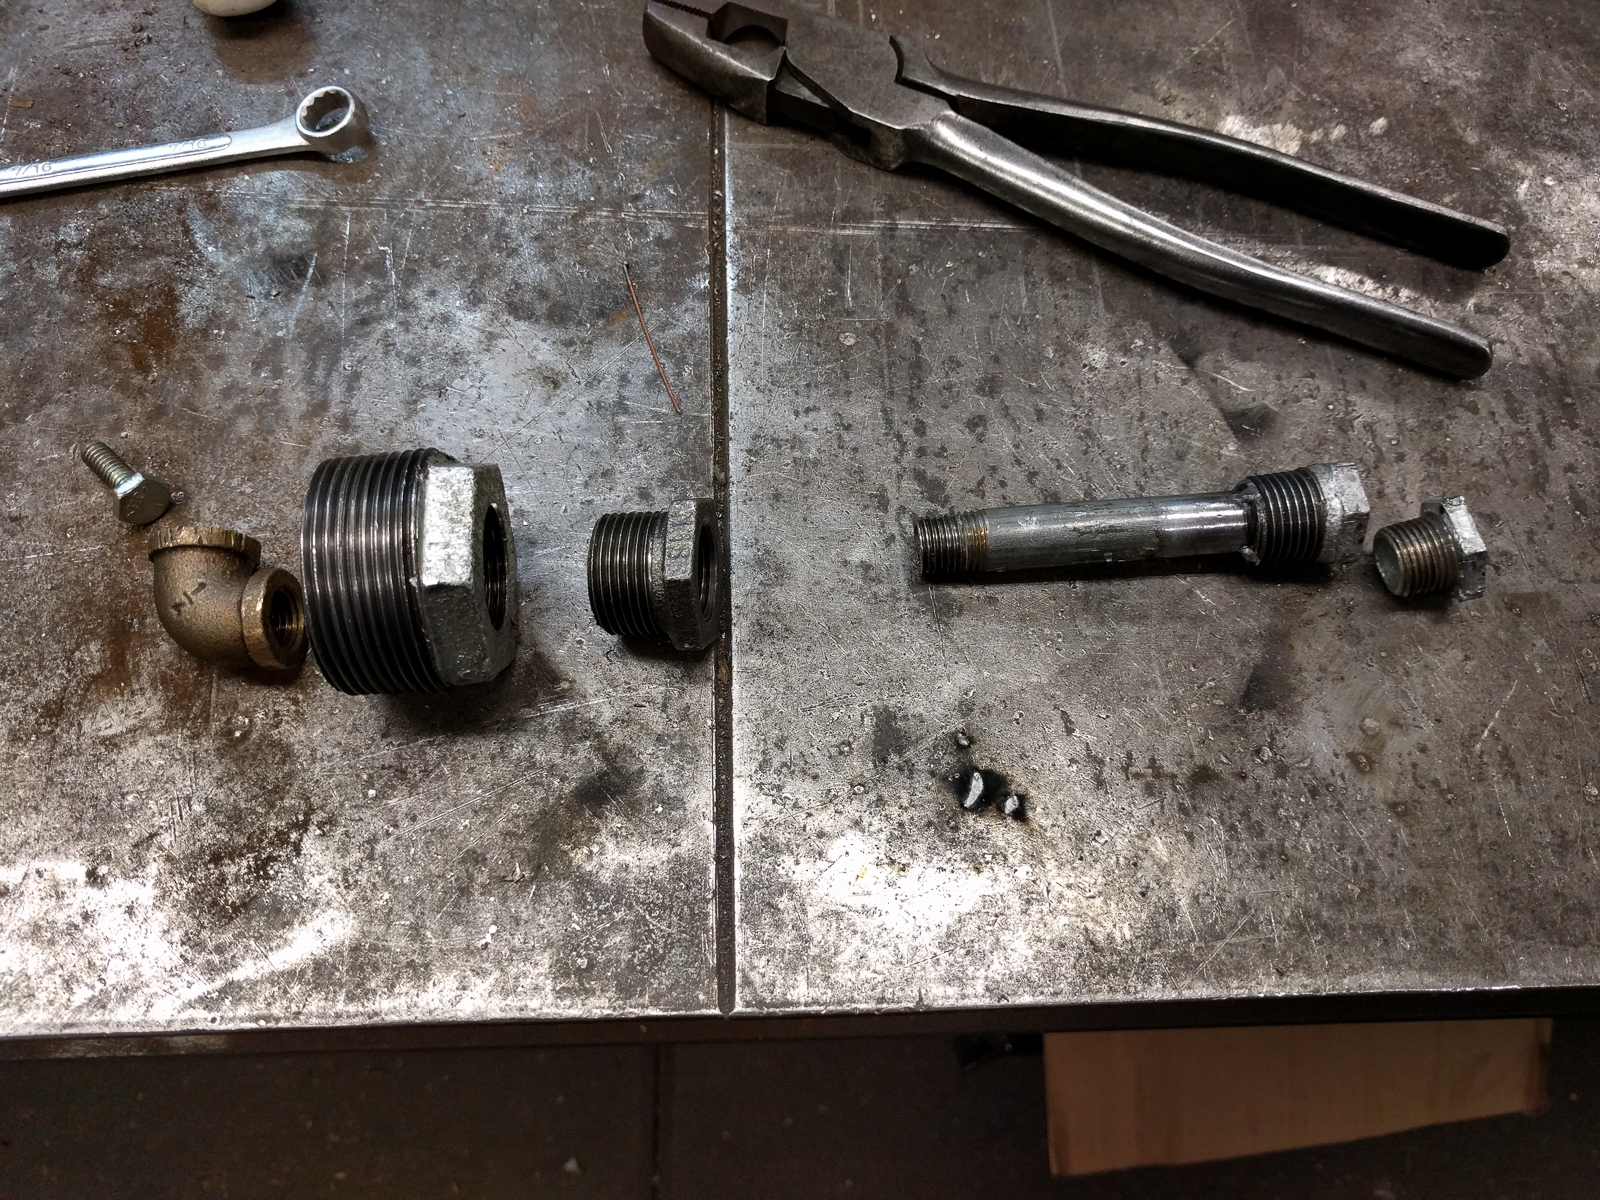
This is my gas in line input. I had to step down from a 2" pipe to a 1/2" line. It’s not pretty but it gets the job done. I also added a 90 degree bend facing up wind. The thought process here is I’m going to be running a blower and I wasn’t sure what it was going to do to the low pressure gas. In my inexperienced mind I though to place the gas in the center of the pipe and headed in the correct direction.
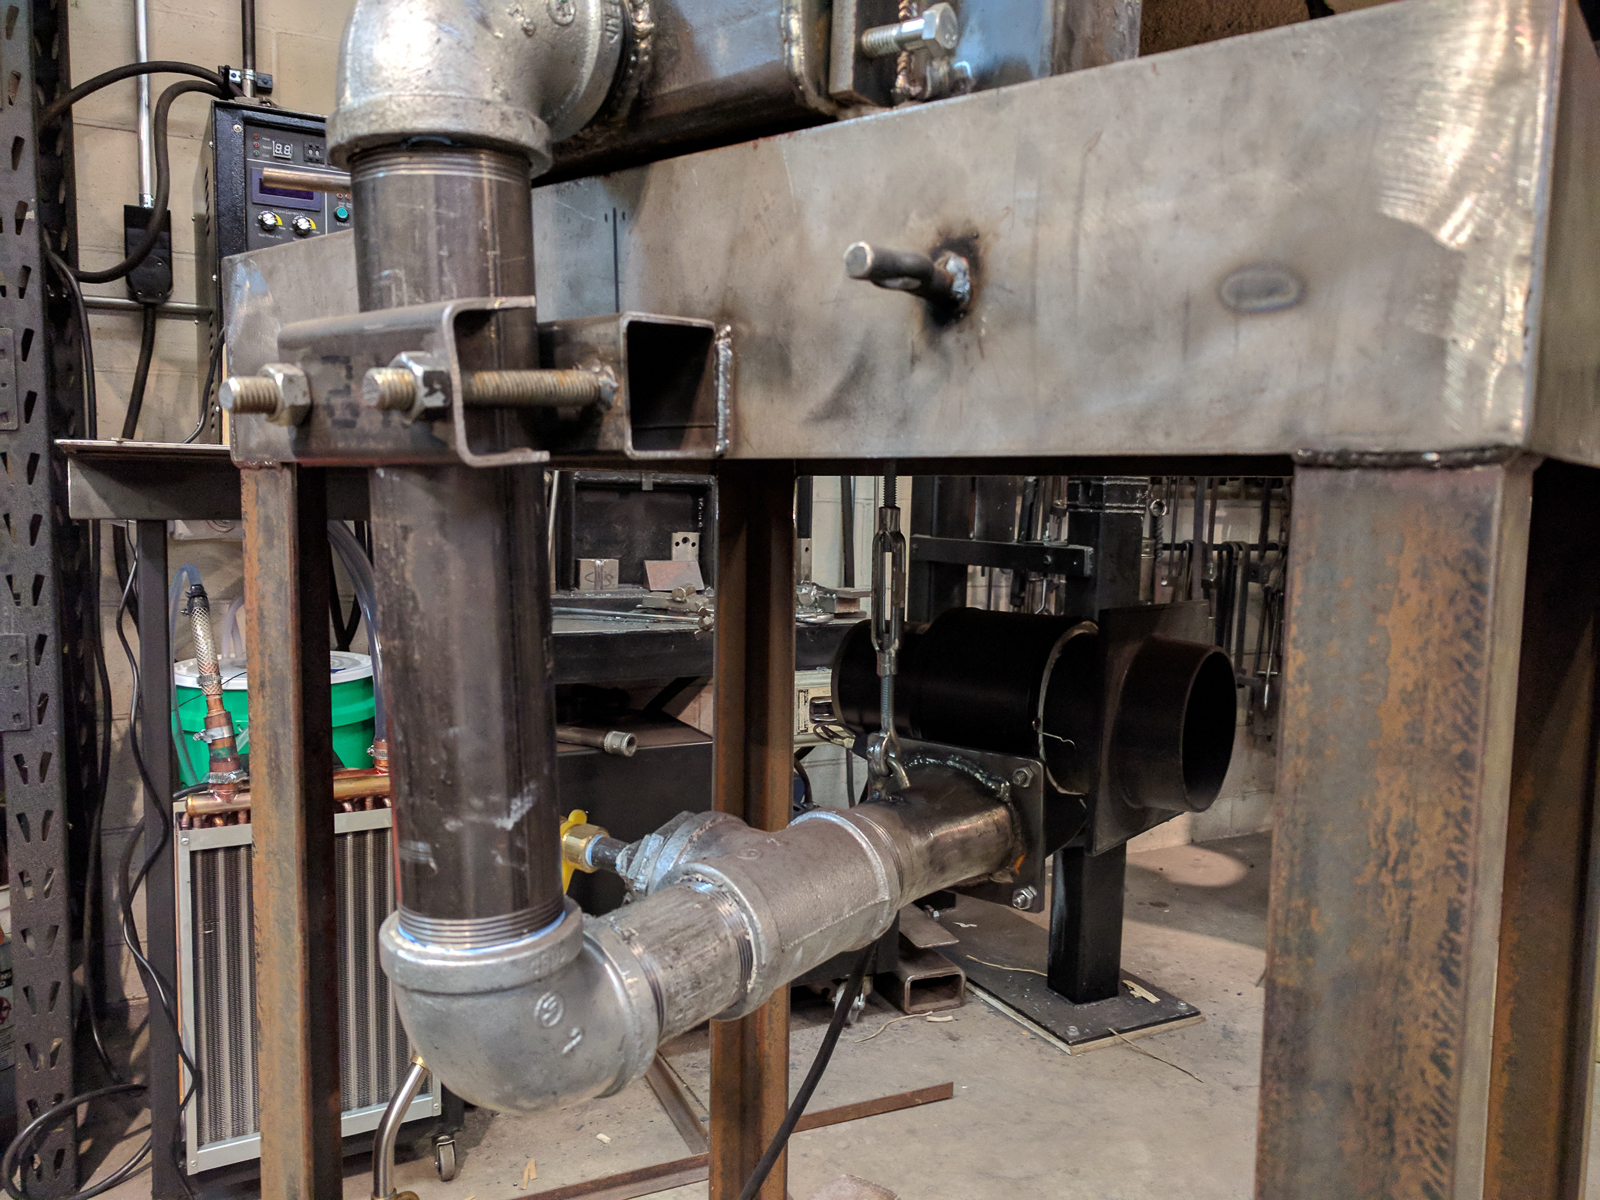
The rest of the plumbing is fairly simple. I tried to keep everything as compact as I could and under the table away from the heat of the forge. All pipe is 2". The problem I ran into there is the local hardware stores didn’t stock all the parts I needed so I had to source from several stores + 2" pipe is $$$
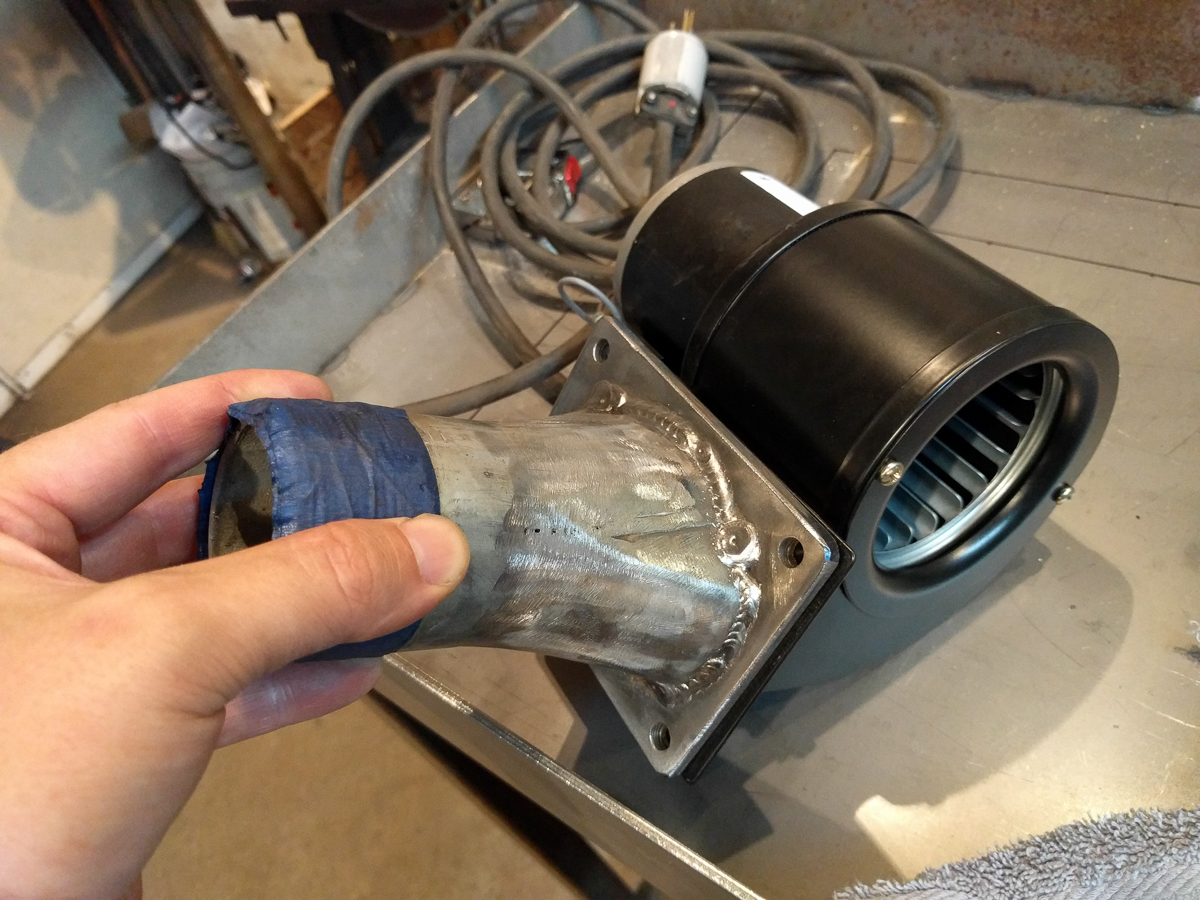
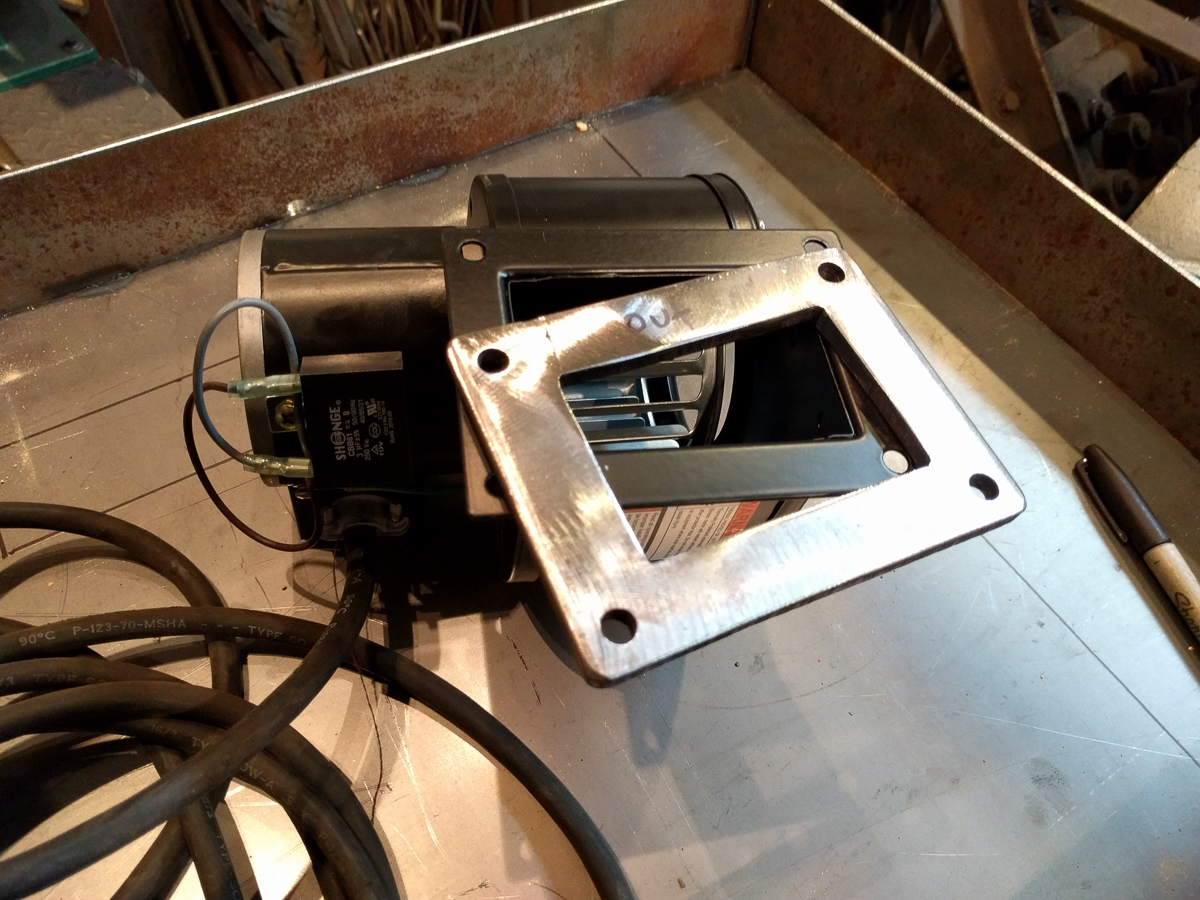
Blower…the age old square to round problem. Photos should explained what I did. I also added a blast gate to the blower intake to control the air volume. I used a dust collector gate and just siliconed it to the body of the blower.
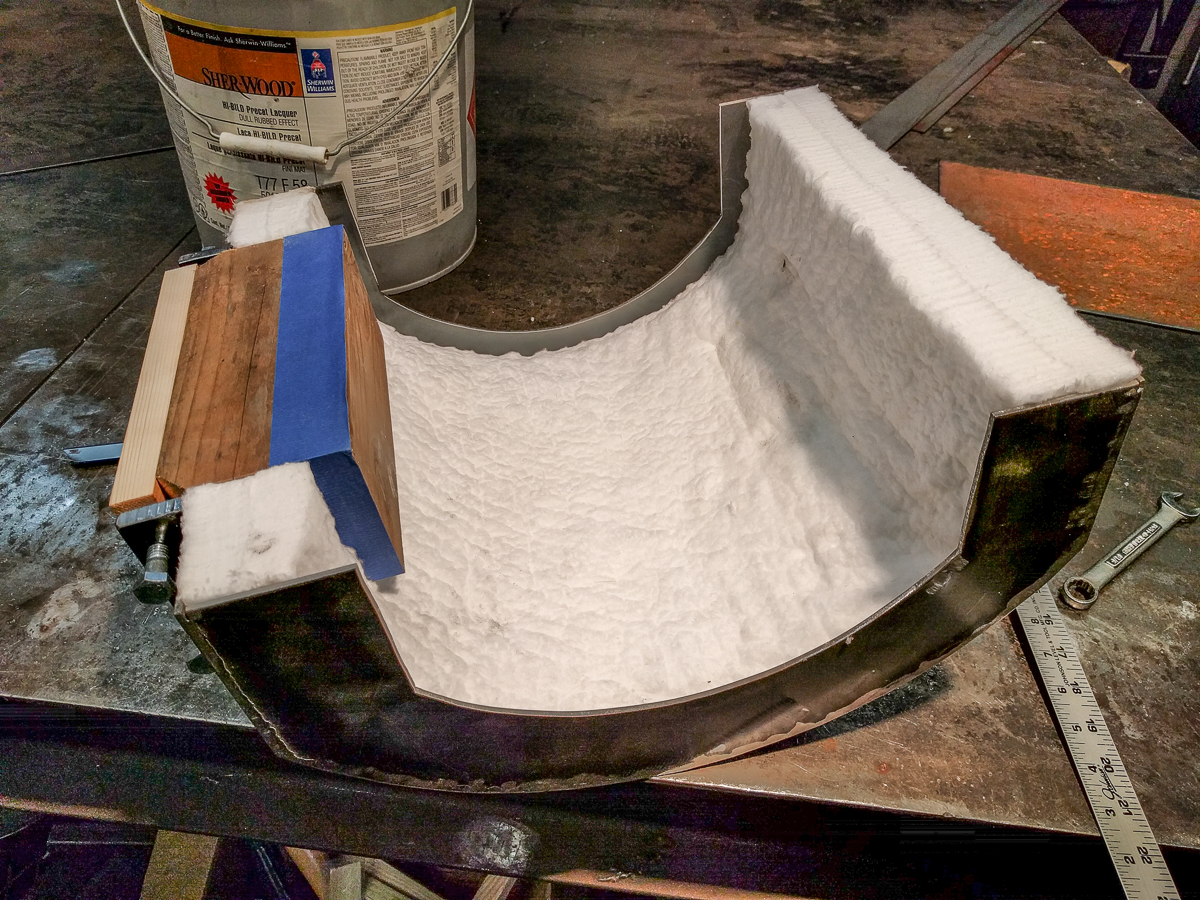
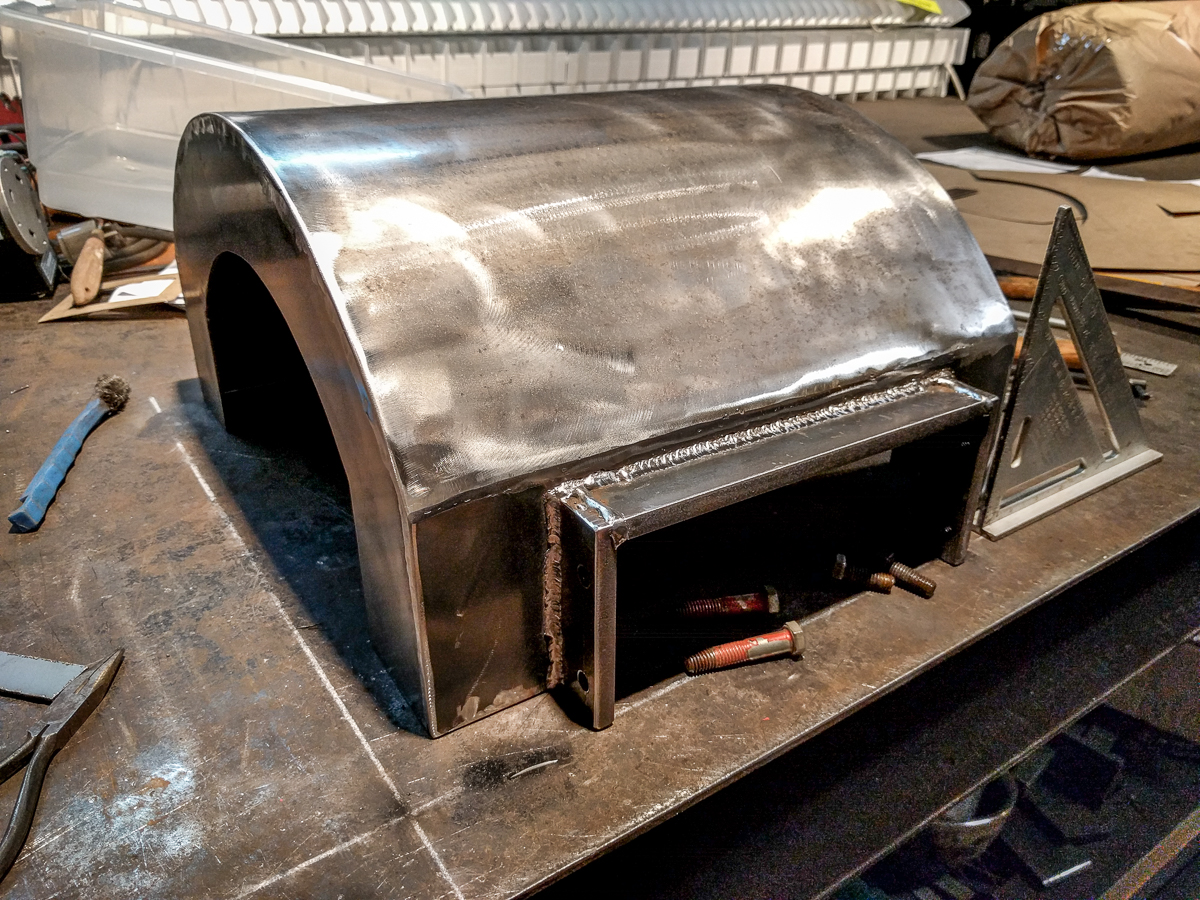
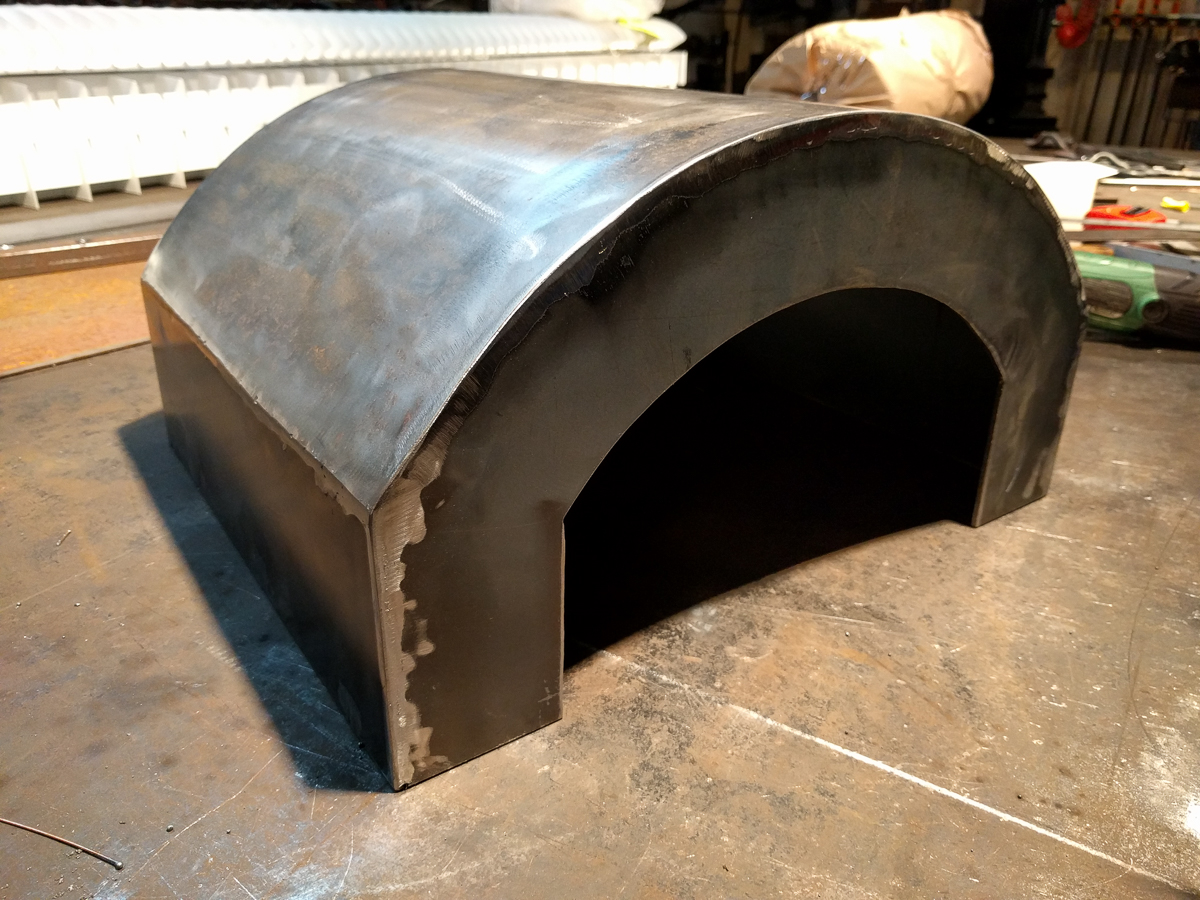
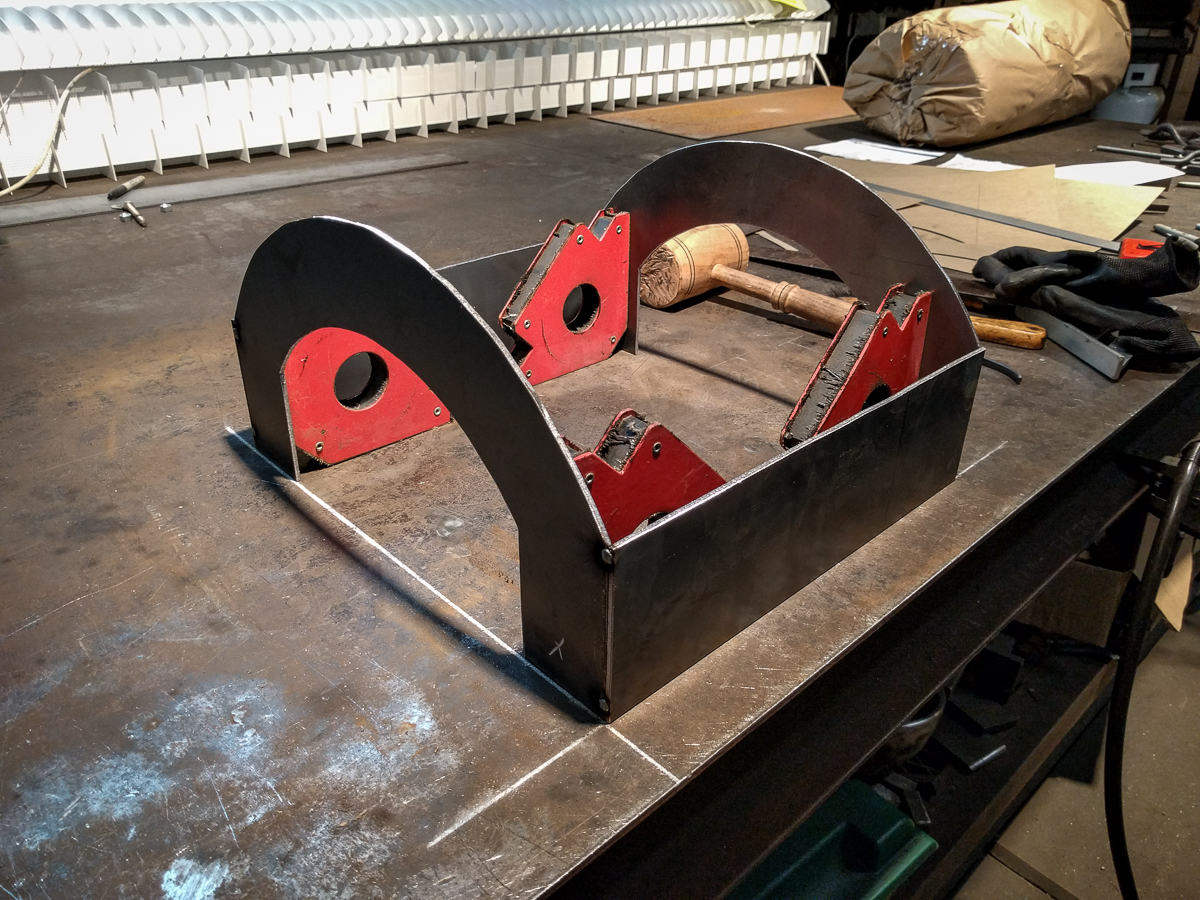
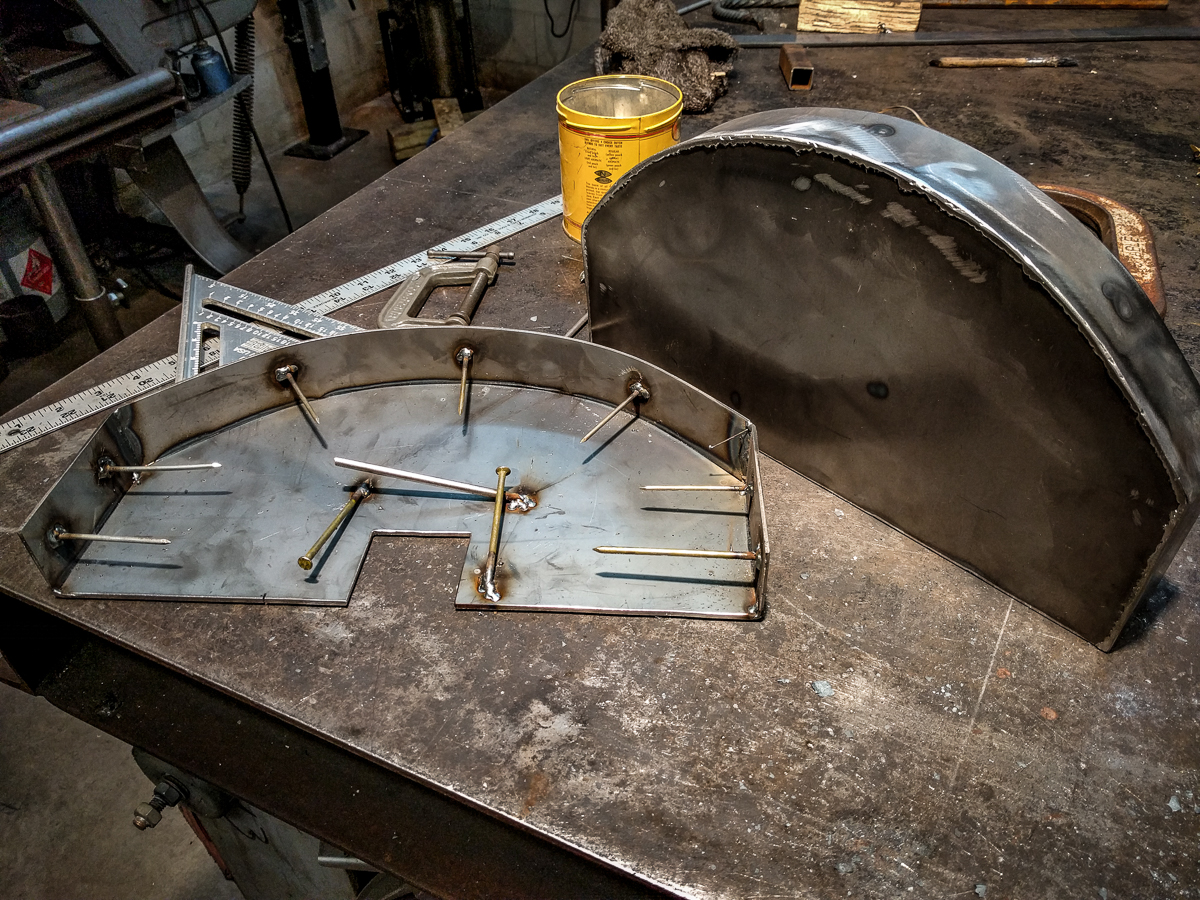
The shell was cut from 12 gauge sheetmetal and lined with kaowool. On top of the kaowool I added the cast o lite refractory. It was difficult getting the cast o lit to stay since when upside down I have two vertical surfaces to deal with. In hind site I should have welded in a few nails for the refractory to grab onto. That said I’m a year into this forge and it’s holding up perfectly so far.
Added nails this time. The doors have a kaowool edge to add a somewhat airtight seal when the door is closed. I used rigidizer to keep the wool firm. I thought long and hard on how to attach the doors and decided on a simple friction fitting. So far it’s been working great and it’s easy to remove the doors and service the forge.
I tried different regulators and pin valves for the gas line but in the end I found using a simple ball valve worked best. Most of the time I run the line wide open.
I usually run the fan with the blast gate closed 75%. I have low NG gas pressure so I guess I require low air pressure too.
I closed off one row of the crayon holes and the burner pressure increased significantly.
It takes awhile to warm the entire forge up (10 -15 min) but when It gets going I’m impressed with the heat it can put out.
In the end I really like the forge. The low price to operate the amazing amount of heat and the forge size capacity all are what I hoped for. Hope this helps folks build their own ribbon burners. Good Luck!
Hello, first off I would like to say wow that looks amazing! Second, thank you very much! This is exactly what I’ve been looking for as I too have been piecing together my research. You have answered many questions I did and did not have! What was your reasoning for burner position on the side? Is location personal preference (top, side, kicked west 30 degrees) or is there any other desired purpose outside of less pipe routing to the blower? What was your reasoning for the size of ribbon burner? In your experience, what is the preferred thickness of Kaowool and refractory when using them together for walls? I’m sorry for the bombardment, I get excited. Thank you again!
Hey Sn33zus, I could maybe field a few of those questions.
For location, it is a bit of preference, there are benefits as to top down for naturally aspirated forges (hot spots, forge welding). Side blasts get a benefit of being more even temperature throughout. The fact is too that the burner itself is basically a brick, and pretty heavy, having it on the side allows the weight of the blower/burner unit to not be as tricky to deal with.
As for size, I’m sure there is an equation for size vs forge cavity, I’m not sure if Javos did calculation but I assume it was just a rough brick size that fit into the ribbon burner assembly. I don’t think you have to worry too much here if your forge is roughly this size. If you are looking for a larger forge, you may need to consider having 2 burners. For smaller you just reduce the size. Javos might be able to add more insight here.
As for coating, that’s pretty standard across most forges. Essentially, the more insulating value the better - but generally we see insulation coming in 1.5-2 inches of kaowool with a coating of mizzou and reflectant (something like ITC-100). You do not want your burner going right into your kaowool. You need a coating otherwise you run risk of breathing in some pretty bad stuff.
Burner size- Pure guess work here. My burner is 8 x 3 and when I ran that with propane it worked great and sounded like a jet plane. When I switched to NG the pressure was much less. I ended up plugging the top row of holes and it really helped with the quality of the flame. So If I was to do it again I would probably make a smaller burner for my NG situation> maybe 5" instead of 8". I also mounted it on the side to reduce plumbing and the overall footprint of the forge. I was trying to make the most compact design as I could. Also heat rises, I have a weird aversion about putting my fuel source above the hot forge. Off to the side just felt right.
I added 2 layers of wool. It comes in 1 inch sheets. I also added a rigidizer to the wool after I plcaed it in the forge shell . The rigidizer makes the wool stiff and allows me to add the refractory on top of it without any give or squish you would get from a soft or not rigidized piece of wool.
I still need to add the ITC-100 coating but everywhere I’ve look it’s been really expensive. If anyone here has a cheaper source I’d love to hear about it.
I really like the design of your forge and may model what I build after yours. I too am interested in having a natural gas forge but have a few questions for you:
The thread I found on your build was 2017- are you still using the natural gas ribbon burner forge? Are you happy with it?
What is your natural gas supply pressure for the forge?
What pipe size is the natural gas line to the T (2" T where air and gas mix)?
How hot does the forge get? Forge welding temp easy?
You mention “footprint as you could” what dimensions did you end up making it?
I have a similar table with firebrick and added a pullout ledge for additional space (if needed). I’m also interested to know what that mat is underneath the table. I’m a big fan of yours… you do really great work. Good luck and thanks for your response when you find time
@alexliterati Javos doesn’t hop on the forums much these days but he has a very active instagram! You might be able to get his answers there.
From my own self watching his instagram updates, it seems he still does use it. Natural gas is cheaper than propane for where we are at and so I imagine the cost savings is attractive. I’m nearly positive forge welding temps is possible.
@tbaugh Not too sure what the dimensions are, as mentioned above Javos is pretty busy on his own instagram page and doesn’t hop on here much! I’d say what “mat” you see is actually just some OSB to catch debris from the cement, if I’m looking at the same picture you are.
Also welcome! Be interested to see if you finished yours!