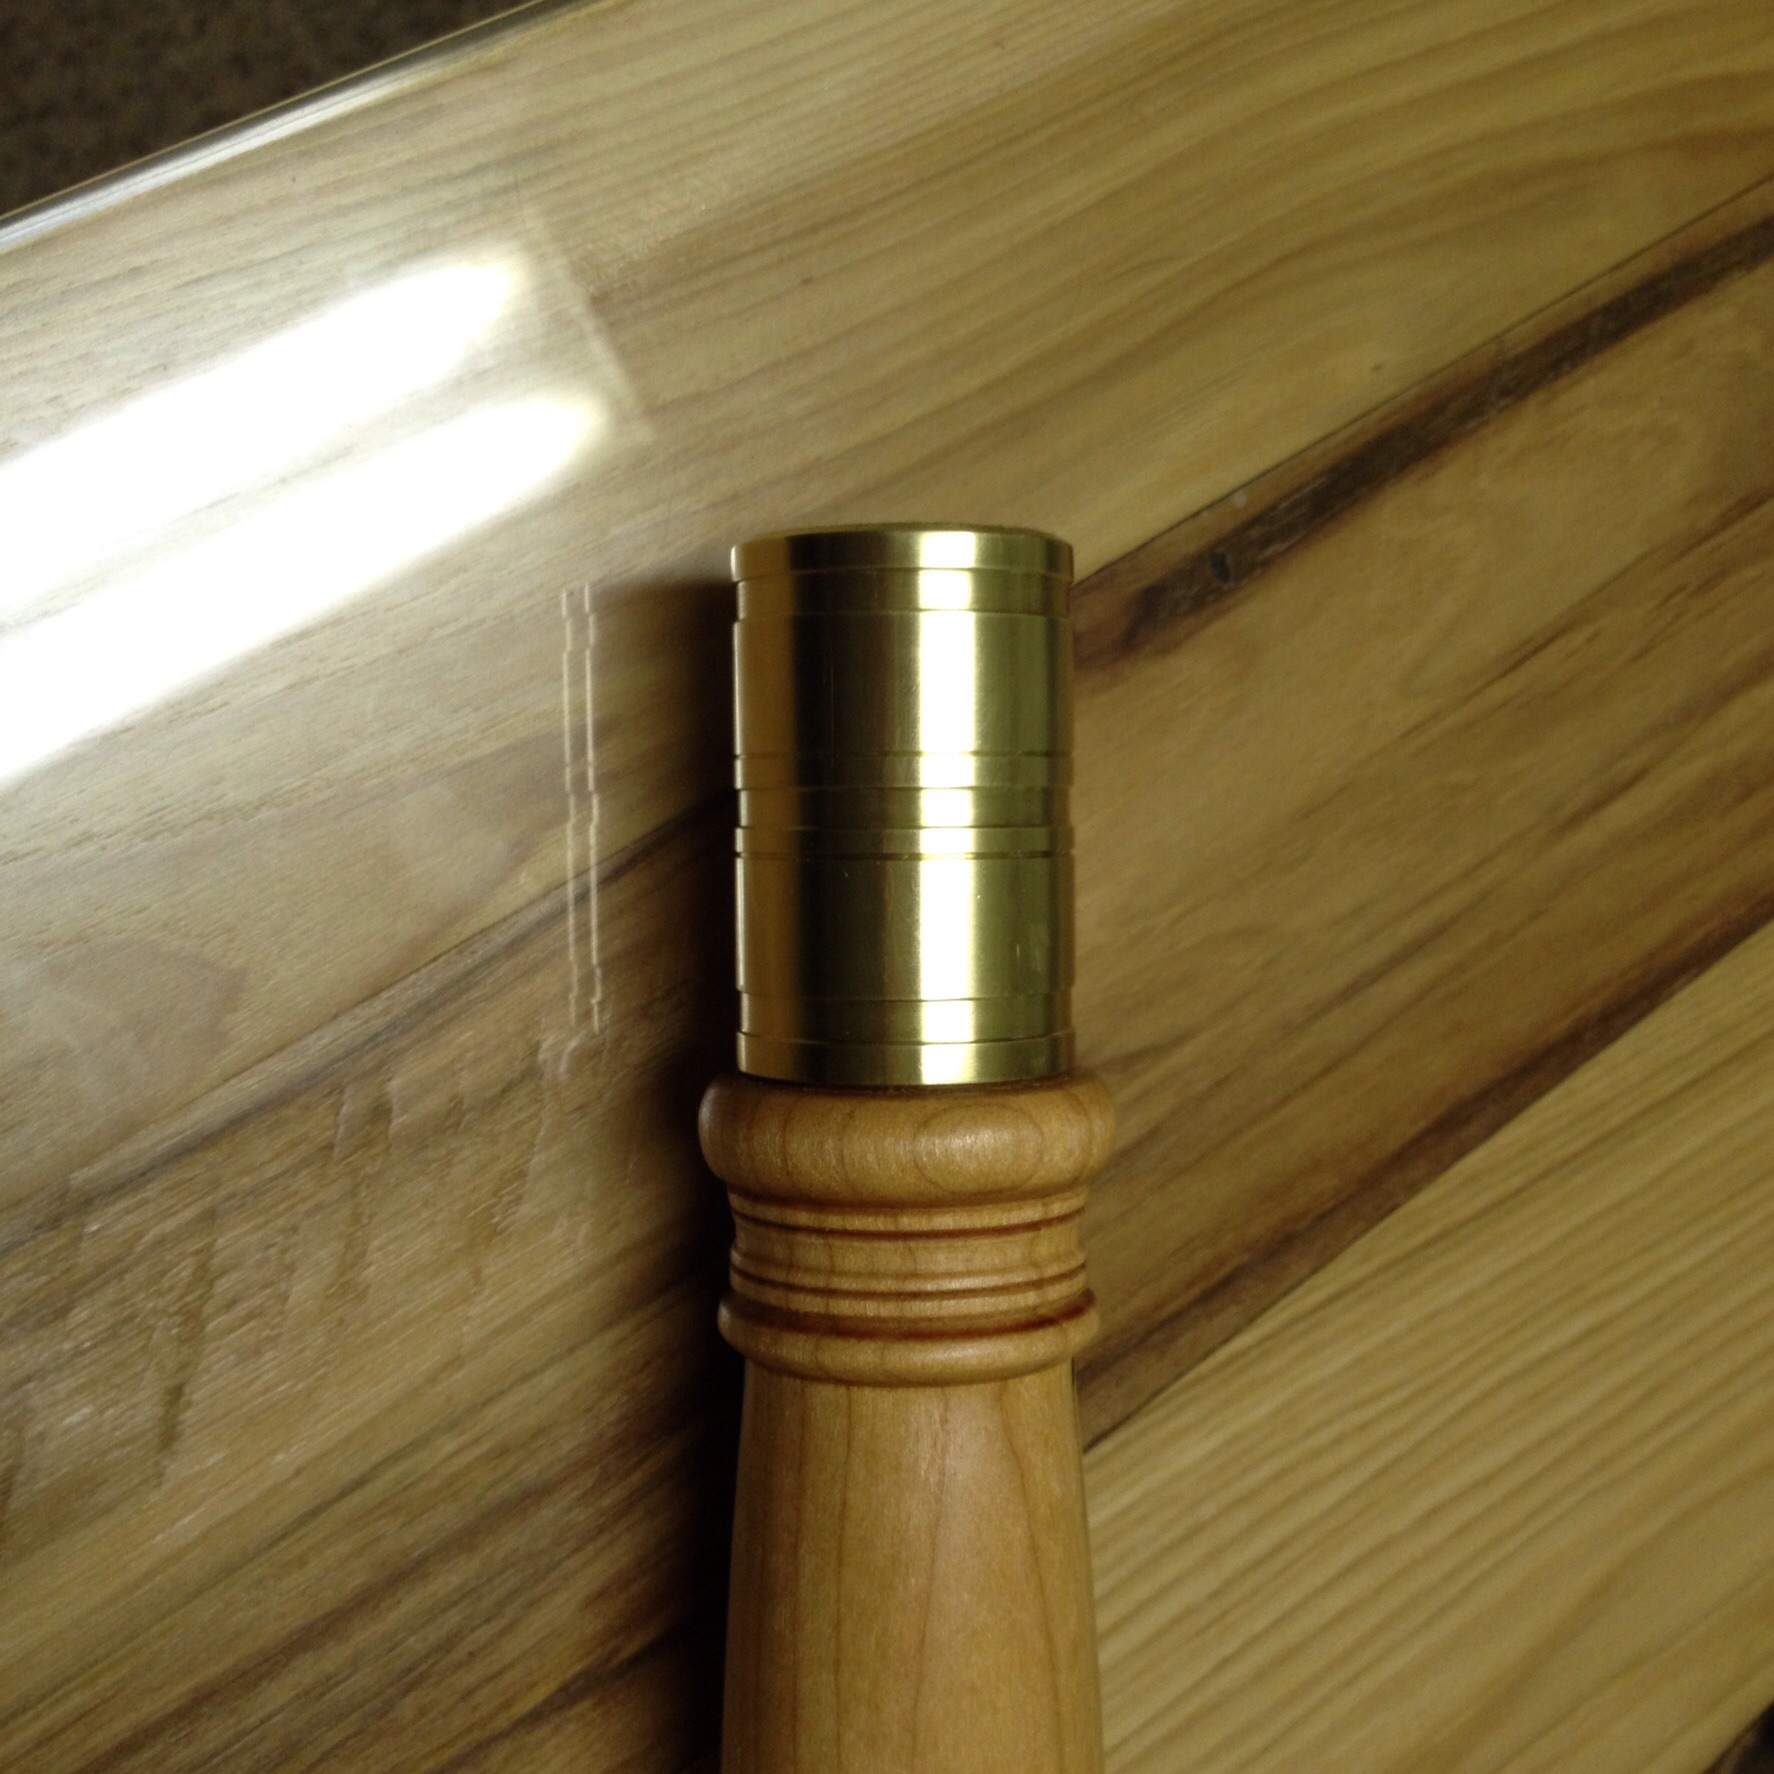
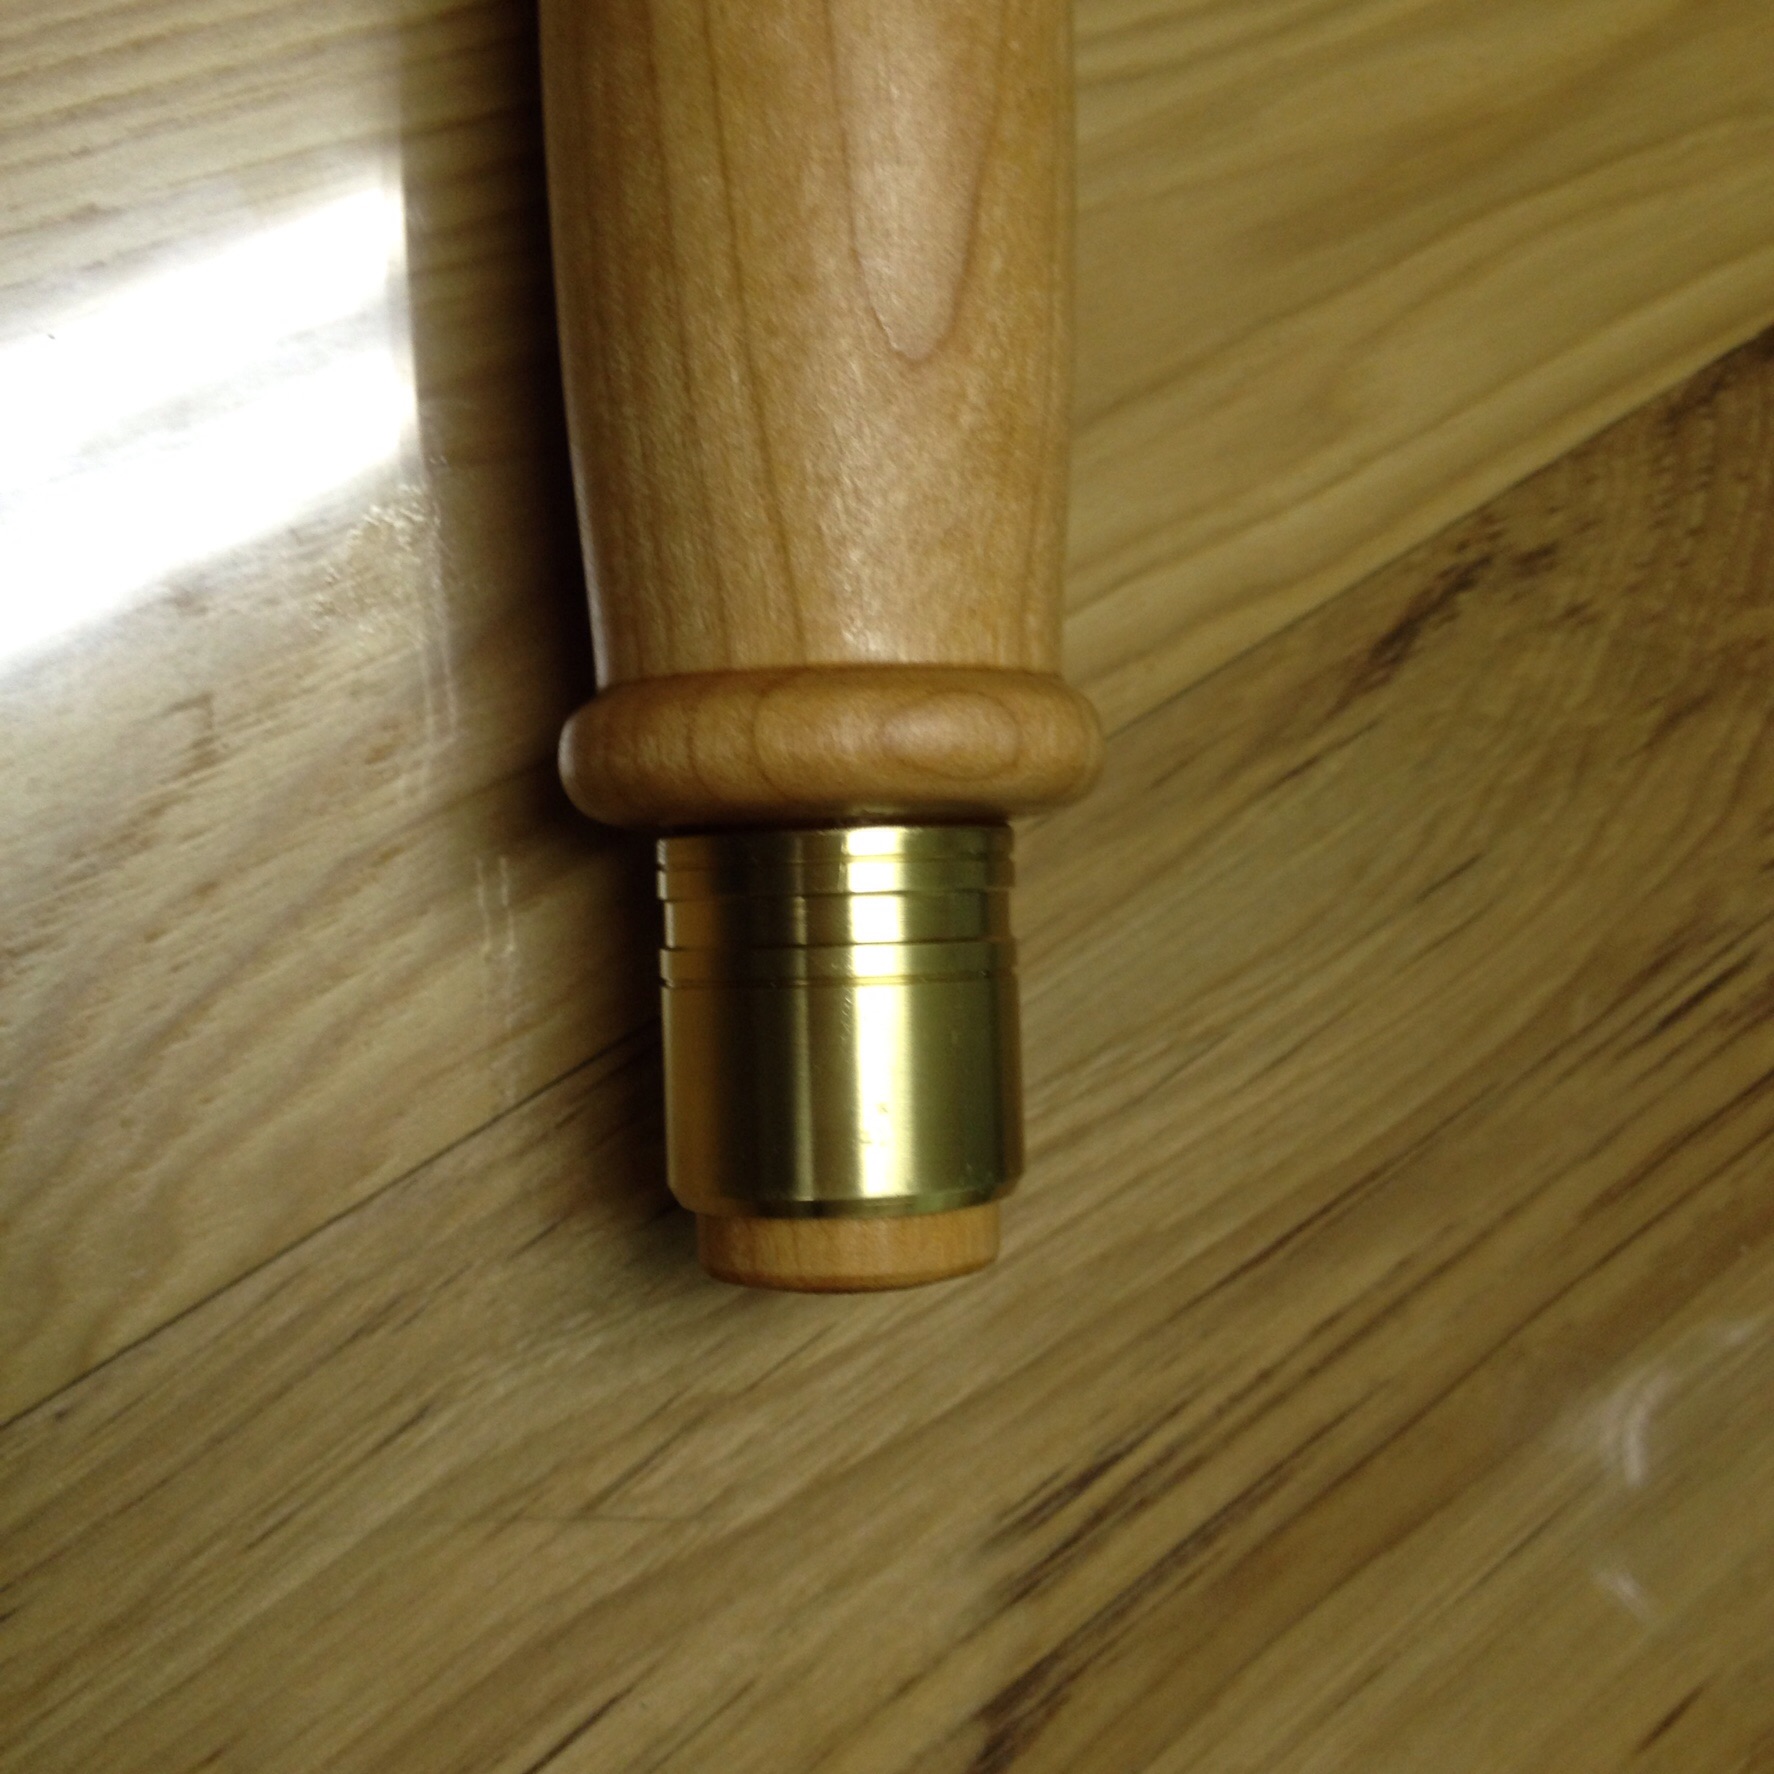
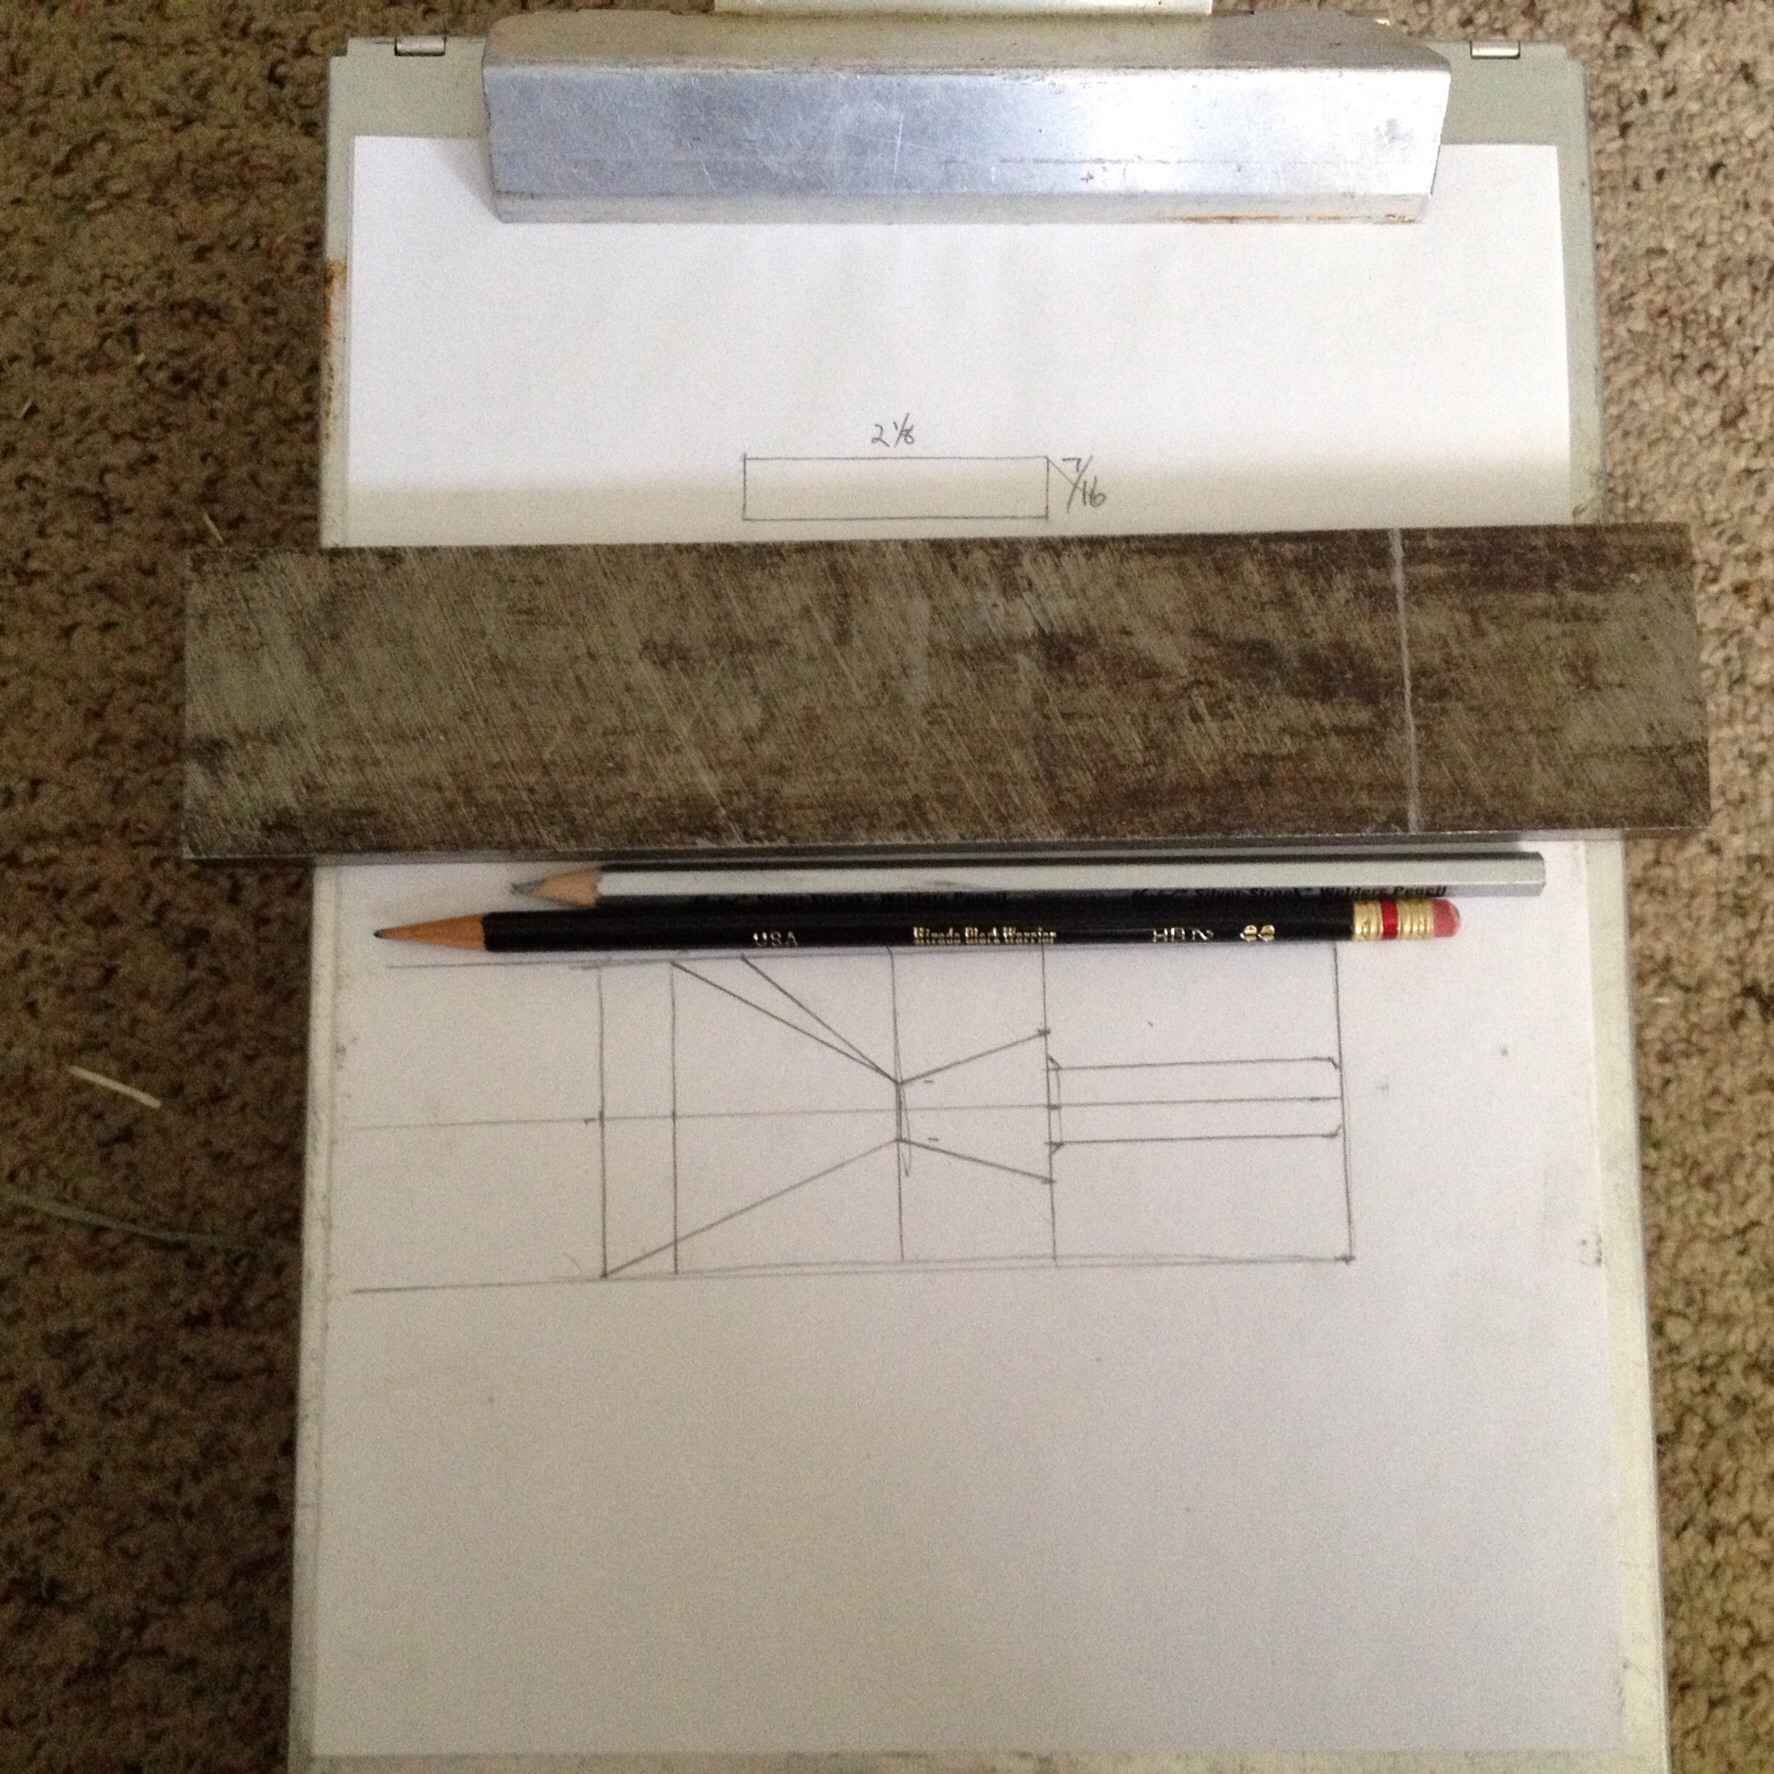
So, I am working on higher end carpenters tools than are currently available, that will be my focus in the forge shop. So I am starting on a 2" framing chisel, I got the tool steel and brass ferrule materials this afternoon, and turned the handle that will house the chisel, I did ornamental turnings on the ferrules and used thick wall brass .065 instead of the thin junk most toolmakers are using today. That allows for more wood compression and some thickness for the turning. Next is to get the chisel body forged heat treated polished and sharpened! The metal turnings will be more obvious after the brass has patina on it again…

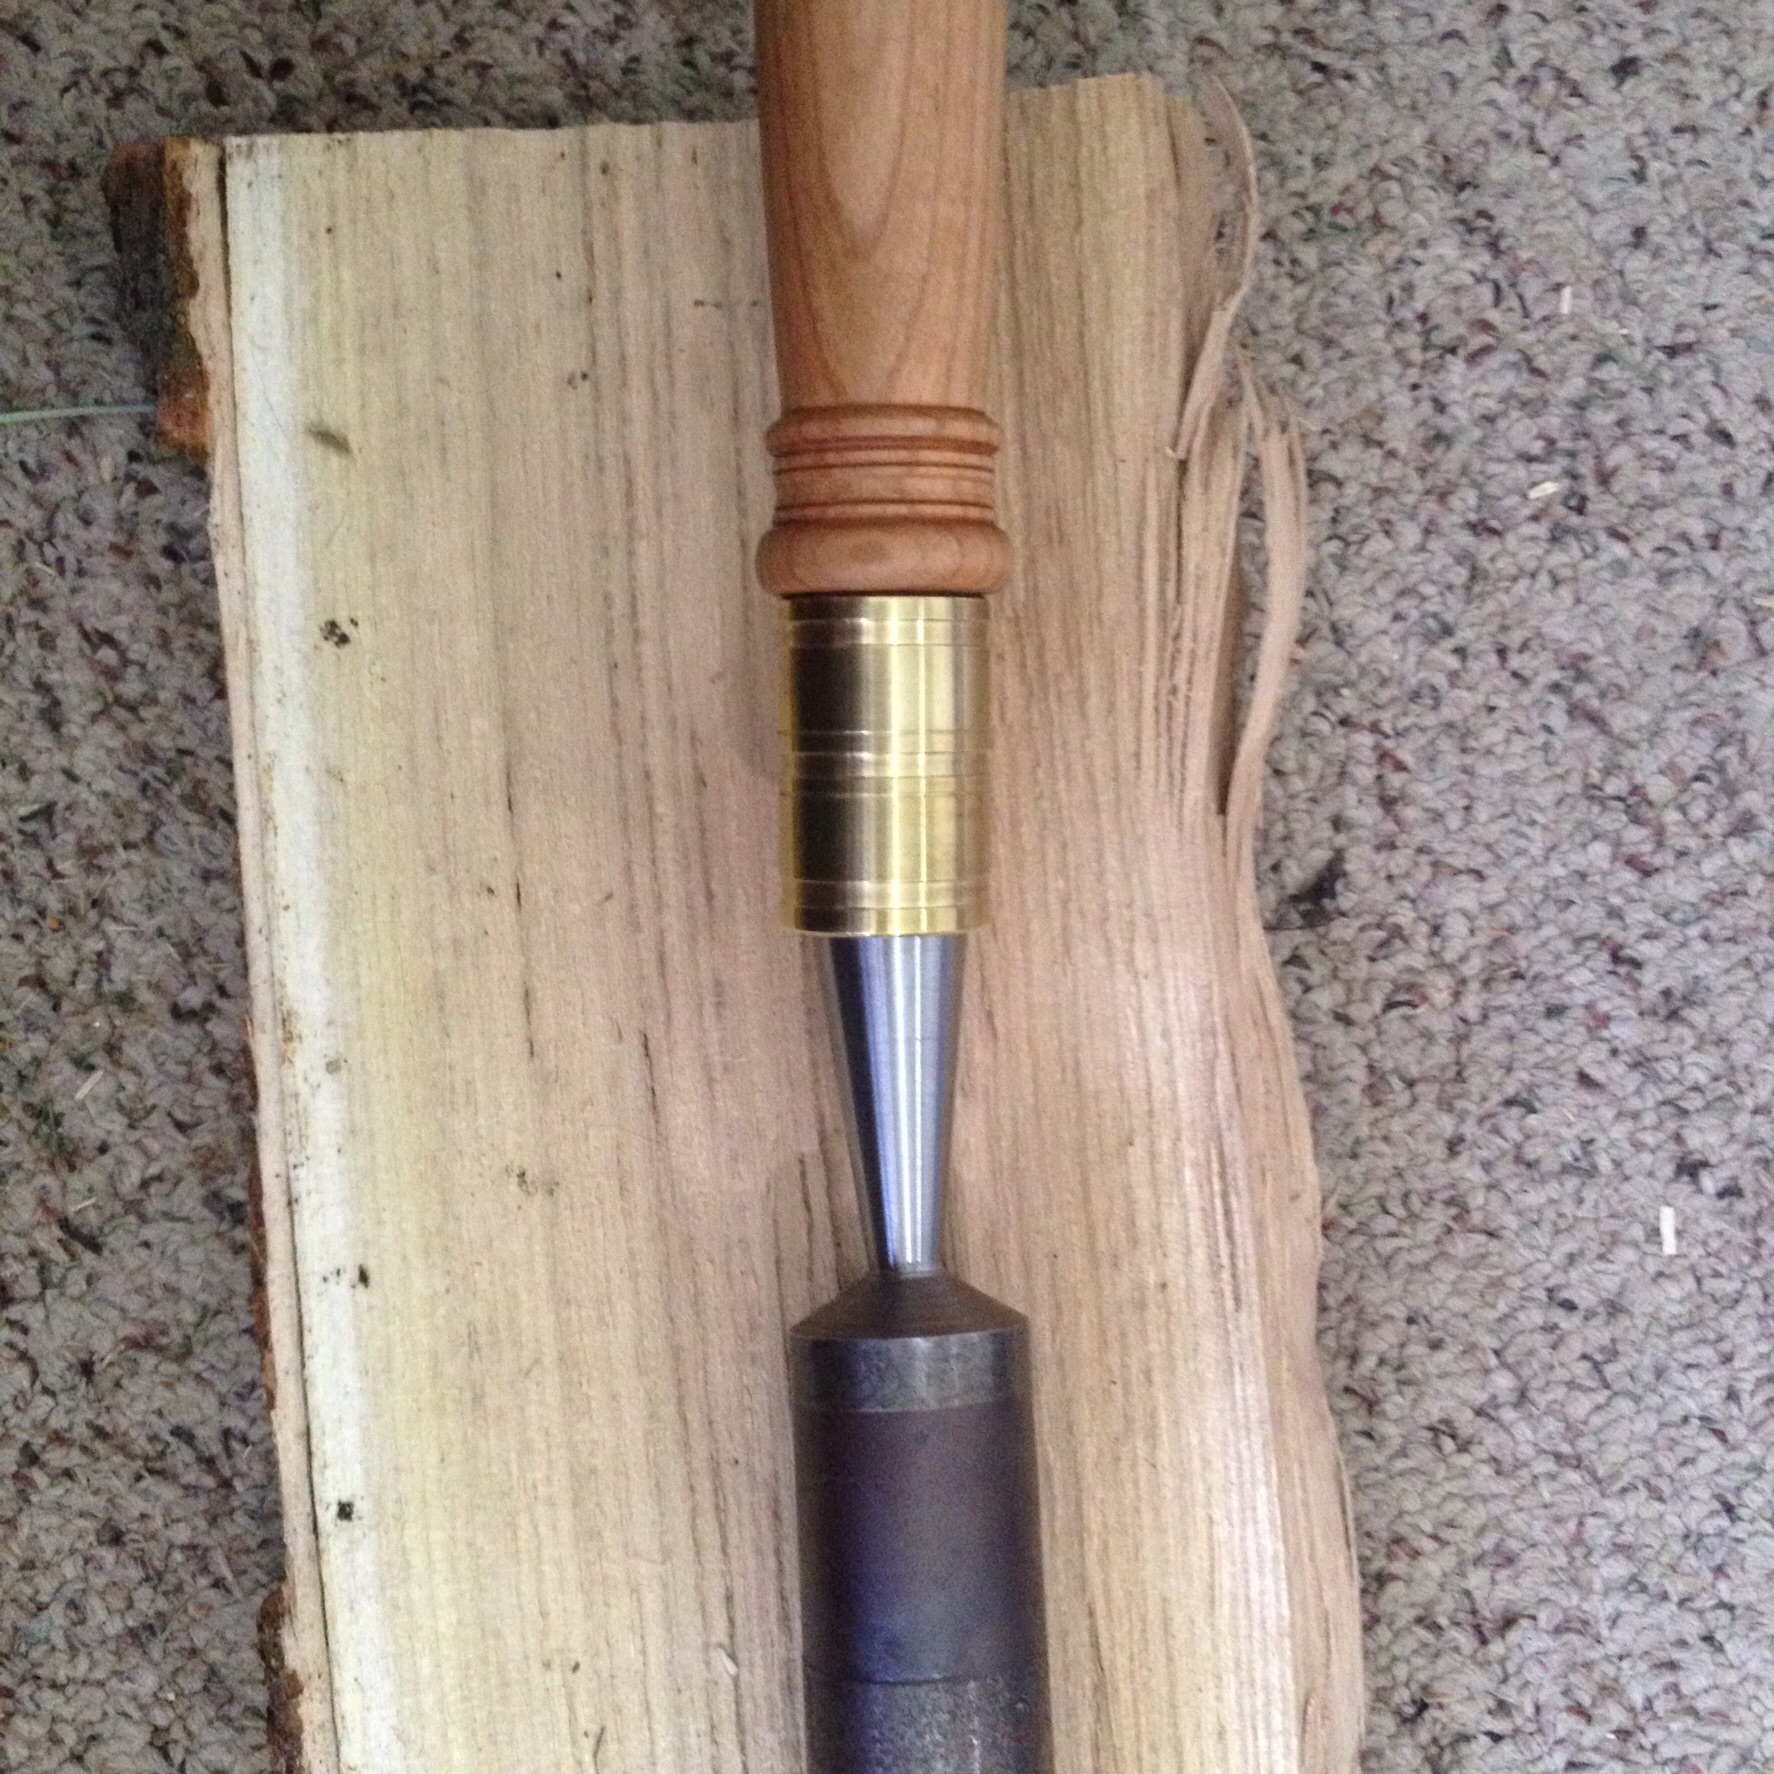
Wow, you have some serious wood (and brass) turning skills! I made a 1.5" timber framing chisel a few years ago and was happy to get the handle somewhat round. This is the only photo of it that I found. I used o-1 steel for it and it really stays sharp so I must have hit the sweet spot on the heat treat.

Good luck with the project!
Very nice! Did you wrap the socket or mill the taper out?
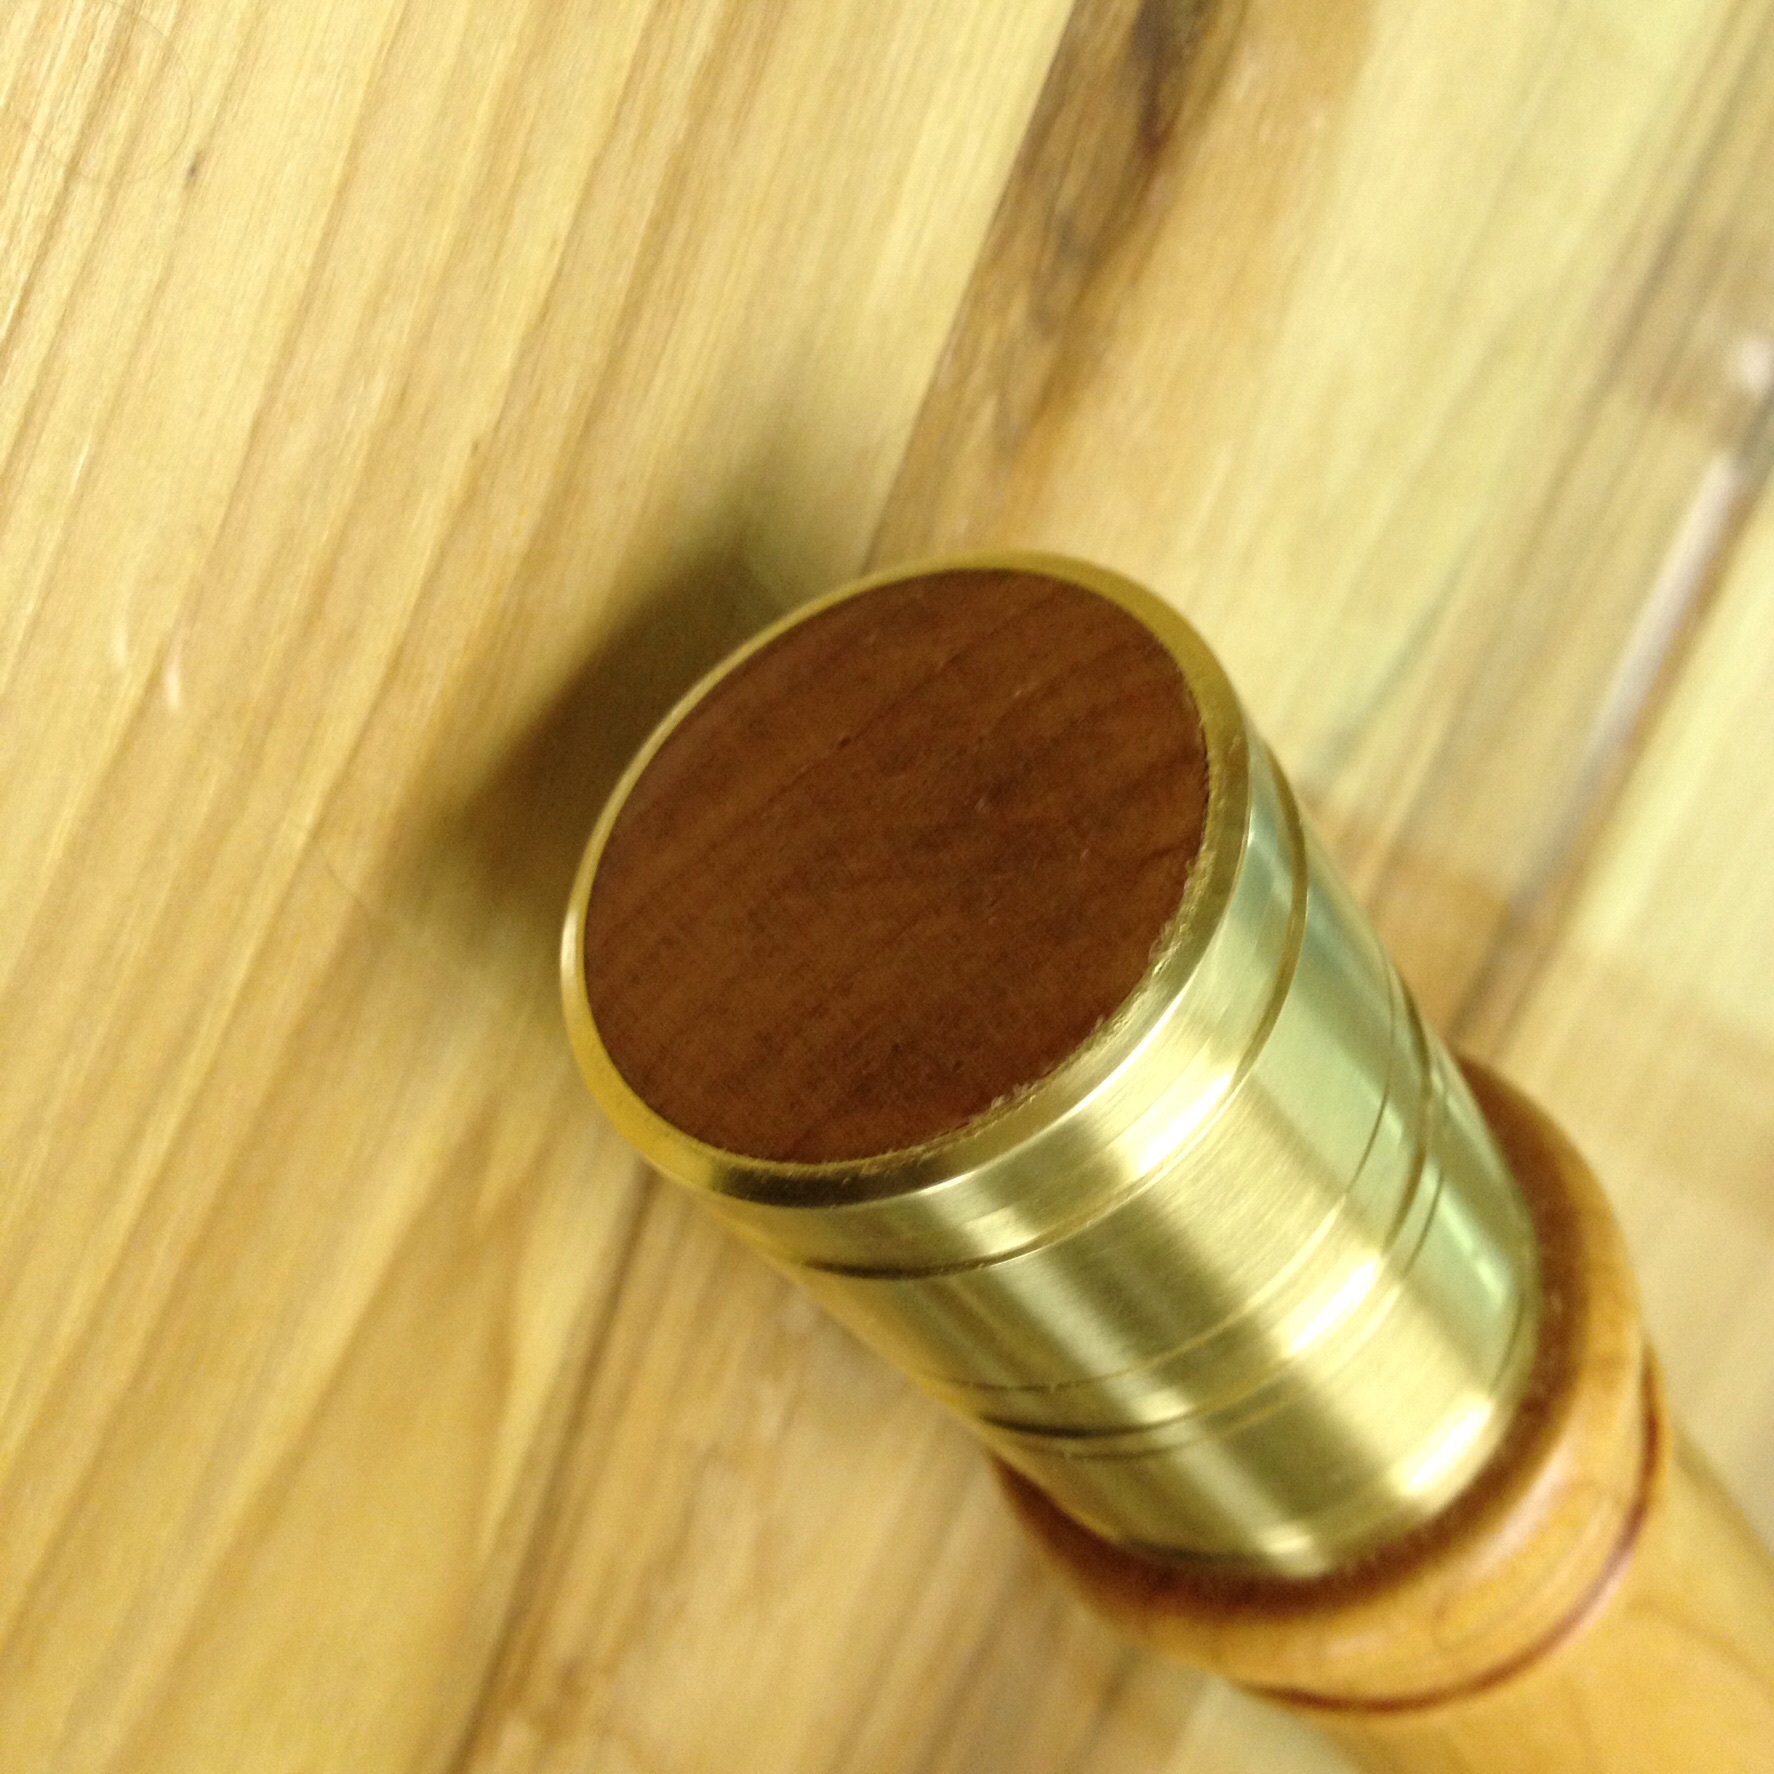
I forged the cone on the tool steel and then welded it shut. The wood is tapered to fit in the cone and I added a little epoxy for insurance. So far it’s held up really well.
Gotta agree with Javos here - superb wood turning skills! That handle itself is awesome, very well done, very obvious you are skilled with wood turning and I love the mild design on the brass ferrules!
I’m interested to see some more process pictures as you complete the chisel, Chadwick.
Makes me want to make a chisel now… 
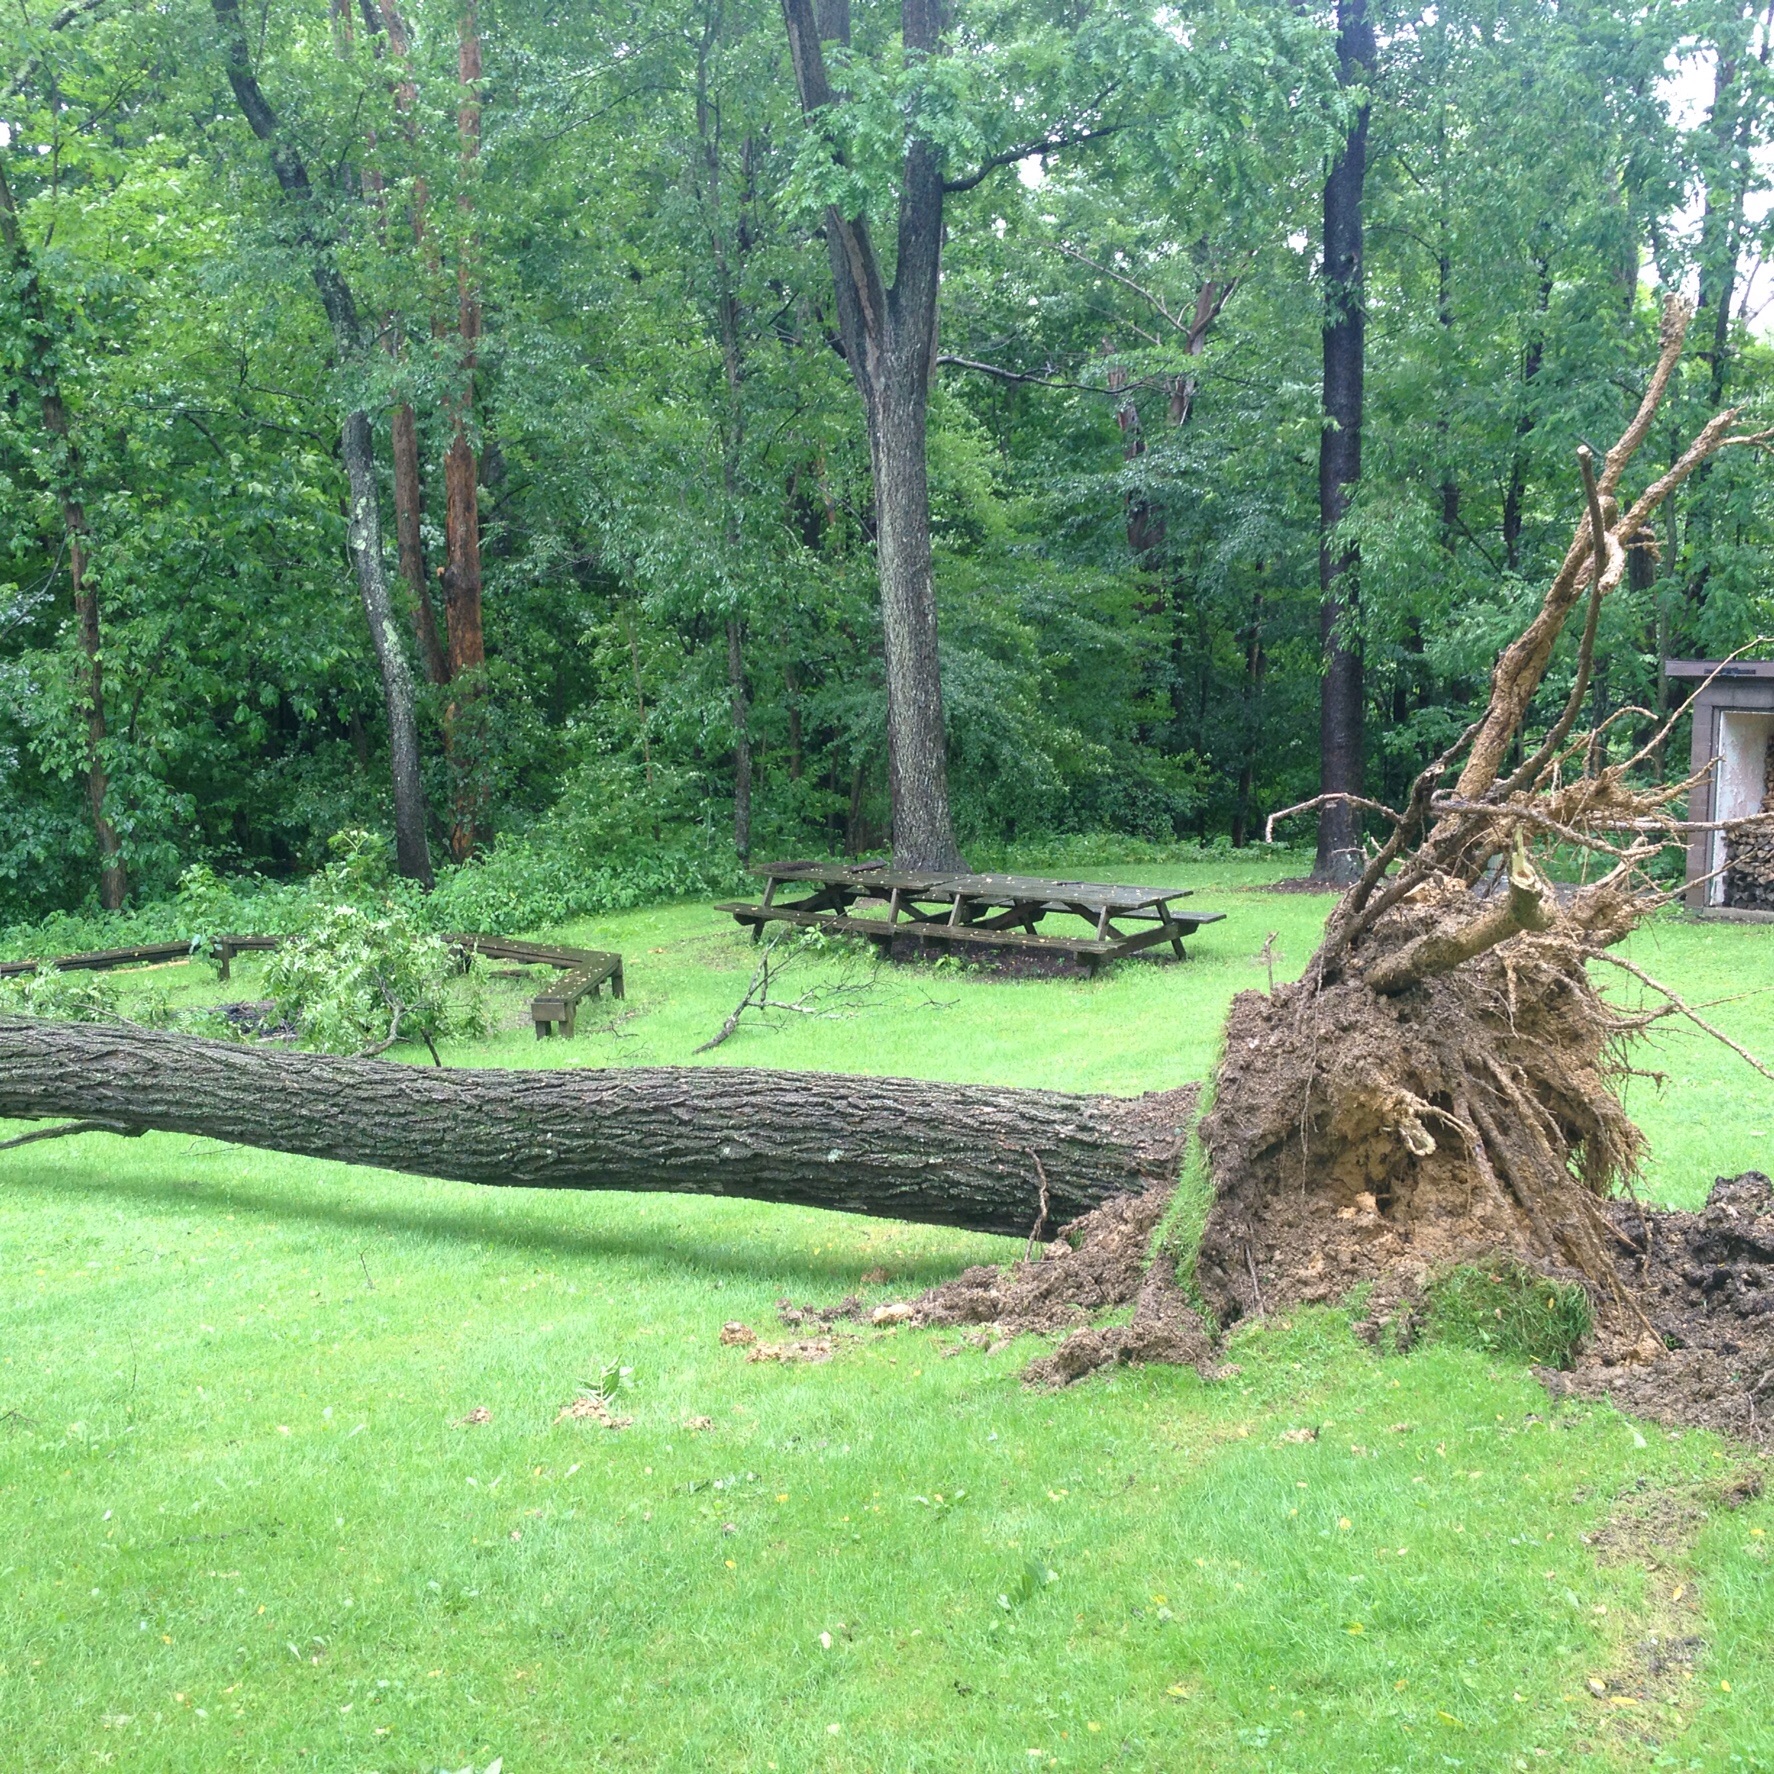
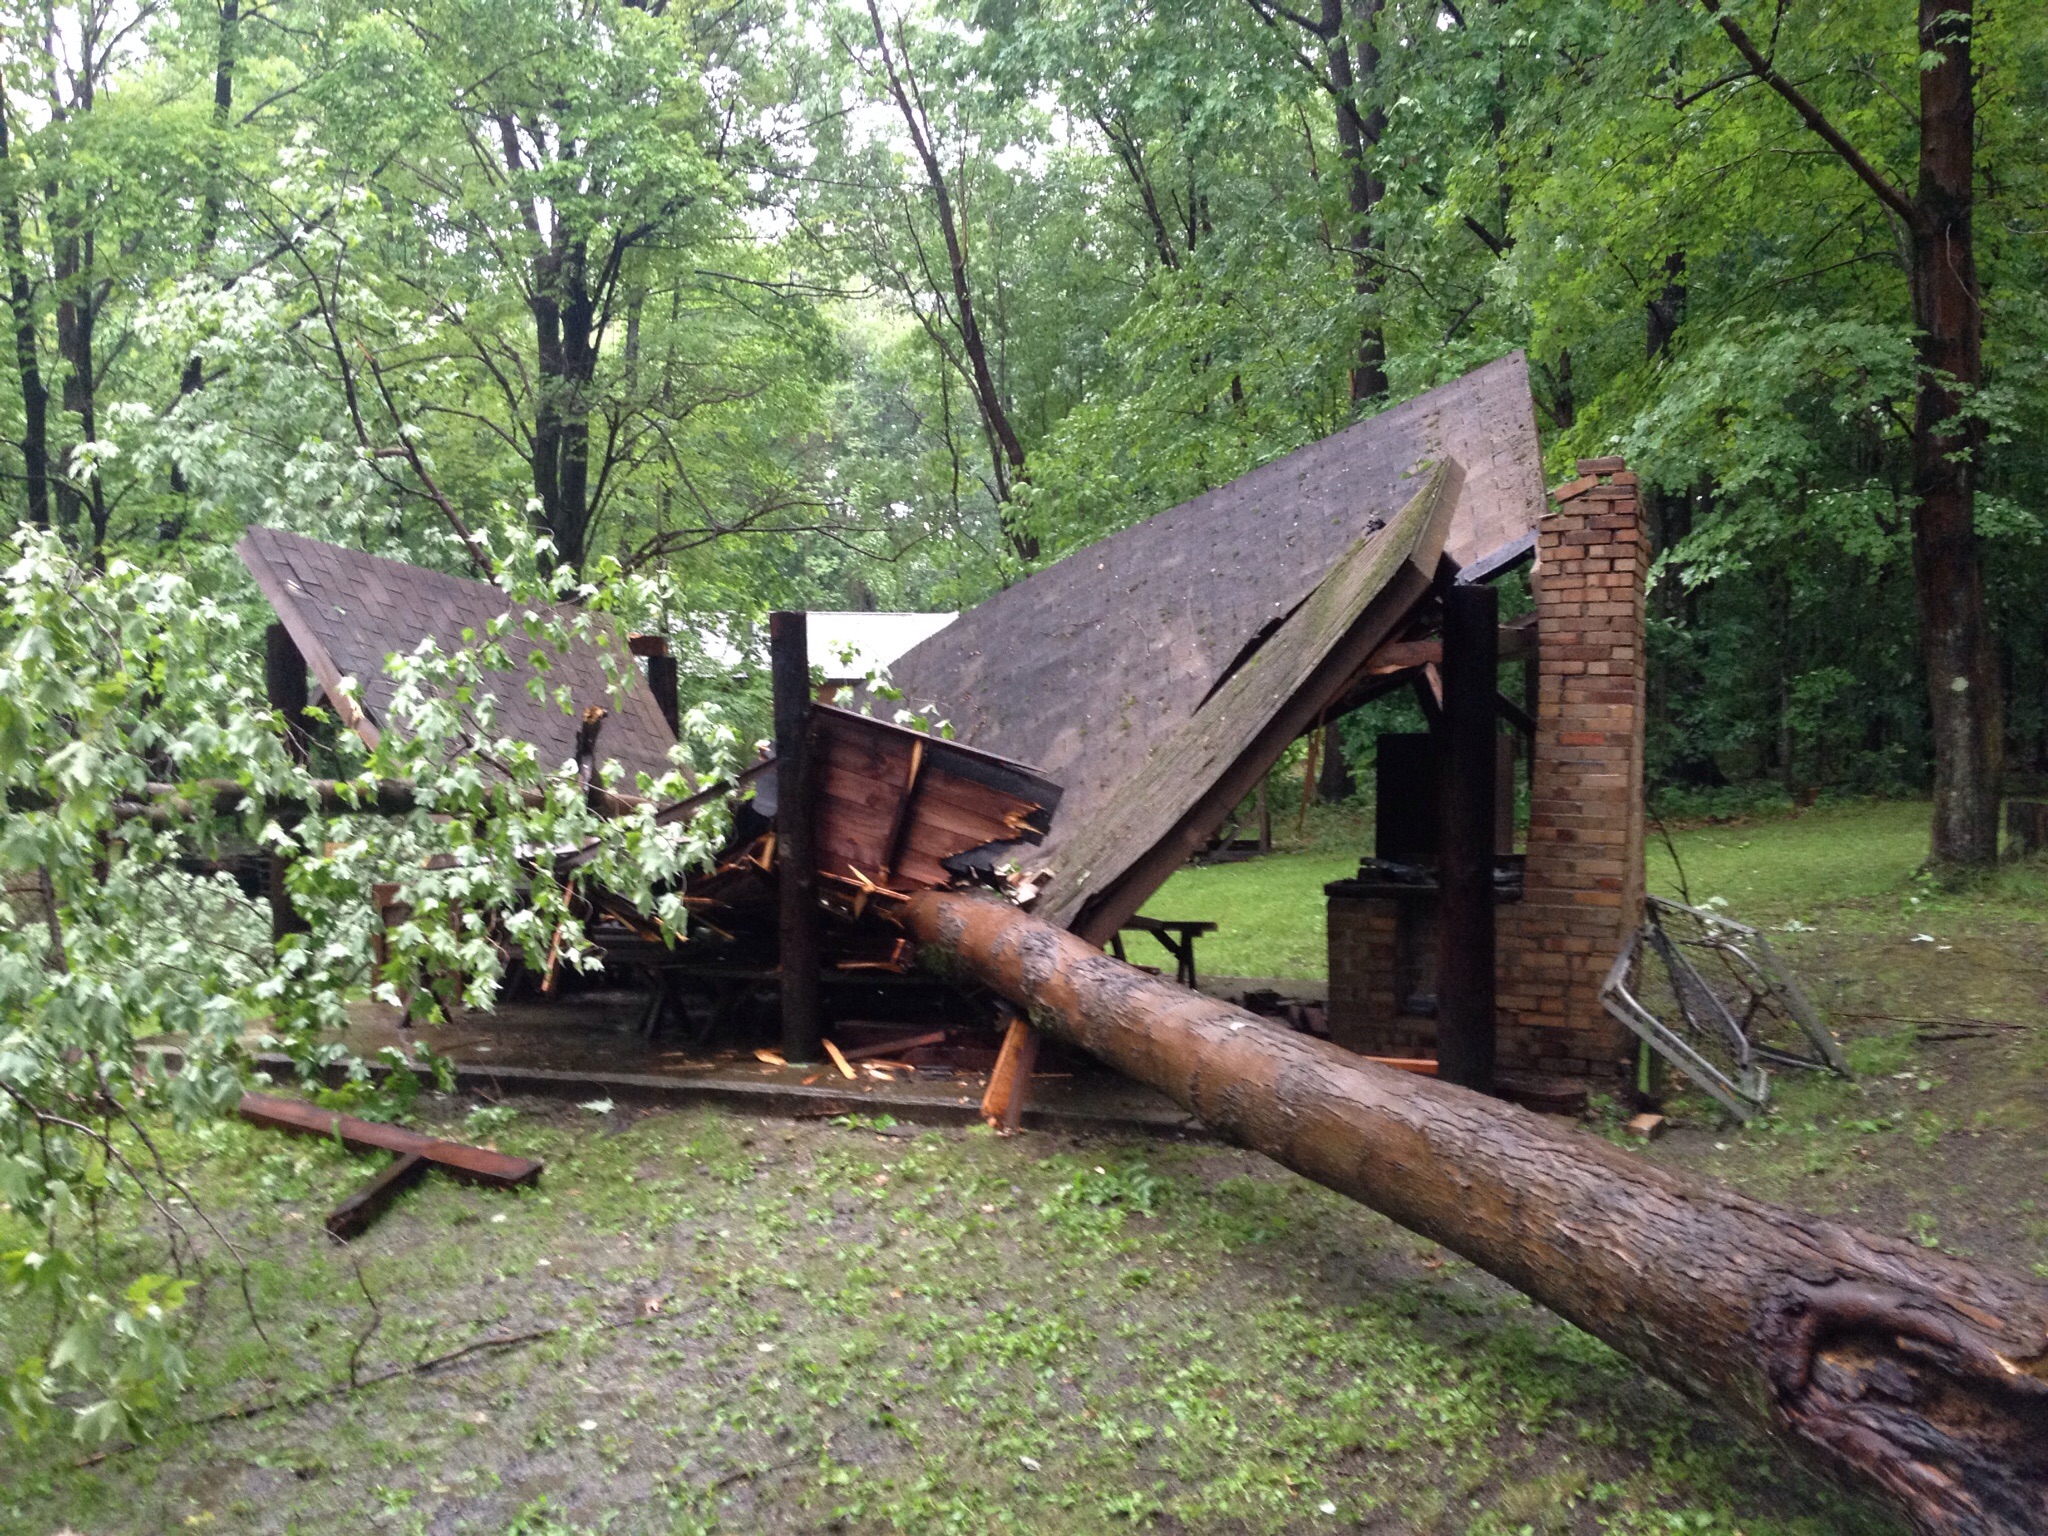
Sure enough, I get a good project running and I get terrible weather! It’s been raining everyday all day for 2-3 weeks now… I had a tree go through a pavilion at a camp site, tree takeout power to camp, road landslide away, and two trees go down without issue. So it’s chainsaw and splitting wood for me! Then to rebuild a roof!
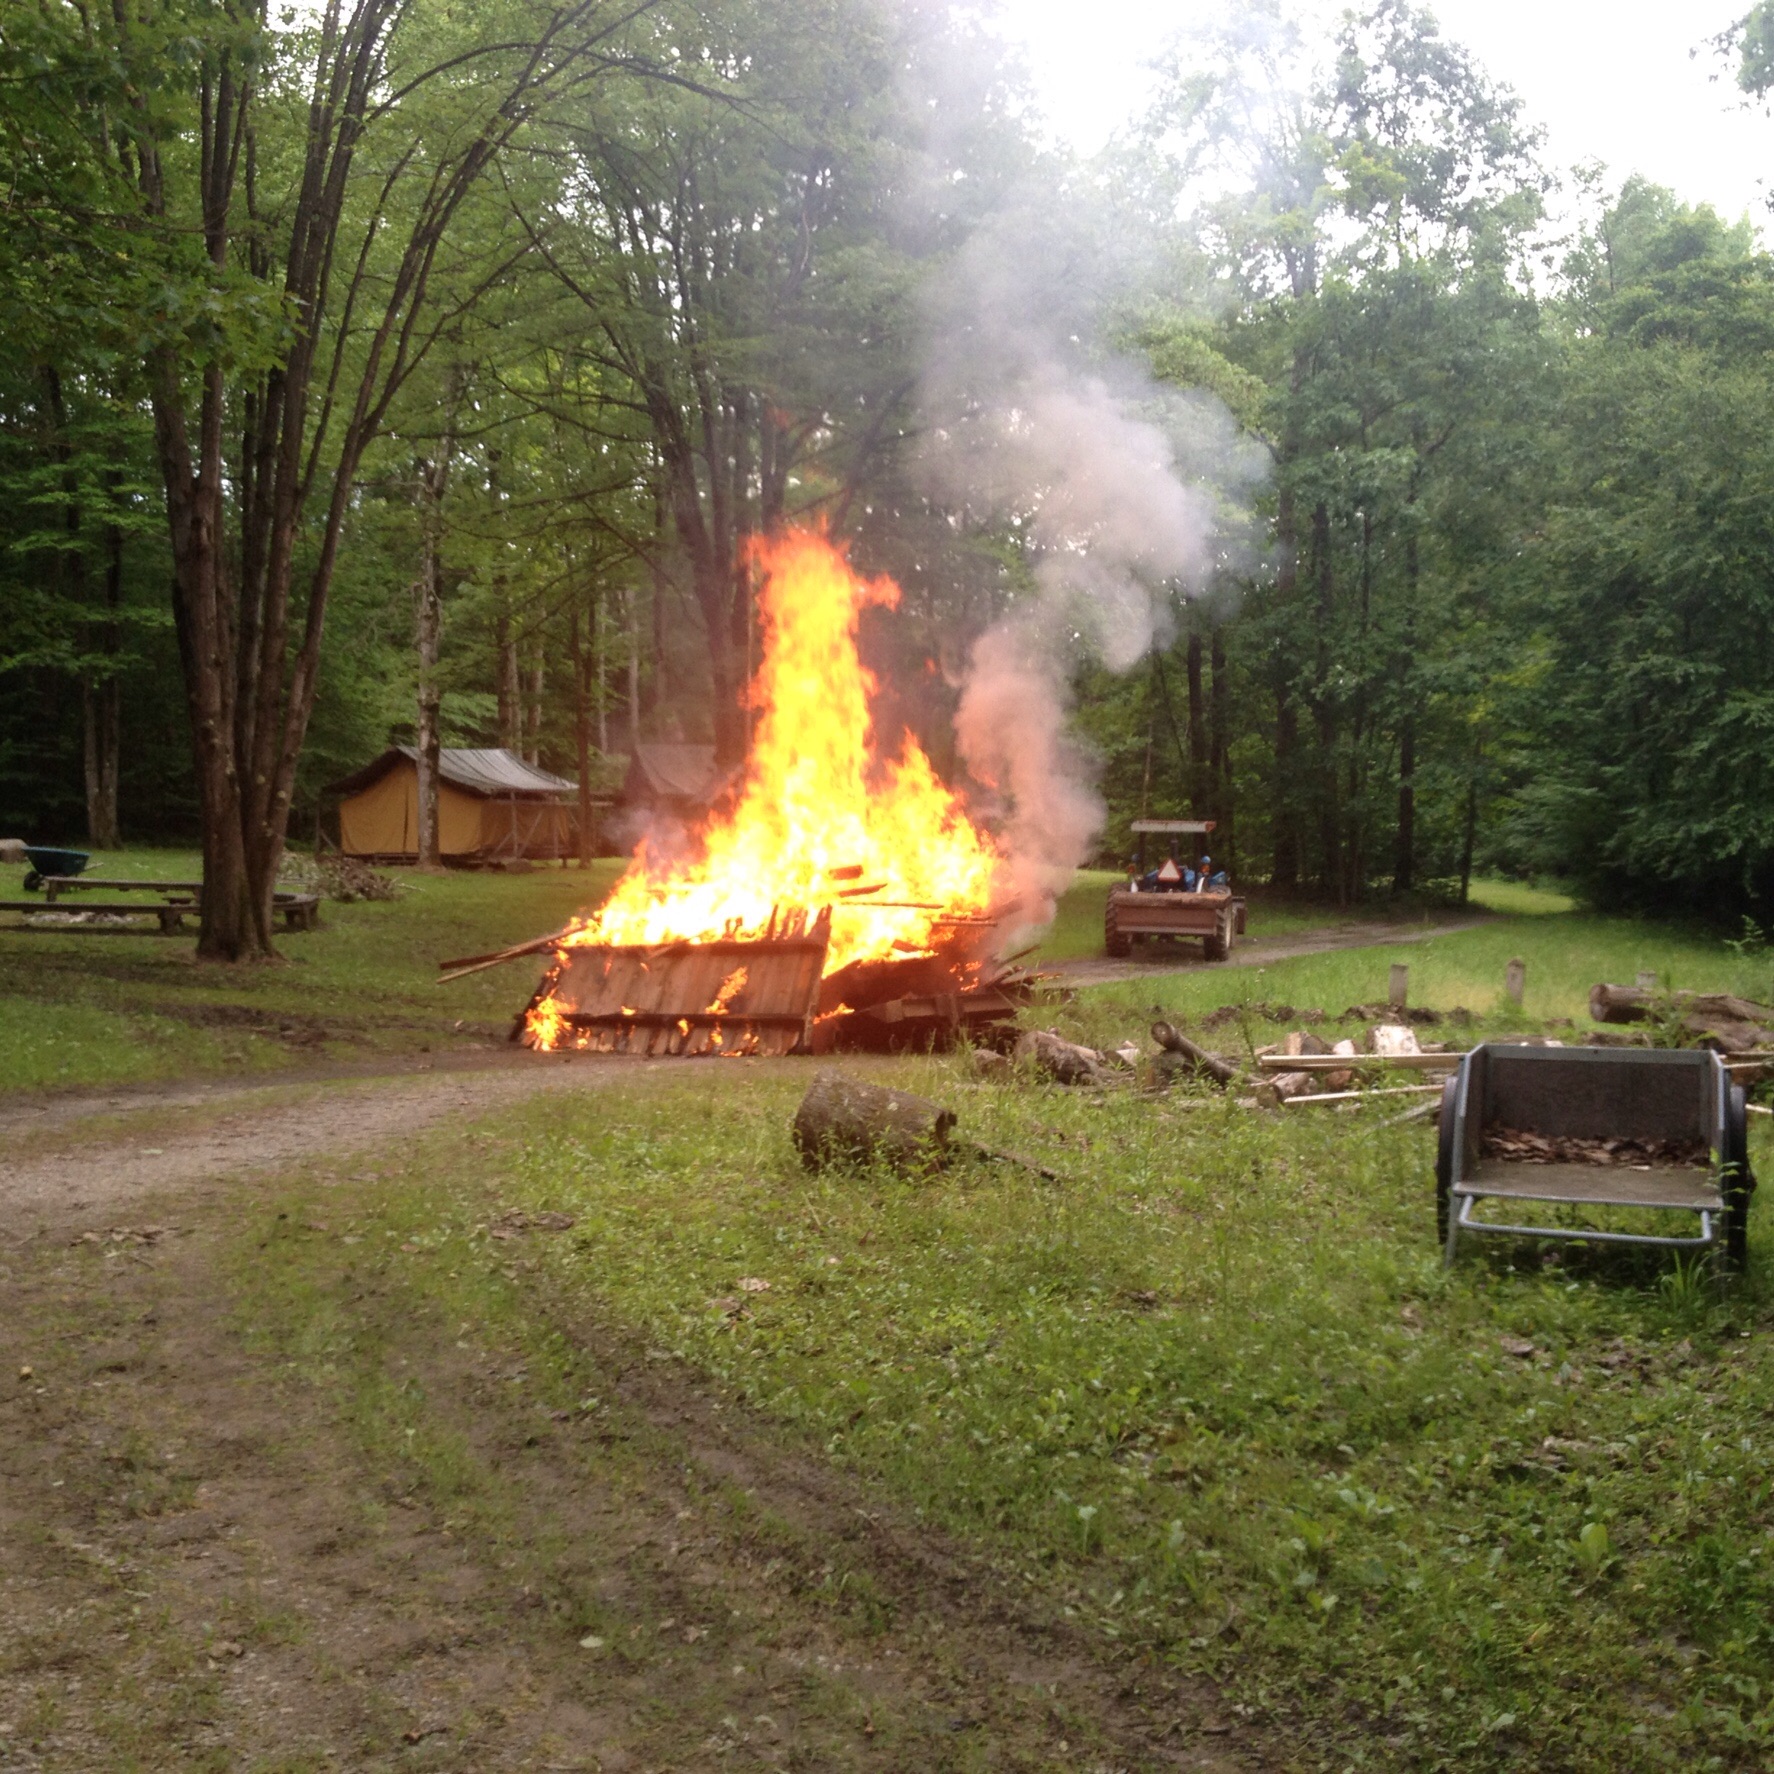
Ground too soft for the tractor, had to use a come along to remove the tree and the roof from the campsite, then chop up the roof and carry it to the road to be burned…this is why old guys are tough!
However the two trees that fell safely are mature hickory and a mature honey locust…both great woods for tool handles and the like! Bonus! So as I am splitting them I am getting good turning blanks split out! Might even turn some large chisel mallets to go with chisels!
So we wait for fair weather to forge the chisel blade… Being a Camp Ranger it’s weeks like these that leave you with no time off from work!
Ok! It’s nice weather tomorrow so I’m gonna fire this thing up! I got that locust tree with the roots up cut up into 2.25 x 2.25 " turning stock, I now have 330 ft of locust turning stock!
Process pictures to come, feel free to correct any issues you see in my work as I am just learning!

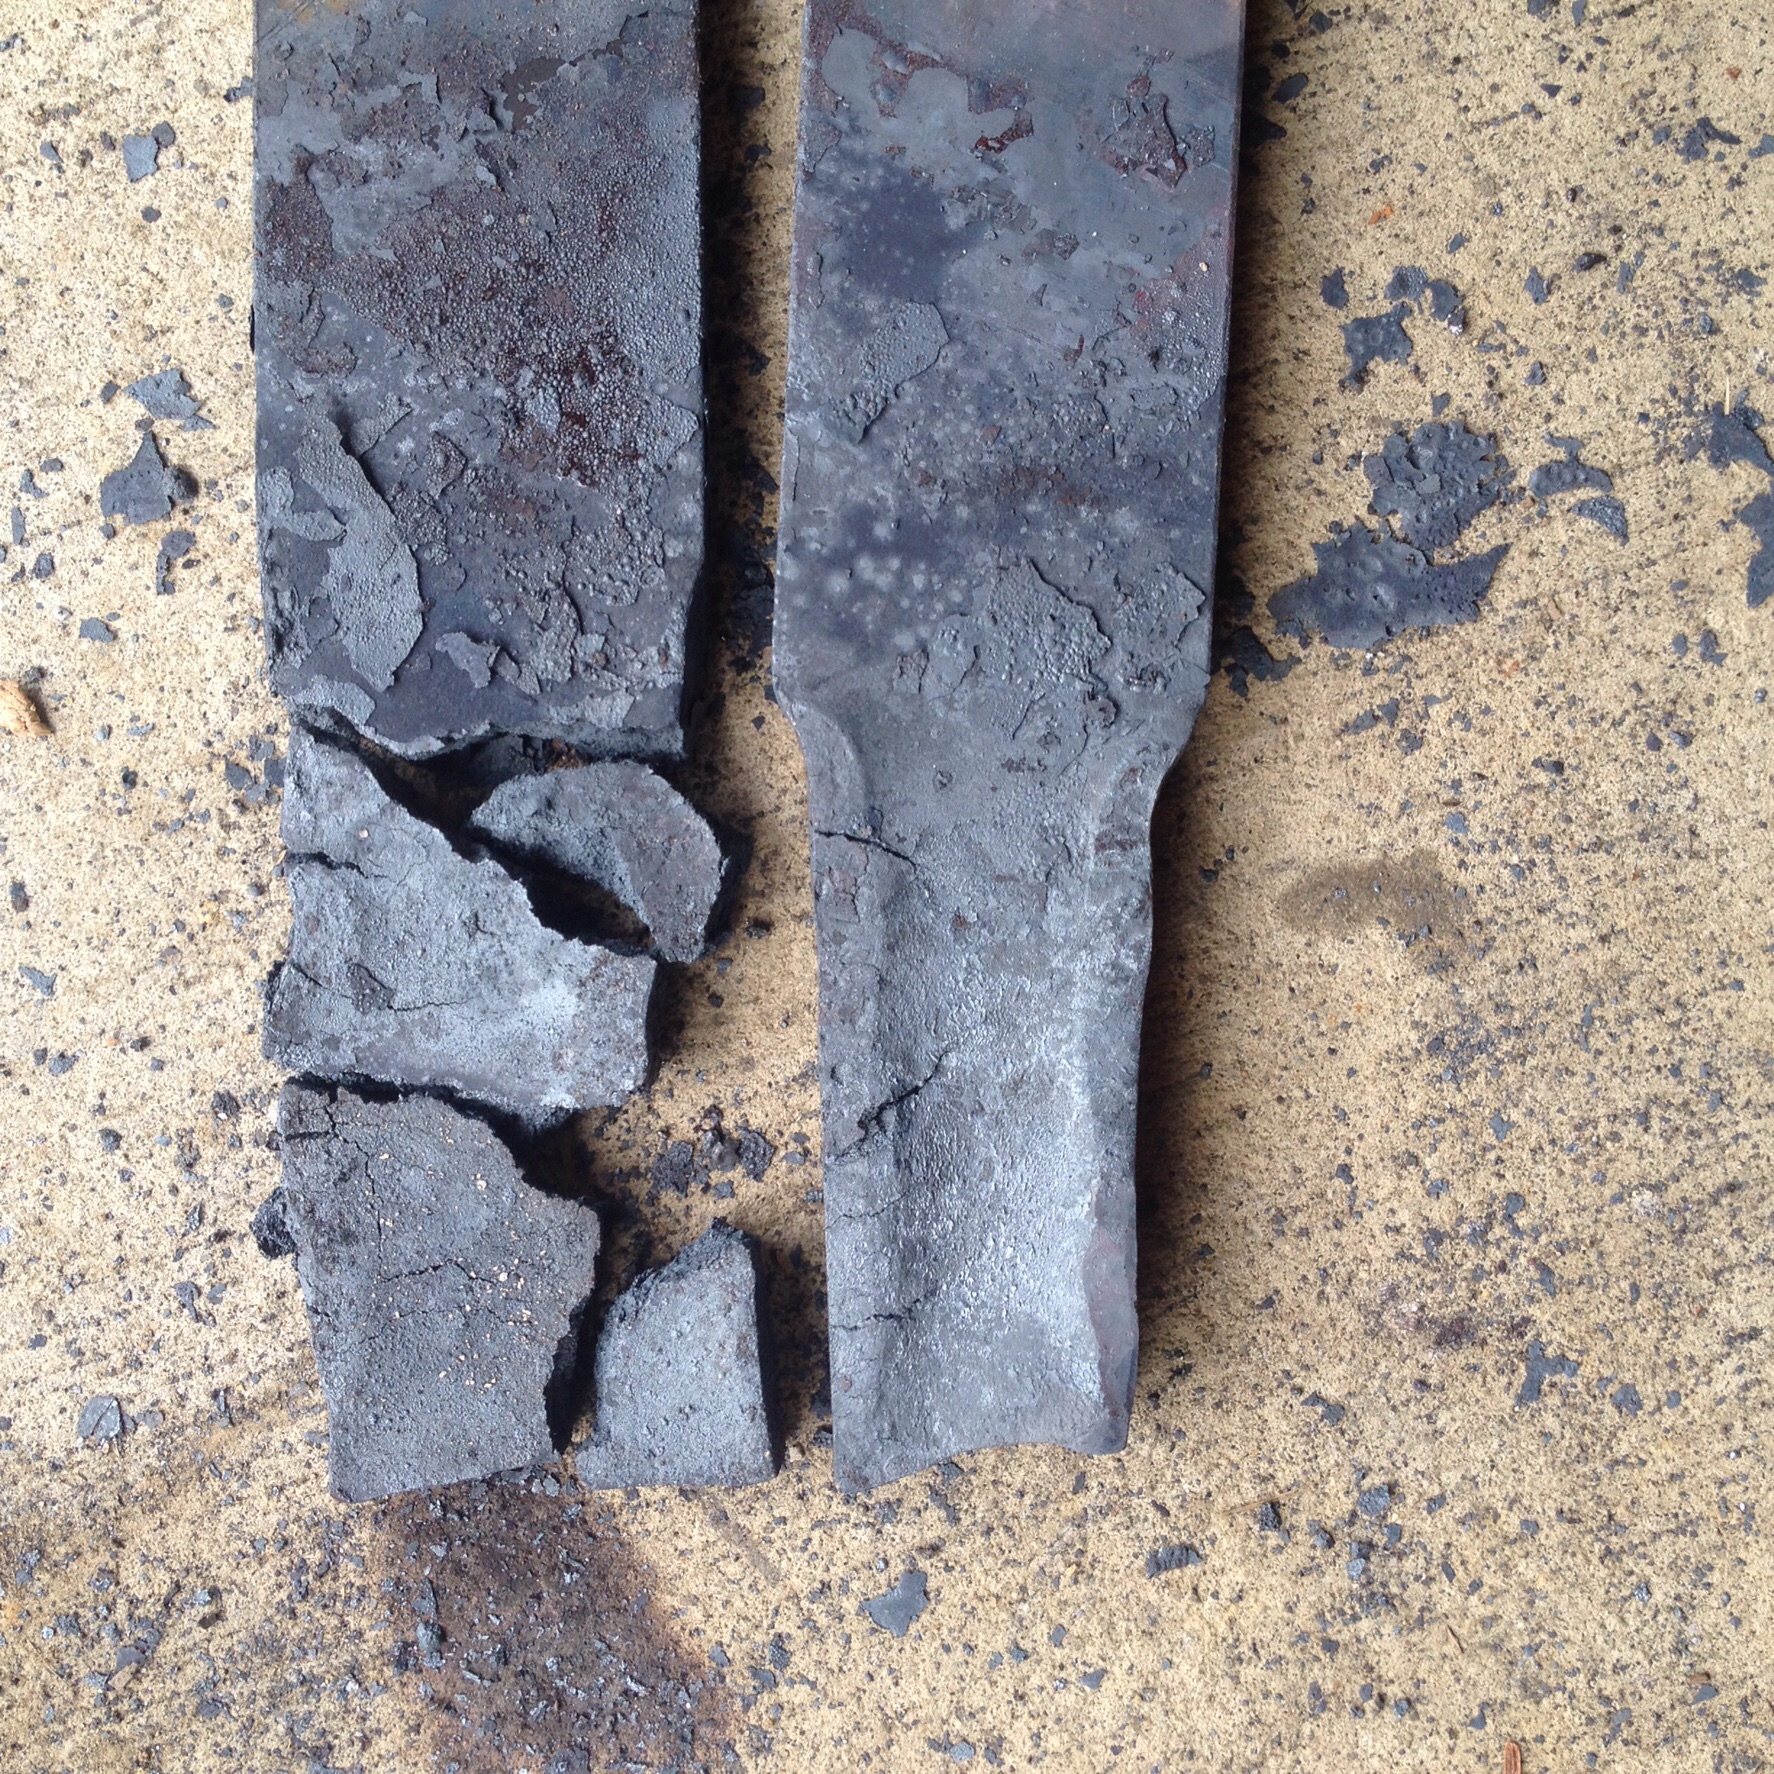
So, I made a new fuller tool, and started the chisel body and the tool steel just crumbled under the hammer, like dry cookie dough…I was trying to bring 2" wide stock down to a tang. Any advice? Anyone know what I did? It’s A-2 tool steel and I didn’t quench it at all I was only on my second heat…is this over heating? It was not very yellow just an orange-yellow…long slow heat but no sparks…
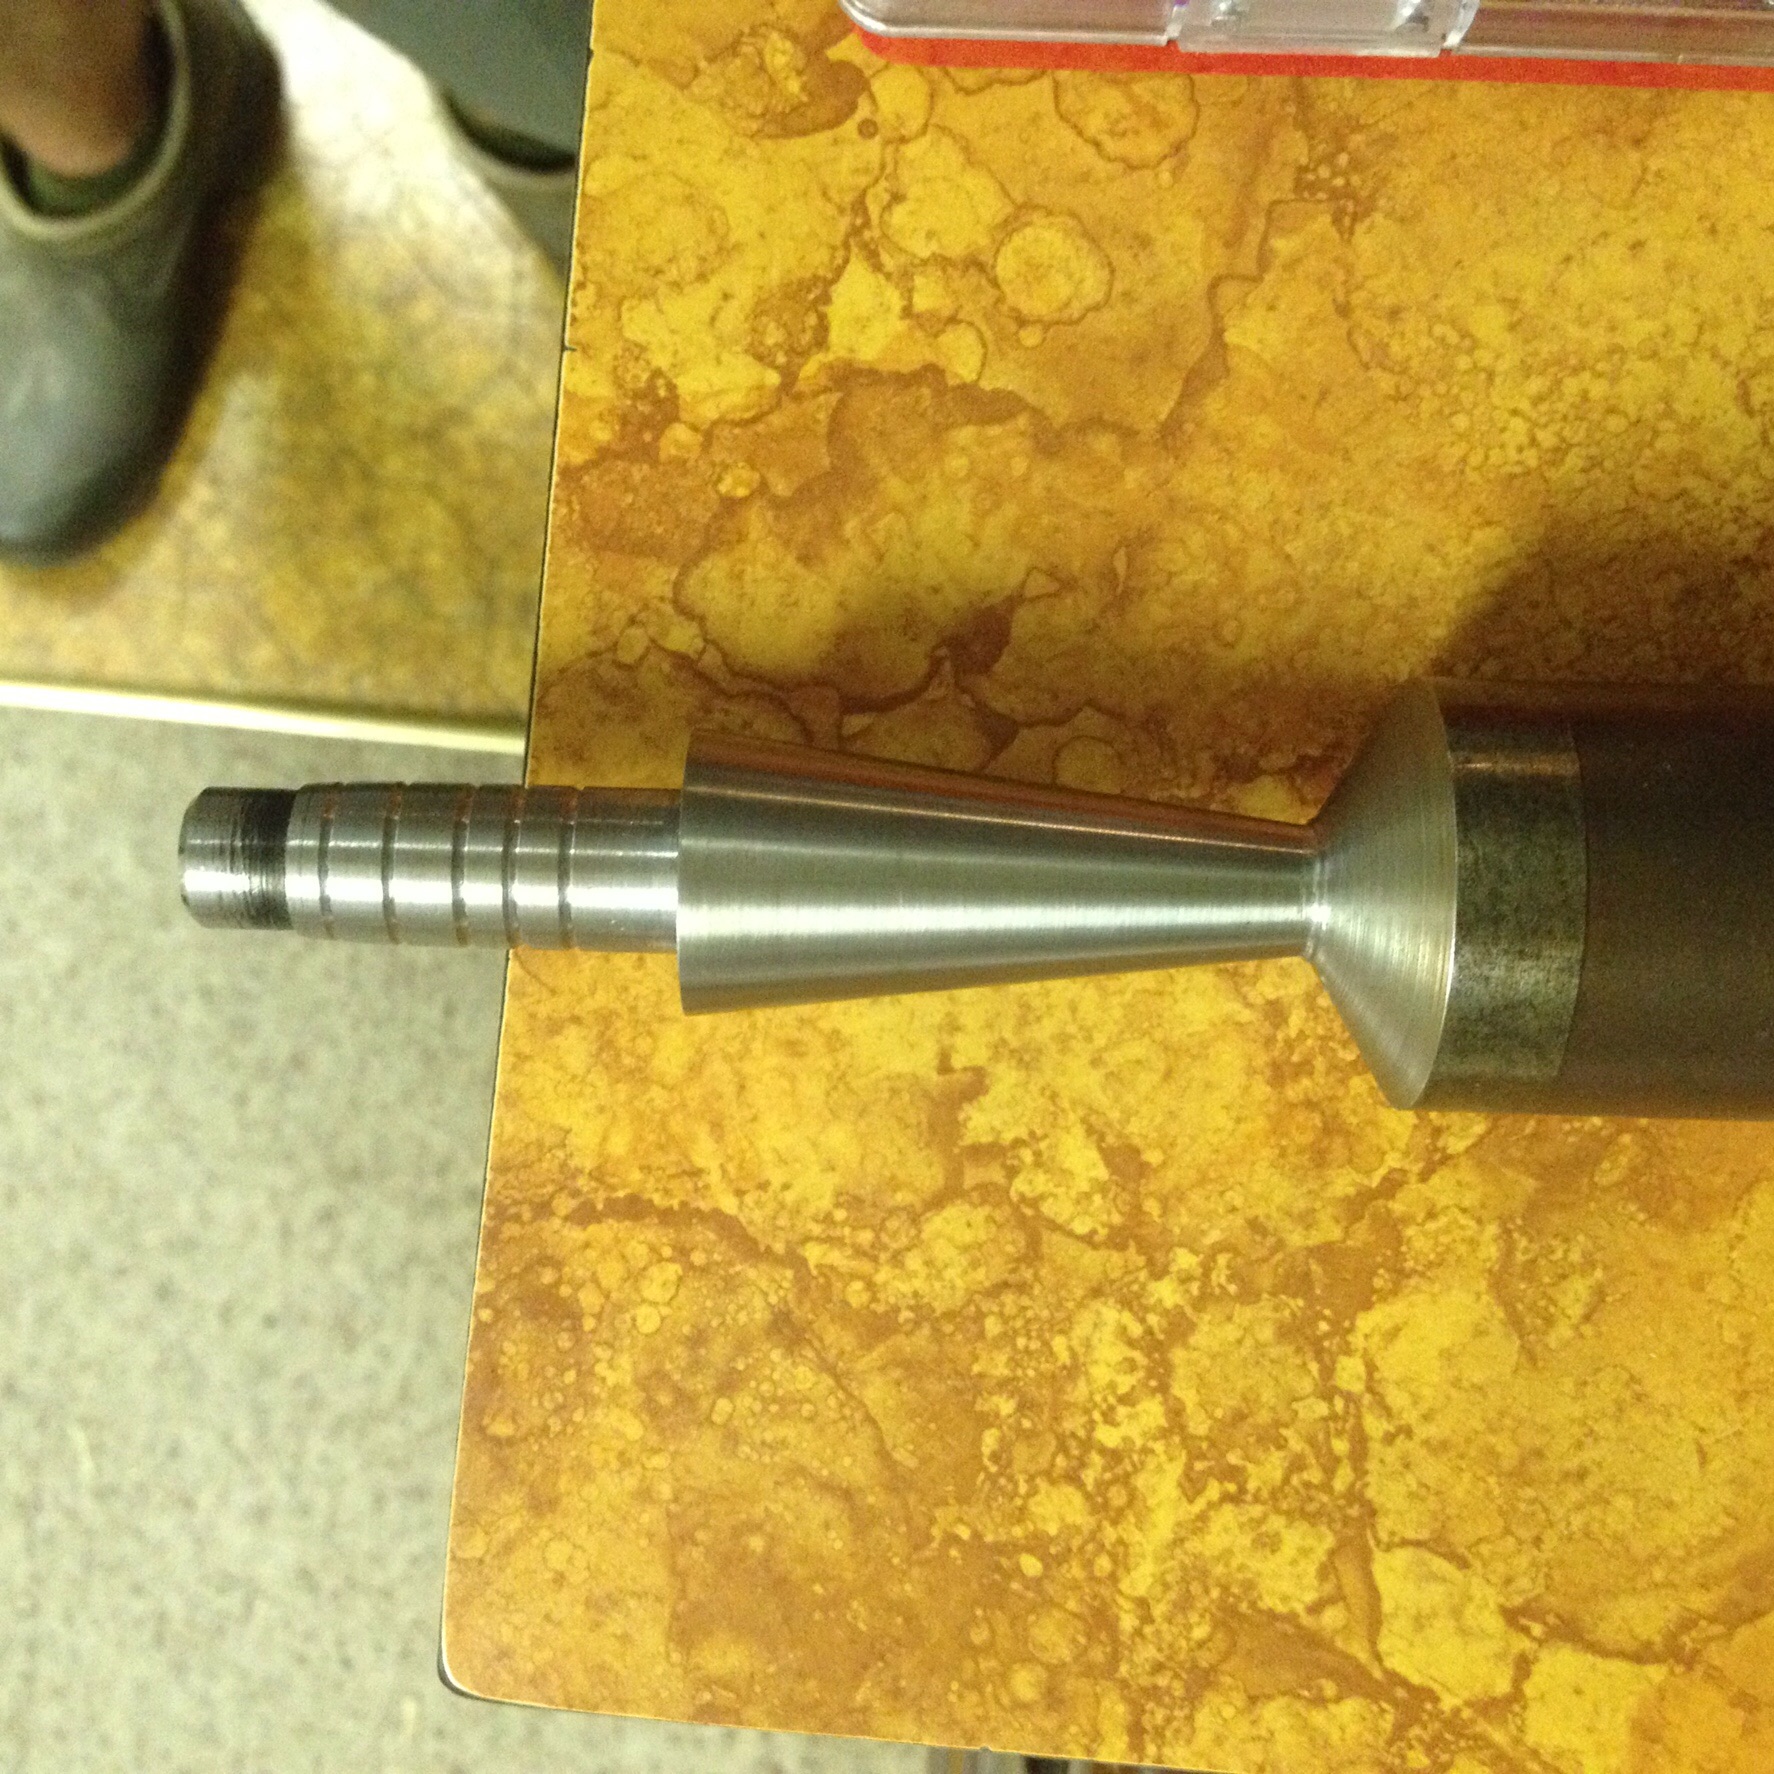
So, after feeling the $83 defeat I figured I might as well go back to what I know. I know I can work old shaft material (1045) and I know how to make a tang…so I turned a tang and cone and I will forge the blade out. It’s 1.5" diameter shaft so… Being a beginner I guess I can fall back on what I know and add a little at a time.
Shoot! That’s too bad about that A2  I never worked it before, but I do know you have to be careful not to let it cool too much to actually harden - to me, if that is for sure A2, that seems to be what happened, but since I’ve never worked it I’m not too sure. On a side note, that 2.25 square looks great!
The 1045 should be easier to work, I think - no worries about getting that too cool while working it, just don’t quench it in water before you’re ready to harden it  I’ve made a few tools from 1045 so if you have questions on the heat treat process of the tool I can help you with that
That definitely does look like a socket to me, very nicely done so far on the metal lathe! I’m curious if you can get inside and clear the inside of that socket out with the lathe as well?
Yeah, I was fairly upset with the cost of that mistake…but as they say education costs!
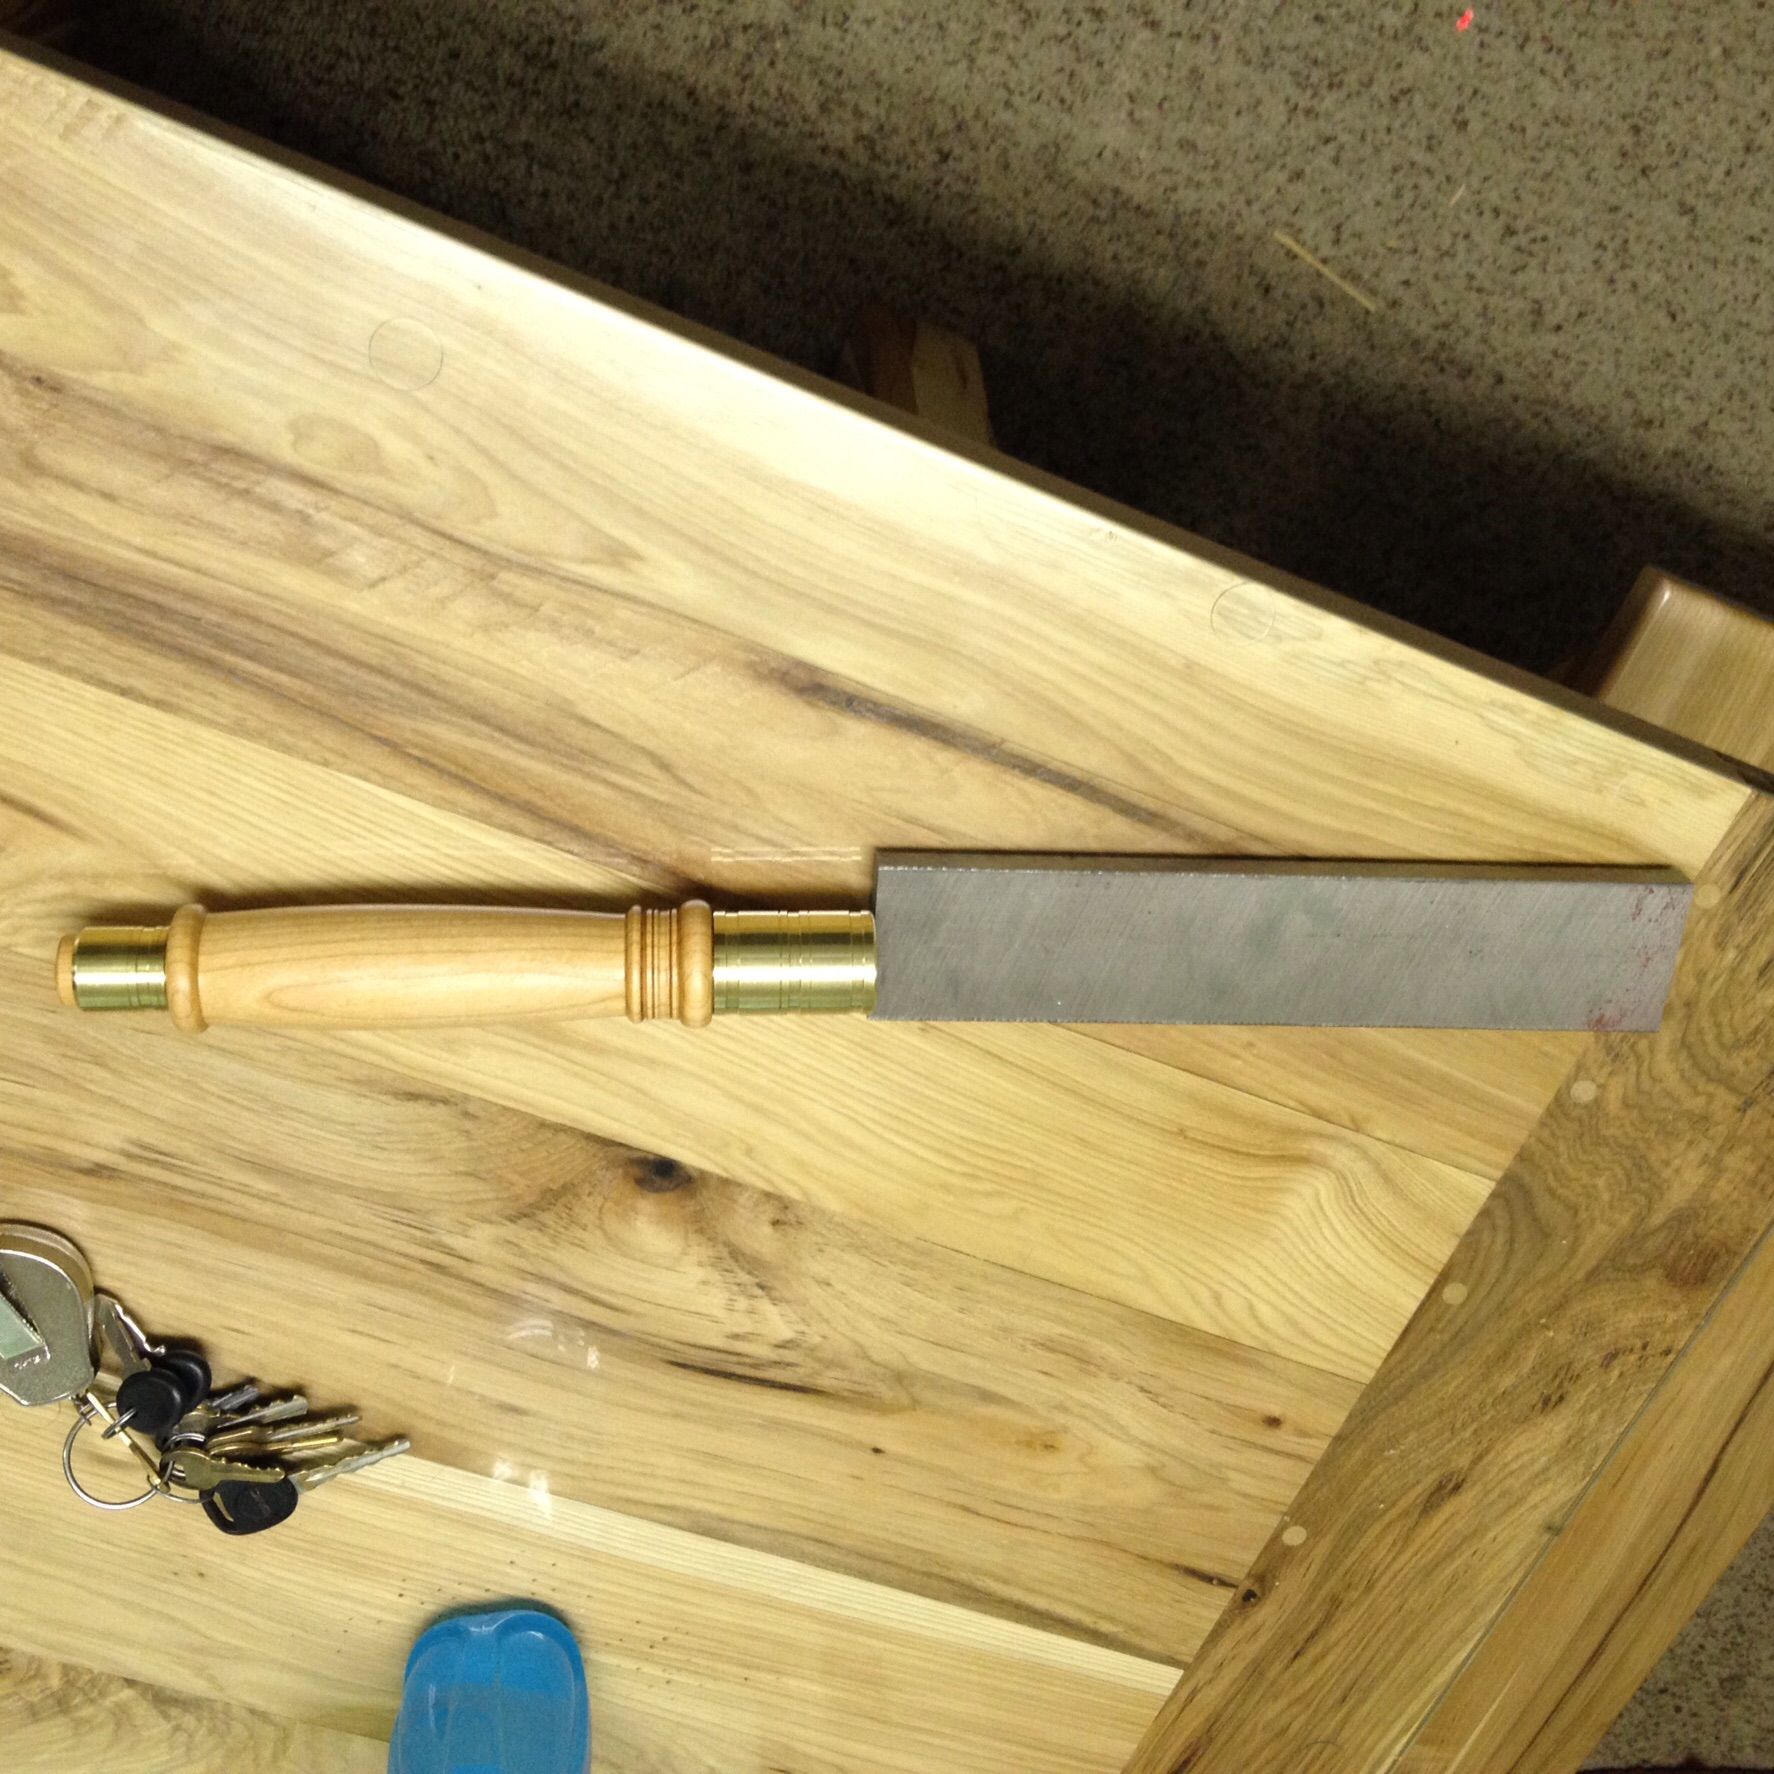
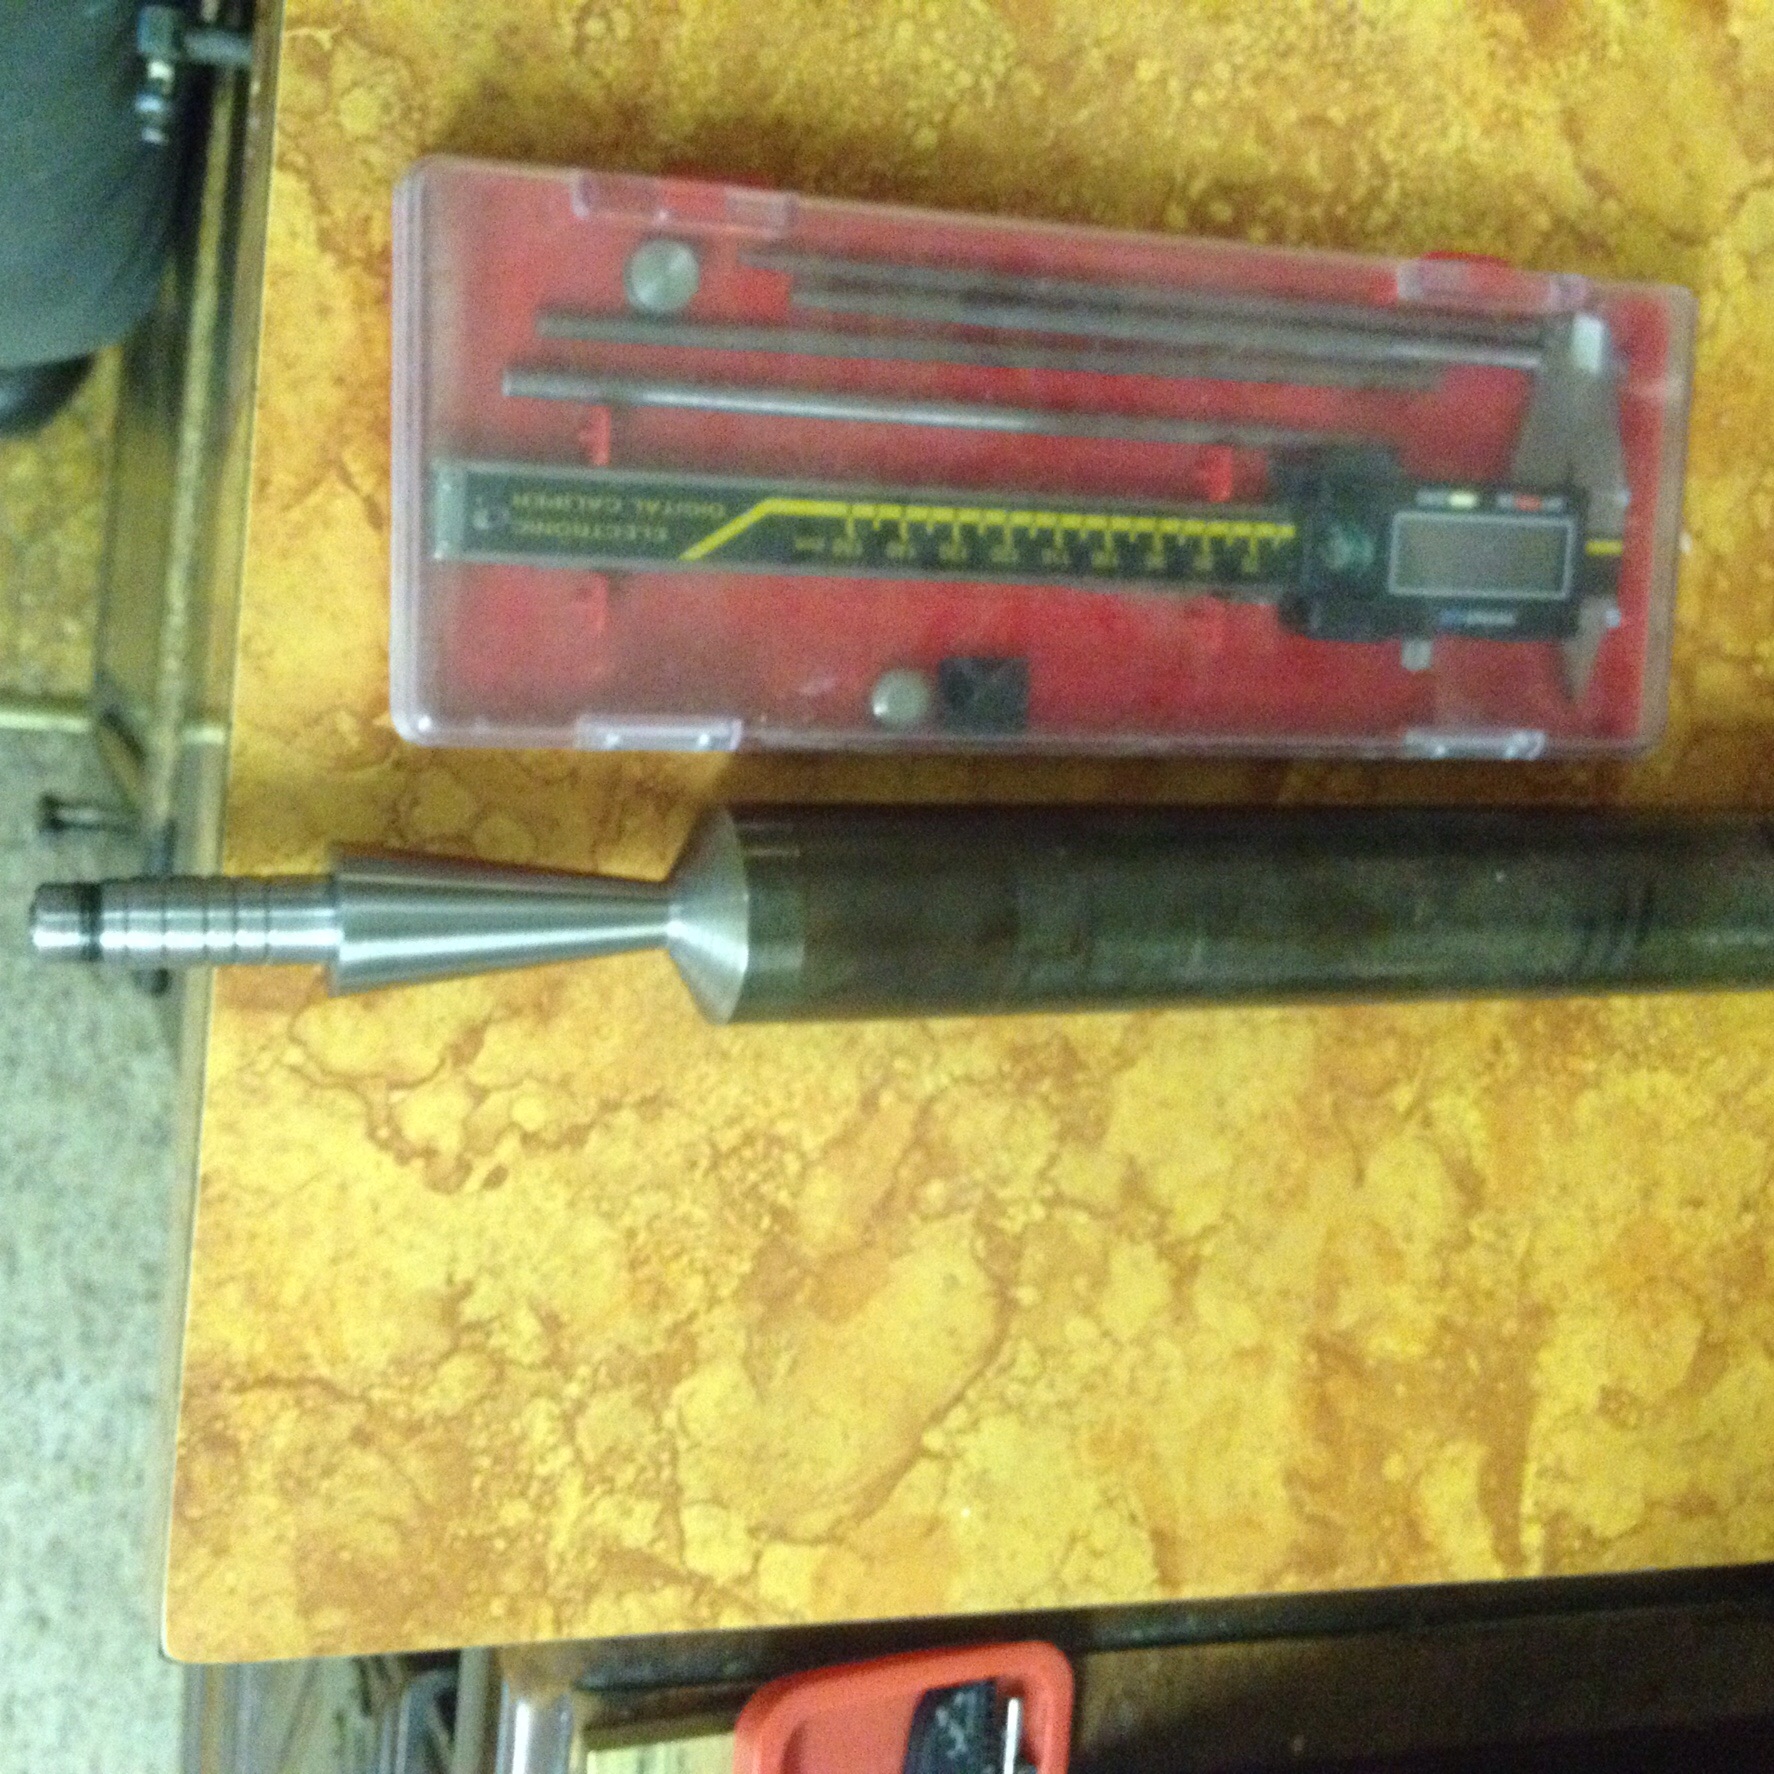
So I was starting with a tanged chisel blade I am wanting to do a socket too but fugured with my skill set ( lack of) that I had best to start simple with a tang.
I was looking into using a morse taper #3 reamer set to bore a socket to a taper and just turn the od on the lathe to match. There are several ways to do the job on the lathe…all of them are more time consuming than forging though.
Will the 1045 hold an edge well? That’s what I was thinking after I started…I’d be all ears on heat treat advise!

Ah! Thanks for showing how it is being put together there, I was confused how it would be. That looks great!
1045 will do a fine job, I think it could probably be a bit higher but it’ll hold an edge for a good long while, I imagine. 1045 is water hardened, so you won’t really want to quench this thing otherwise it might break right at the end of the taper before the chisel starts (looks like a bit of a weak spot there). There is quite a bit of material on the end, it might be a bit difficult to heat it up adequately enough and hammer it flat with that taper on there already - It might gooseneck some while forging, and too much goosenecking can start causing stress cracks.
Nice and slow is the way to go, you won’t get much goosenecking with accurate blows.
As for hardening, once you get your chisel pounded out on that thing, you’ll want to normalize it which is to heat it to an orange (~1600) and just let it air cool til you can touch it. The longer it takes to cool down, the better, so you can throw it in a bucket of ashes or sand - I use vermiculite when I normalize. It takes quite a few hours to cool down, so probably best to just throw it in there and start up with it another day.
After it’s normalized you can then file/grind it to shape, I wouldn’t put an edge on it at this point, but I would grind down the taper and leave like a 1/32 edge about. If you’re shaping it on a belt sander, you don’t need to worry much about temperature just don’t get it so hot you can’t hold it anymore - dip it in a bucket of water to cool it down.
When you are ready for the heat treat, you’ll throw it in the forge til it reaches it non-magnetic (austenitic) state, with 1045 according to just a simple google search, you’re looking at a 1500-1600, which is an orange/orange-red. Keep a bucket of water right next to your forge, you don’t want to spend more than a few seconds between pulling it out of the forge and dunking it. Swish it around a lot in the bucket, keep it in motion, when you pull it out you should see a bunch of white blotches on there, that is martenzite - run a file across it, it should skip.
Now you want a temper - if I were you, i’d start the temper at the base of the tool (at the tang), and draw it up. I probably would just let the hardness go away in most of the piece, that is to say to let it just get blue. To temper it you can put a little propane torch on and kinda roast it in the flame, the tang getting most of the heat. You’ll start seeing colors run up the chisel blade, and once that starts turning a straw, dunk it into water really fast again. Swish it around. As a tip, you can rub denatured alcohol on it before tempering it, it’ll help show the colors more. Also, be sure to get all the scale off, of course.
Long explanation, but that’s how I would do it I hope others can chime in here.
Oh thanks! That’s a great explanation!
Yes as I am looking at this thing I saw the neck too, but also that I left too much mass near the neck. I might turn a steeper angles to the mass that will be the blade…
The problem is I have no interest in ornamental stuff or things that have no use…so my interest is in things that take a lot of practice, I know there will be a lot tossed out before I am up to snuff.
Hey fellas!
Busy times had me for a while there, the framing chisel that I started broke off at the narrow point, We saw it coming but I was hopeful…
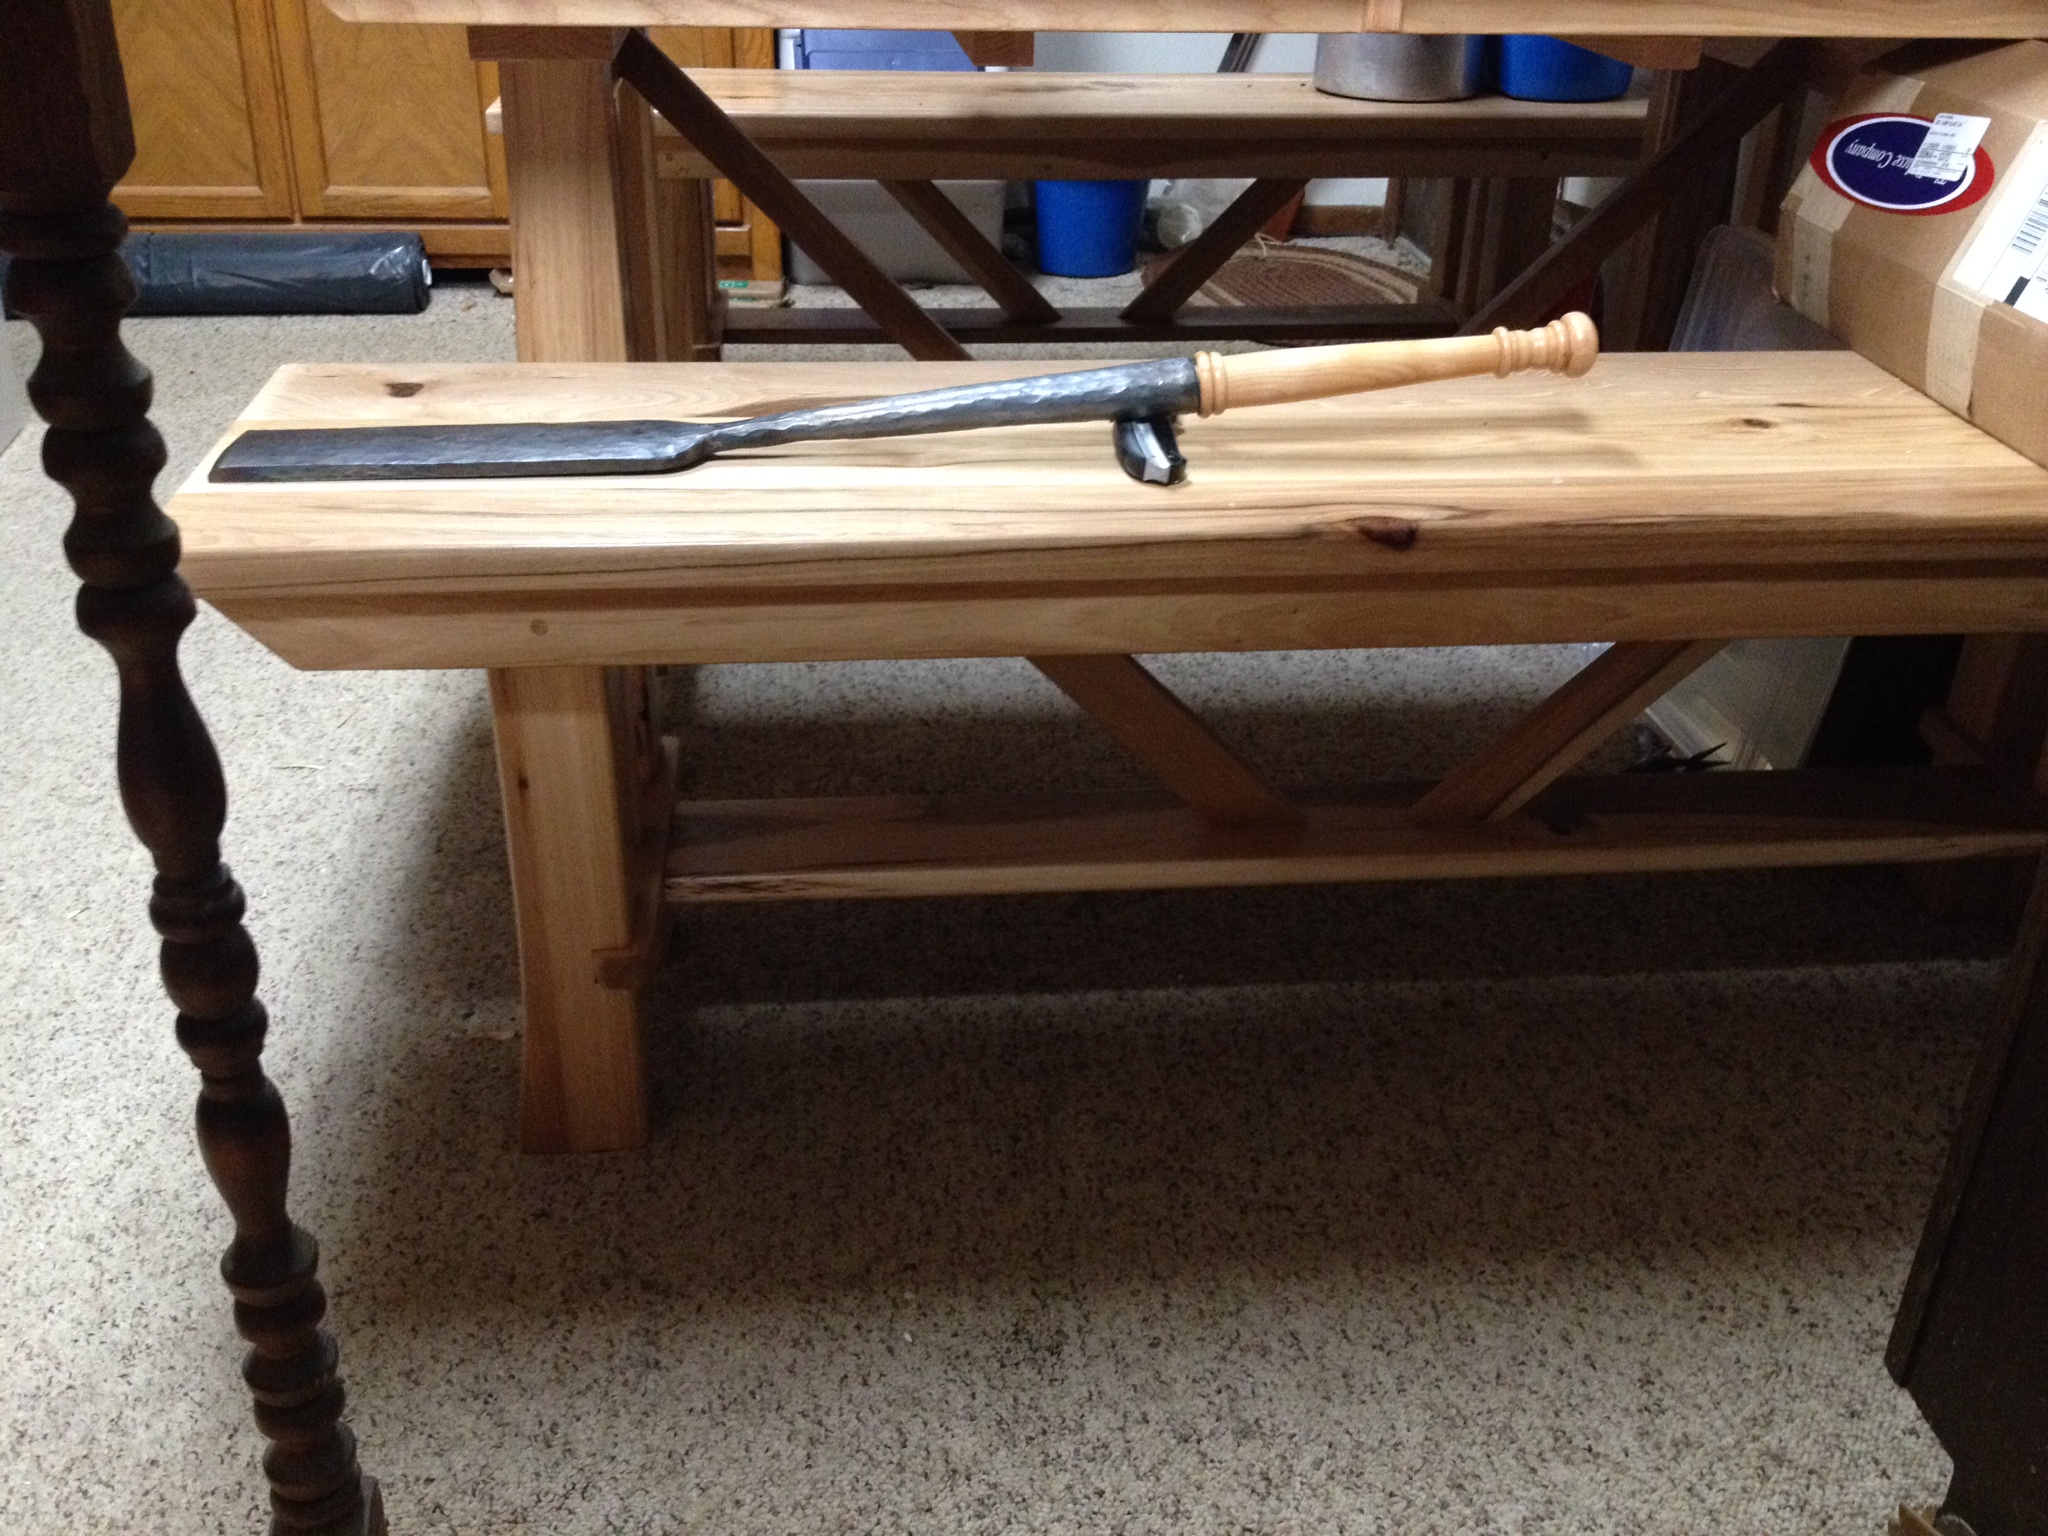
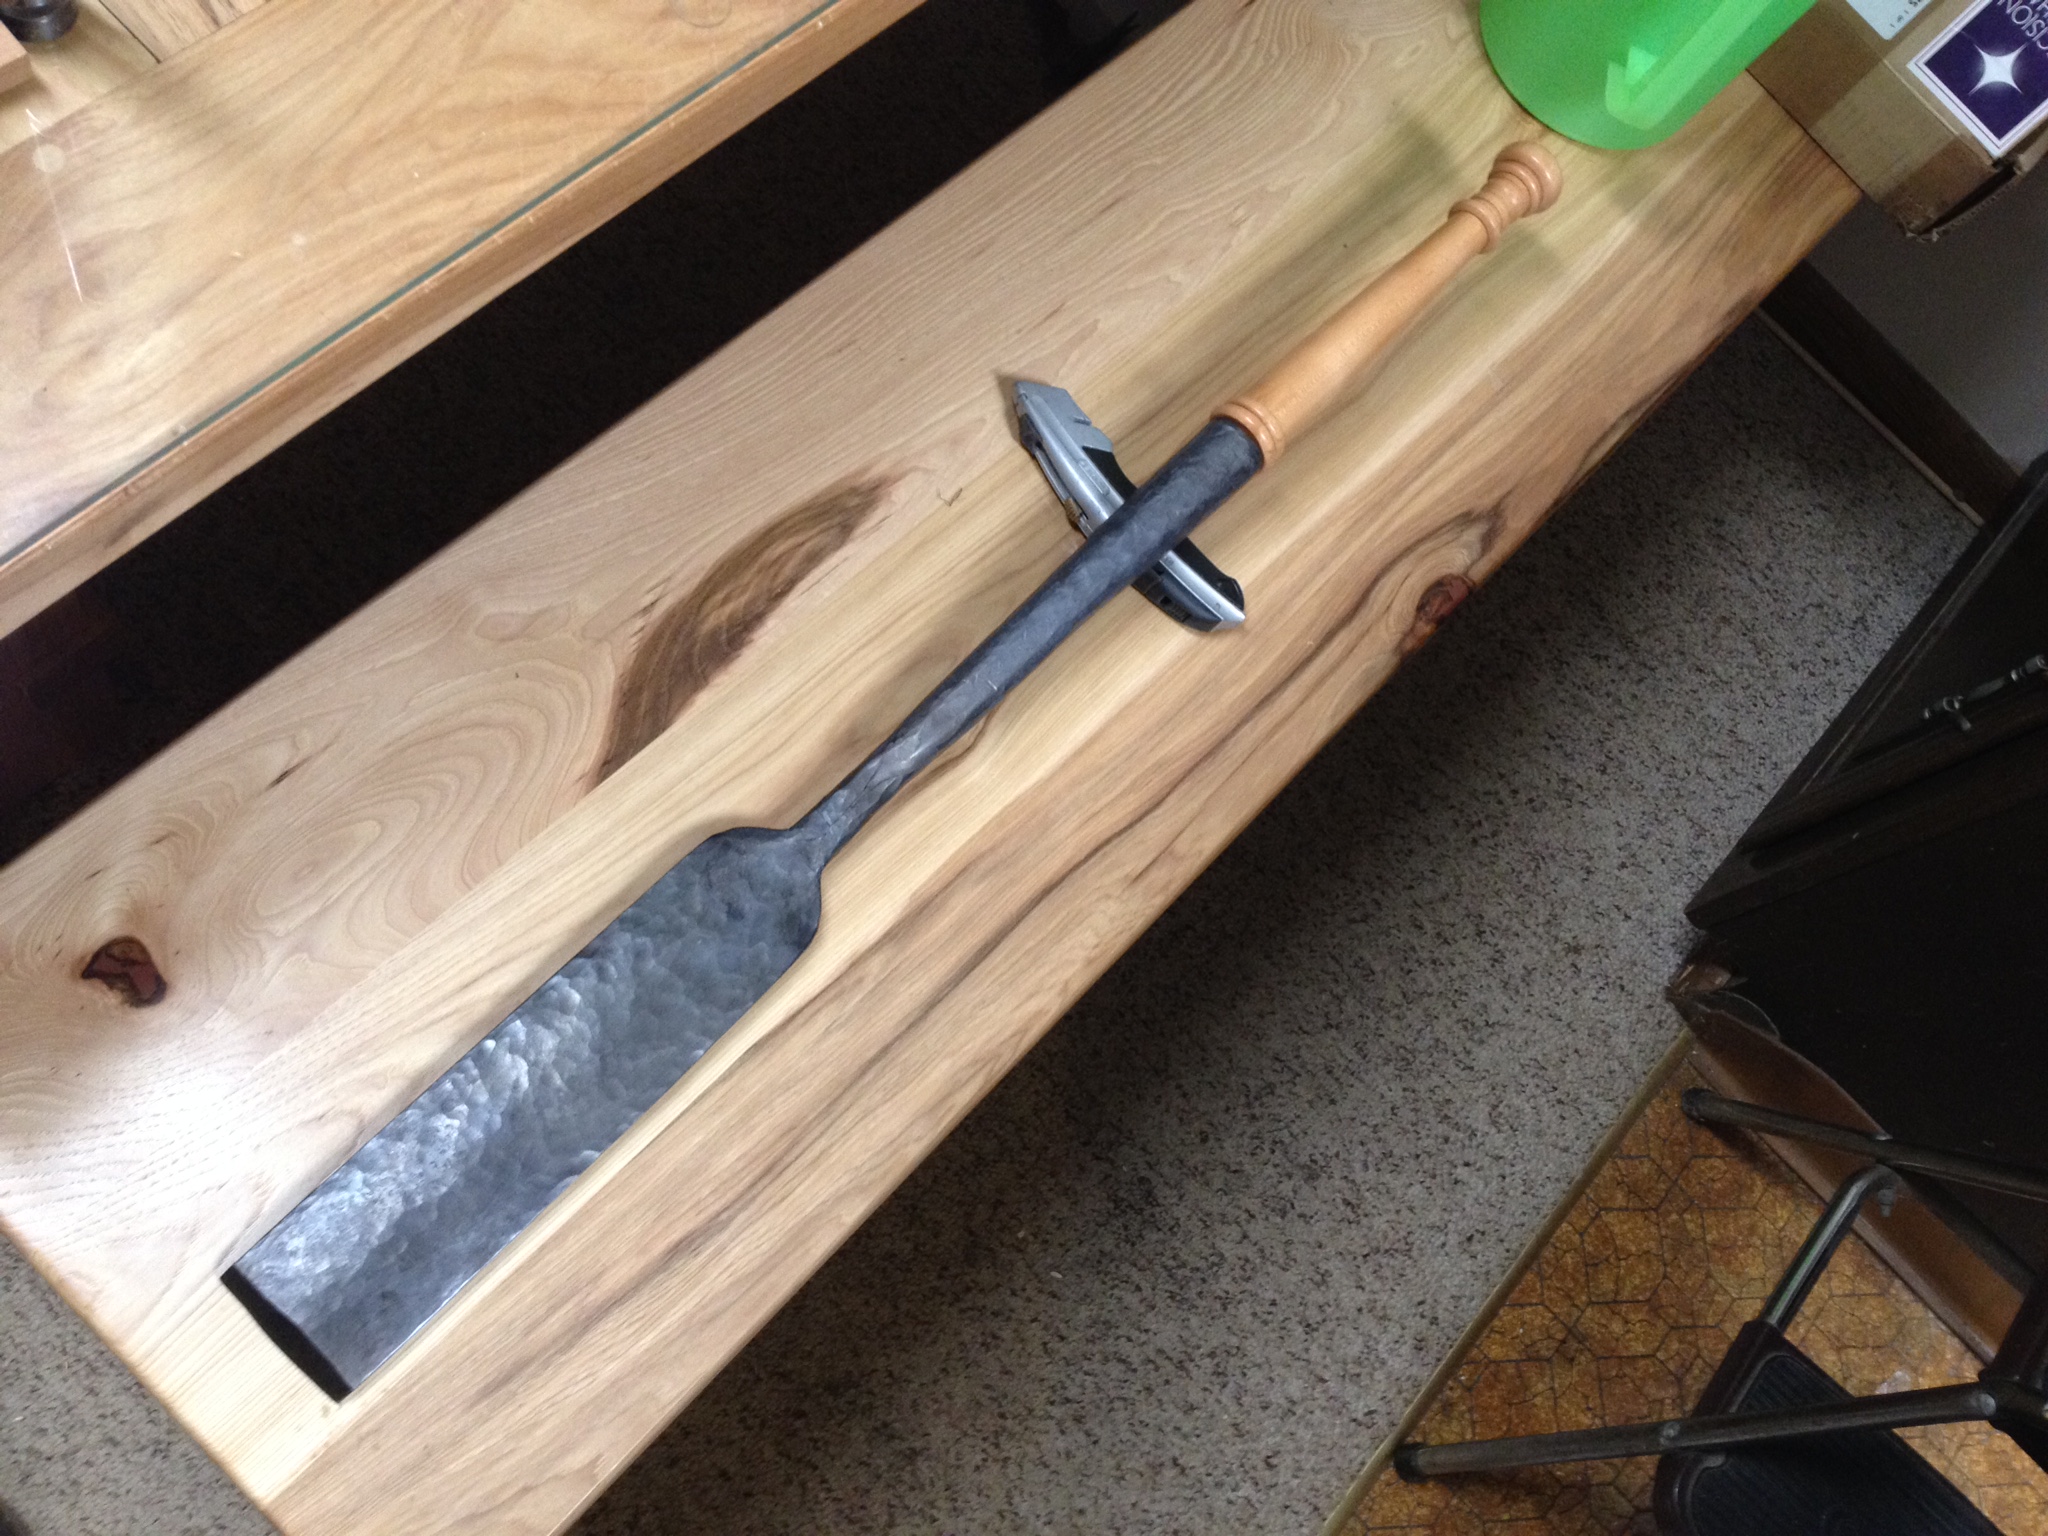
Anyways changed it up did a timber framers slick out of 0-1 like you suggested Javos, with a socket.
So 12" socket, 2 3/4 x 12 inch blade, 33 1/2 inch over all length…let me know what you think, still have to sharpen it, that should be fun, going to ask my machinist friend to mill it for me!
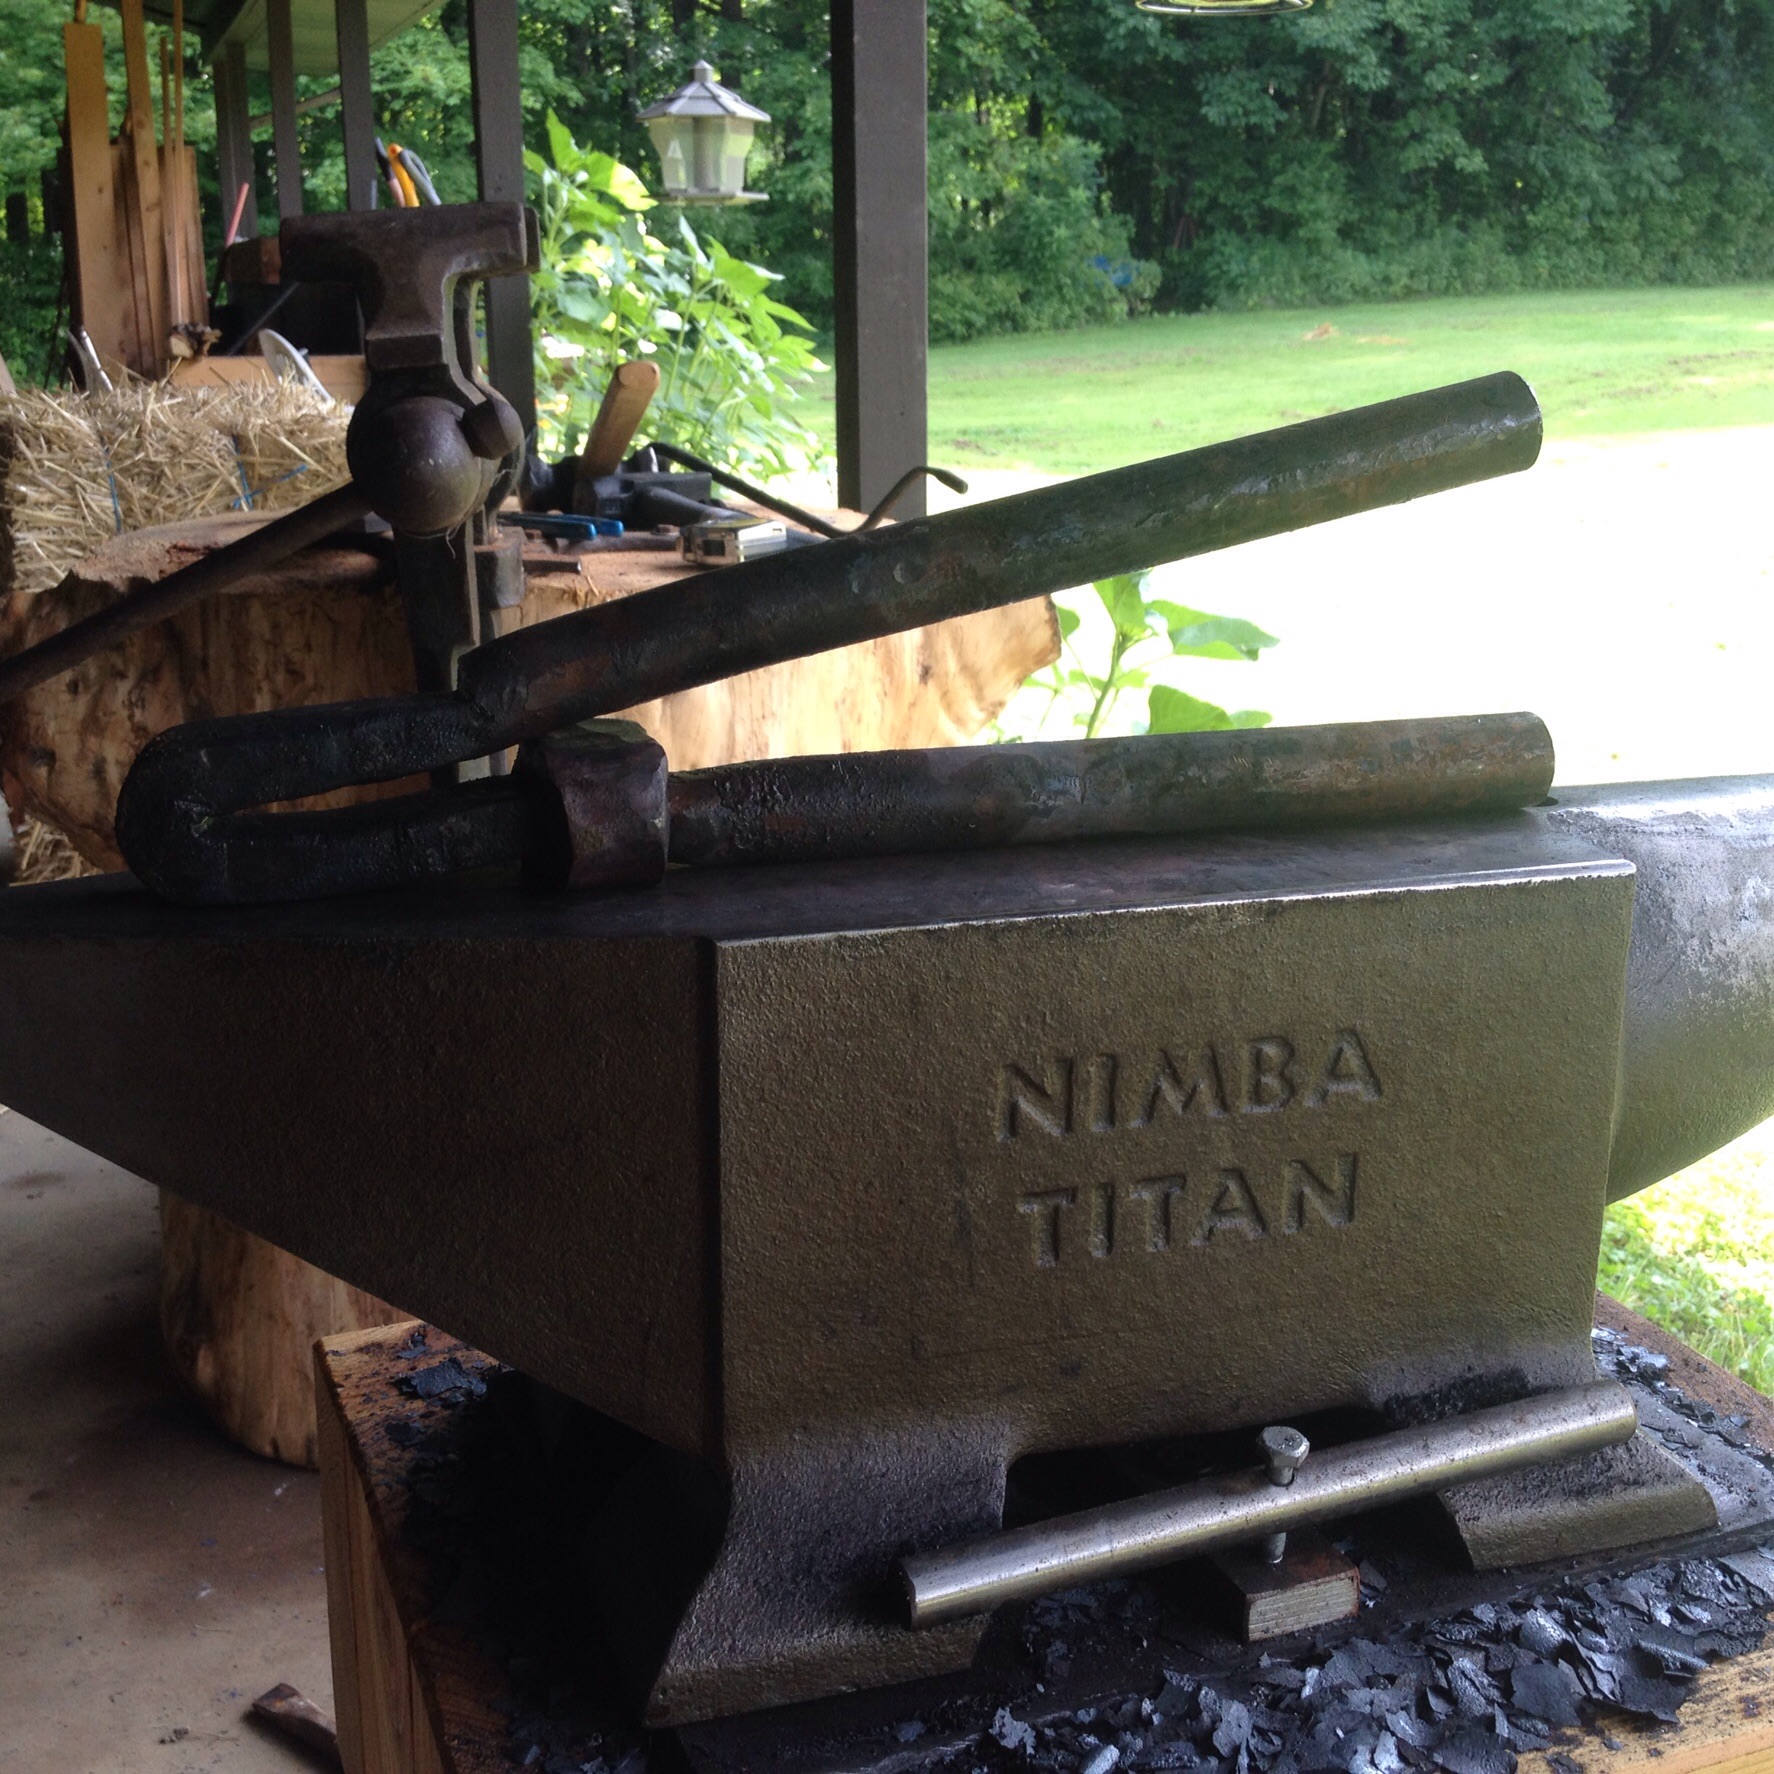
That’s a lot of hand hammering, more jealous of that press Javos!

Sorry pictures are weird you gotta scroll around…strange!
Hey Chadwick! Been wondering where you been Good to see you.
Weird on the photos, hmm, I’ll look into it. Chisel is looking real nice! Yeah looks like a heck of a lot of material to move, but really turned out. The handle on it looks very nice as well! I bet you’re itching to start using it
Yes I am! I was going to ask also, how thin can you take an edge before heat treat?
I left about a 5/16" flat on the end and just started the shape of the sharpening area, but could I have taken that down a lot further?
Started with a 2 1/2" x 1/2" x 18" chunk of stock, so it wasn’t too bad! Me and the anvil gift a workout though!